Author Archive

Web Usability: Top 10 Tips

With bounce rate and time-on-site assumed to be the top trump cards in Google’s new algorithm; there is most certainly a push from Google — and subsequently advertisers — for websites to become more user, in addition to search engine, friendly. Read on to find our top ten tips for enhancing the user experience including everything from Search Engine Optimization (SEO) and rich media, to navigation and mobile device optimization.

1. Faster is always better.
It is not a newsflash that speed and load times rule the web. Every second a user has to wait, the more likely they are to leave your site. If you’re experiencing some lag time, try reducing the number of HTTP requests by simplifying the design, using CSS and CSS Sprites, combining images into a single file, and reusing elements — like page headers — which can reload from the cache. You can also create the illusion of speed by placing style sheets in the header. This will allow the header and navigation menus to load first thereby showing progress and pacifying user impatience.

2. Simply site navigation.
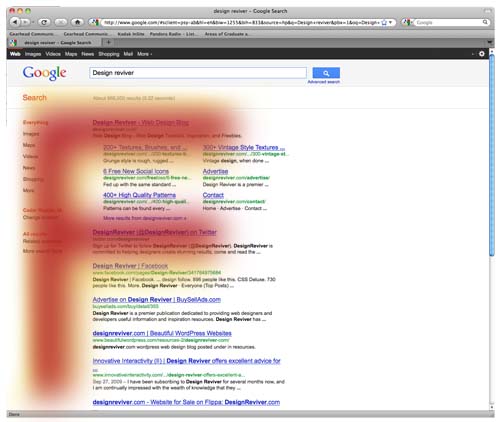
The foundation to every webpage is the sitemap and navigation. Clear and concise menus are essential as well as a single page showing all links. Online reading patterns lend themselves to the typical “F” pattern (example below). To ensure that the user can easily interact with your content, keep a relatively short list of menu option down the left side and across the top. Be sure that all navigation info stays above the fold and that the logo links back to the homepage. Intuitive navigation outlasts number of clicks, so go ahead and forget about that 3-click rule. Not to imply that the user will stick out a lengthy path, but ultimately clicks don’t cause user frustration, poorly organized sites do.
Example of F shaped reading pattern

3. Embed Rich Media
Tickers, videos, animation and other rich media options have changed the landscape of the web and help keep the user on your site for longer while they interact with more content options. Nowhere is this more valuable than on education, news and entertainment sites. The biggest hurtle to overcome with rich media embeds is software compatibility. Consider using a third-party hosting site like youtube.com and embedding the video directly on your site. This will level the compatibility playing field and remove the server-hosting burden from you.

4. Optimize for Mobile Devices
While designing (or redesigning) your site, the need to factor in mobile devices is pressing. There are several schools of thought regarding site optimization, but the most all-encompassing and user-friendly option is to simply use the same URLs as the standard website. Strip down the site content to only the bare essentials. Simplicity is of the name of this game. Avoid using scripting languages or Flash components, as most devices are not equipped to support them. Keep in mind the small screens and use small graphics or ads and content that are scalable.

5. Bookmarking
Listing your site on social bookmarking websites like Digg can drive quality traffic to your way and bump your page views. It can also have a cascade affect where a user will tag your site for yet another site where yet another user will tag it again, and so on. Bookmarking is a handy tool that is relatively easy and doesn’t require a ton of time to achieve.

6. Utilize Social Media links.
Social media sites have taken over the way users share information with one another. Give viewers an easy way to link content they like from your site to their profiles. Not only will it spread the word, it will also get the attention of like-minded users who will not only click out of curiosity, they will probably spend quality time on your site which will help bolster your chances in the search engine pool.

Examples of Social Media Icons


7. Clearly Identify and Brand.

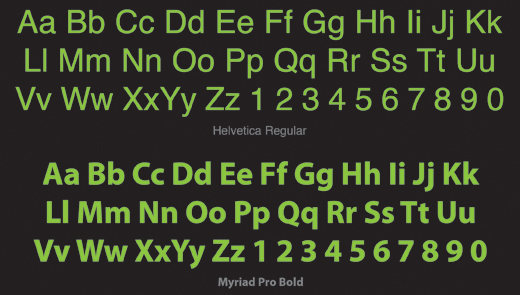
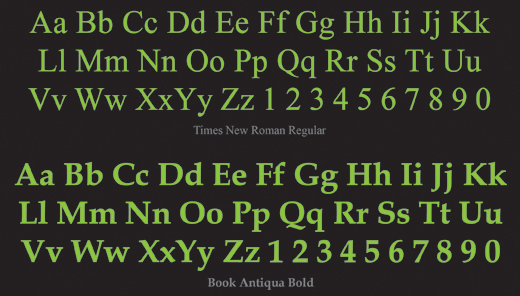
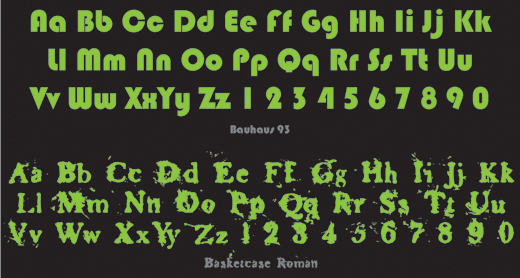
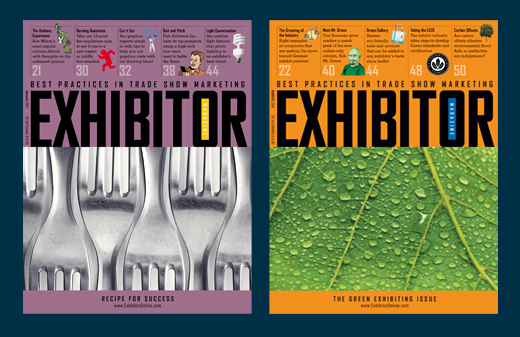
Brand identity is essential in all forms of media, but is most important on a large and complex website. Be sure the company’s logo or name is clear in the header. Choose, colors, fonts and graphic treatments compliant with brand style guides and reinforce that look at every opportunity. The more comfortable the user is with the style, the more familiar they are with the brand and are more likely to come back time and time again.

8. Search Bars are Essential
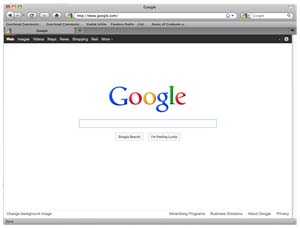
The more complex the site, the more essential the search bar . For user ease, stick to the tried and true method with an input field and a “submit” or “go” button located at the top, right of the page. Design the search bar cleanly with the font and color style already established for the overall look. In regards to search fields, less is more. Take Google for instance (see below), their entire brand is built upon the search bar and it remains simple and straightforward.
Example of Google Search Field


9. Strategically use Keywords and Titles
Be true to your content. Of late, Search Engine Optimization (SEO) has been all the rage, but don’t sell your digital soul for a few extra clicks. Google is working hard to filter and outsmart spammers who abuse the algorithm. Instead of getting caught up in the hype and fortifying your site with endless keywords, focus on how the user would look for your information and what words they might use. Be strategic in your keyword choices and get to the kernel of the matter to effectively garner the largest audience who will also spend the most time looking through your content.

10 Design. Design. Design.
Place big, attention-grabbing headlines above the fold, but don’t be overly concerned about making a user scroll. If you’ve successfully filled your site with quality content that is organized and clearly designed, scrolling won’t deter a user. The presentation of information requires a designer’s eye to ensure a site that is both aesthetically and functionally sound.

The post Web Usability: Top 10 Tips appeared first on Design Reviver.


Full-time or Freelance?

They say the grass is always greener on the other side, but which side suits you and your needs best? Before making a potentially life-altering decision, read on to discover the differences between, benefits to, and drawbacks of being full-time or freelance designer.


The In-House Designer

Due to the varying nature of business models, responsibilities appropriated to the in-house designer varies greatly from company to company. On the most basic level, however, an in-house design position includes meeting with internal and external customers, creating concepts, mocking up proofs, presenting those ideas to the team, executing the overall layout, processing proofs, production of final files, archiving of native and final files, and updating all projects as needed. Further responsibilities can also include acquiring bids from printers, illustrators, photographers, and other freelance designers, press checks, project management, and image or topic research.

Thumbs UpThe upside?

• The team succeeds or fails as one. Everyone is in the foxhole together. Working in such close and constant contact propagates a feeling of camaraderie with coworkers. The team environment comes with a vested interest in the company as a whole and includes everything the company releases for public consumption.

• The in-house designer is often more involved with varying projects which don’t necessarily fall under the “design umbrella� as well as the conceptual or brainstorming process than a freelance designer may be. Fulltime, in-house designers are often valued by other departments as an equal team members whose opinions carry more weight. With this level of involvement, the designer can take pride and ownership in their work and give them a receive a true feeling of career fulfillment which some freelance designers find lacking in their day-to-day transactions.
• There is something to be said for getting to know a brand and style so well the designer becomes the go-to style expert. Once the brand requirements are second nature, a new layer of design can begin. On this level, constantly refreshing and updating projects or pages is an art in and of itself. Success as an in-house designer often means appreciating the little things, and understanding that small changes make big differences.

• And most obviously, a consistent paycheck is quite favorable and reassuring. The security of knowing that the next paycheck is only a few days away helps to keep many-a-graphic-artist from starving, not to mention the added benefit of paid vacations and sick leave. Many companies also subsidize part of the employees’ health, short-term and long-term disability insurance, and provide a group retirement plan (in some cases, they even match the employee contribution up to a certain percentage) and reimburse continuing education efforts.

Thumbs DownThe downside?

• Working within the same style can feel repetitive, and it is difficult to keep the design feeling original and fresh.

• Organizations sometimes confuse design with production, and designers are often expected to simply execute what has been dictated.

• The constant proximity to coworkers can be difficult if the tense and subjective design environment causes personality conflicts.

• Most positions are salaried instead of compensated on a per-hour basis, and the modern day in-house designer will be working far more than the standard 40-hour week without any additional monetary gains. The economy also plays a role in the designer’s day-to-day workload. When companies down size, the responsibilities of the remaining staff are exponentially increased.

• Typically, an in-house designer makes less per hour than their freelance counterpart, they have to work more and take home less. This trade off is made to finance the aforementioned benefit package.


The Freelance Designer
Freelancing truly requires a jack-of-all-trades mentality because the designer’s success or failure depends on how well they advertise and sell their skills long before the actual act of designing is able to begin. In addition to the networking and marketing necessary to grow a client base and build lasting business relationships, the freelance designer is also responsible for their own administration and accounting needs. The freelancer must also be comfortable creating and writing bids for projects, presenting proposals and ideas, and be available to the client at all times. Once a client and project have been won over, the actual design work can begin and includes spec and design work, reworks, proofs, production and archiving.

Thumbs UpThe upside?
• A freelance designer gets the luxury of variety. The variety of projects, styles, clients and hours is a great way to keep day-to-day work and a portfolio fresh impressing.

• There is great independence in working for one’s self. The designer may not be calling all the shots (after all, it is the client’s project), but they are definitely at the helm and as such can create a work environment, flow and process of their choosing.
• Repeat business is the equivalent to money walking in off the street and is a marker of a job well done. The in-house designer does not get paid per project or hour, so repeat business doesn’t always feel like a positive, but to the freelance designer it means dollar signs. The trust a client shows by returning validates the designer’s design skill and business acumen. As client lists grow, the designer is able to spend less time on marketing and advertising and more on the design work. As these relationships solidify and grow, natural working relationships and rhythms emerge and speed the process as well as underscore the client’s confidence in the designer.

• The ability to truly control one’s income is quite empowering. Freelance designers can make as much or as little as they want by effectively managing time to achieve whatever goals they may choose.

Thumbs DownThe Downside?
• All business ventures have highs and lows, emotionally and economically. A freelance designer must be prepared to withstand inconsistent paydays, delinquent clients, and poor communicators.

• Building relationships, winning projects, and proving not only design agility but also professionalism are all important and time consuming pieces to the freelance puzzle. A considerable amount of time and energy must be devoted at the outset of a freelance career to things not necessarily design- related but instead to tasks that don’t qualify as billable hours which makes a long day feel even longer.

• When bidding on projects, the designer must track the pulse of the economy and constantly price themselves within the competitive ballpark without under or over charging for their services. Charge too little and the quality of work may come into question, charge too much and business may be driven away.
• There is not a benefit package waiting to backup the designer should they fall ill or take a holiday.

When it comes down to it, every position has both positive and negatives. The trick to finding your niche in the design community is to be perfectly honest with yourself about your strengths, weaknesses, and career expectations. Armed with the guide above and the career goals you’ve set for yourself, you should have all tools you need to get started on the right path for your future.

The post Full-time or Freelance? appeared first on Design Reviver.


Choosing Fonts & Typefaces

Typefaces come in all shapes and sizes, and much like smells and sounds, have the power to conjure emotions, meanings, and correlations. But instead of being paralyzed by the overwhelming number of typefaces in your drop-down menu — or worse, inadvertently misrepresenting the information with an uninformed typeface choice — peruse the following guide to help navigate these sometimes confusing waters.


CLASSIFICATIONS

The contents of a typography library can be broken down into four primary classifications: serifs, sans serifs, scripts, and decorative typefaces. Before delving into the sea of available typefaces, start by understanding the types and generally accepted uses of each classification.

  • Sans Serifs are best recognized by their lack of ornamentation. With the advent of the internet and ever-evolving printing techniques, sans serifs are used consistently in almost every capacity due to their easy legibility at nearly every size. Sans serifs are most effective at quickly and concisely displaying information to the reader without any underlying emotional or visual triggers. Designers have also adopted the sans serifs’ simplicity to create a modern or minimalist feel when relevant to the design of their project. On the flipside, take extra care when using a sans serif for identity or branding efforts. The lack of decoration leaves little to brand as specific to one company or a visual identity. Common Sans Serifs: Helvetica, Arial, Verdana, Tahoma, Futura, Franklin Gothic, Gill Sans, and Univers
  • Sans Serif Typeface Example


  • Serifs, in the most basic form, are a sans serif typeface with small finishing strokes at the beginning and end of each letter stroke. Serifs are commonly used as the default typeface by nearly everybody from the average email user to professional designers. From the design perspective, serif typefaces are often used for body copy because it is widely believe that the smooth arcs help lead the eye easily through large amounts of text. They are also a good choice for business and formal correspondence, marketing materials, and myriad media due to the under current of credibility and professionalism they project. Within this classification, there is a subset know as slab serifs, which feature block-like, heavy serifs that do not naturally run into or join to the next letter. Due to their weight, slab serifs should predominantly be used for headlines. Common Serifs: Times New Roman, Georgia, Book Antiqua, Garamond, Century Schoolbook, and Bookman (Common Slab Serifs: Courier and Rockwell)
    Serif Typeface Example


  • Script typefaces are modeled after handwriting, and are often used to introduce a human feeling or connection to the reader. Varying from child-like scribbles and chalk letters to elegant calligraphy, script typefaces are effective at introducing fun or sophistication to a computer-generated piece. Scripts are most often used in formal, or decidedly informal projects (see the example below). Scripts rule the world of personal design from invitations to announcements. However, the use of scripts in corporate design should be minimal, as they do not project authority and reliability. Common Scripts: Comic Sans, Monotype Corsiva, Mistral, Lucinda Handwriting, and Brush Script
    Script Typeface Example


  • Decorative (also known as ornamental or display) typefaces typically fall into the serif category due to their highly ornamental nature. As their name indicates, they are highly decorative and best used to create or reinforce design styles and themes in large sizes (such as headlines). Their otherwise unique letter shape can be refreshing and attention getting. They can also be used to mimic the emotions and aesthetic of a specific genre or time frame. However, the intricate strokes often used to create these typefaces make them undesirable for use in large amounts of text or at smaller sizes, and therefore are not ideal for body copy.  Avoid using highly decorative typefaces in news or business reports, as they tend to detract from the neutrality for which most organizations strive. Be wary of over using a decorative typeface, or choosing a one inappropriate to the subject matter.
    Decorative Typeface Example


CONVENTIONS

When choosing typefaces its important to keep in mind the established conventions for the medium at hand. This is not to say that conventions cannot be broken — after all, design s all about breaking rules — but its important to know what the rules are before breaking them.

Websites and online projects require a typeface’s compatibility with the largest common denominator of computers, which usually necessitates the use of otherwise familiar or commonly used typefaces. As such, web standards have been quickly been defined with the use of a sans serif for body copy paired with a serif, script, or decorative typeface for headlines and subheads.

The opposite can be said for print pieces. It has become the collective opinion of most designers that the smooth arc and small leading lines of serifs helps the eye move comfortably through large amounts of text, and as a result, the serif has become the champion of body copy. In recent years, studies have proven that though serifs are not necessarily easier to read, rather our eyes are trained early on to believe they are. From this point the classic nature versus nurture paradox exists. Whatever the case, serifs remain the universal choice for body copy.


CUSTOMIZATION AND STYLING

To further customize or illustrate your intent, try playing with variations of weight (regular, medium, bold, heavy), width (narrow, condensed, extended), italics, outline stroke, and color. The adjustment of any of these components can severely alter the visual cues your typeface relays to the reader.

AVOID OVERUSE

Finally, and this can never be said enough — think twice before using the following typefaces: Comic Sans, Curlz, Papyrus, and Times New Roman. This is not an editorial on their quality or usefulness in the proper context. When observed in a vacuum, each font has its merits. Unfortunately, the designer needs to account for all external influences and these fonts have been overused to the point that even the most unobservant passerby can probably identify them by name. The last thing a designer wants when presenting information is to allow the message to be obscured by the typeface.

When choosing typefaces, classifications and best practices should merely be a guide to jumpstart the creative process. Good Luck!

The post Choosing Fonts & Typefaces appeared first on Design Reviver.


The Top 10 Secrets to Designing a Magazine

Each avenue in the design world has its own unique challenges and tricks, and magazine design is no different. From style guides and gutters to editors and entry points, designing for a magazine comprises its own set of rules and considerations. Before jumping head first into the text-heavy, deadline-driven world of magazines, take a moment to get your bearings and familiarize yourself with the terrain. Using the road map below, your creativity, and a bit of luck you’ll have everything you need to produce a top-notch, reader-friendly magazine.

1. Style Guides and Templates
In magazine design, consistency is imperative not only to branding but also to creating familiarity between the magazine and its audience. This familiarity breeds trust and loyalty, and ultimately keeps readers coming back for more. One of the biggest misconceptions in design is that templates and style guides are restrictive. On the contrary, they open the door for more creative solutions. Just like in web design, style guides, style sheets, and templates create consistency and allow for global changes without hassle. Instead of regarding style guides and templates as rules, think of them as the framework holding up the design for each page.

2. Audience First
It’s really that simple. The reader profile should inform your approach to the material. Designing something you like is important, but are you the target audience? Ask yourself, “Does this service the reader?�

3. Diligently Seek Out Inspiration
Working within the same style issue after issue can quickly zap the creative energy right out of you, and unfortunately this will most likely show in your work. Something should surprise the reader every time they turn the page, and achieving that is your responsibility. When you’re feeling uninspired — and you will, eventually — go to a newsstand and flip through other publications, stroll through an art gallery, or simply take a walk. Design is all around you so keep your eyes peeled and refresh your creativity. Many designers keep folders or boxes full of inspiration they’ve collected (such as tear sheets from other publications, art work, postcards, photographs, greeting cards, patterns, fabrics, websites, etc.) near their workspace.

4. Cover Planning
Covers can be the most sensitive and time-consuming part of a magazine issue. Each cover is obliged to achieve several goals. It must attract attention while sitting on a newsstand, adhere to print and postal code regulations, be intriguing while still falling into alignment with brand standards, and — most of all— stand up to the scrutiny of the design and editorial team. Brainstorm, plan ahead, and have a backup plan … or three.

Example Magazine Covers

5. Editors Are Your Friends
Magazine staffs often operate with a strict delineation between editorial staff and design staff. However, stronger ideas and solutions emerge when these departments work together early and often. As the designer, familiarize yourself with articles coming down the pipe. You may be able to offer an outside perspective or new approach. Equally, be open to editorial suggestions and help build on them. After all, this is a team project.

6. Typography and Points of Entry
When talking about mass amounts of text, as is the case with most magazine articles, the way in which text is treated and formatted is paramount. As a designer, you have the power to form the way in which the reader is presented with information. With that in mind, text-heavy pages take extra care as you must provide easy points of entry for the reader that lead them through the page. As you see in the example below, a page with no imagery can still be appealing and attention grabbing with the use of grids, headlines, subheads, drop caps and pull quotes. As with many things in design, hierarchy is key.

Example of Magazine Typography

7. No Budget? No Problem.
Budgets are being slashed around the world and publishing is taking its fair share. Fortunately, there are several inexpensive stock-art websites and photo-sharing sites such as flikr.com that can help out in a pinch. If illustration is a better match for the feature at hand, foster good working relationships with a small pool of illustrators. Illustrators are much more willing to negotiate if you’re a regular customer and can provide steady work. And when all else fails, create what you need. Choose a visual theme appropriate to the article and bask in the freedom. This is when design truly proves its value.

8. Design is in the Details
Take the time to check over the details of each page. Finishing touches are the difference between a professional end product and an amateur one. Clean up and double-check the file for rule alignment, overlapping text and image boxes, unresolved text spacing and breaks, and color matching (e.g., make sure that the same black is used throughout the whole issue).

9. Get to Know Your Printer
The physical production of each issue is a topic in and of itself, but there are a couple pitfalls that can be avoided by simply communicating with your printer. One of the biggest oversights when designing the interior of a magazine is failing to account for the spine. Depending on the size of your magazine and how it is bound, any element that crosses the gutter may lose necessary information such as text on a sign or facial features. Your printer can help you determine the amount of overlap necessary. Also, ask the printer for output specifications to assure that the high-resolution files you provide are compatible with its system. This saves everyone time and saves you extra processing costs.

10. The Big Picture
Designing a magazine is just as much about balance and organization as it is about the text and images on each page. From ad placement to the aesthetic of each feature, designing a magazine requires both a close eye to detail and, conversely, a healthy distance for perspective. The best magazine designers consider each article individually, how those articles fit into a particular magazine issue as a whole, and then how that issue fits into the larger publication set. The end result should showcase your cohesiveness, consistency, and creativity.

The post The Top 10 Secrets to Designing a Magazine appeared first on Design Reviver.


  •   
  • Copyright © 1996-2010 BlogmyQuery - BMQ. All rights reserved.
    iDream theme by Templates Next | Powered by WordPress