Archive for November, 2010

Stunning Morning Dew Photography

Advertisement in Stunning Morning Dew Photography
 in Stunning Morning Dew Photography  in Stunning Morning Dew Photography  in Stunning Morning Dew Photography

Watching the morning dew is the most refreshing view that helps relax your mind and soul. Capturing such a beautiful moment can be exciting as well as a fun activity. The morning dew pictures are mostly taken before sunrise or in the evening and capture the droplets in a very impressive way. This requires a lot of practice and patience. In this post we have gathered over forty stunning morning dew photos for your inspiration. Feel free to share your opinion with us and let us know which one is your favorite!

Morning Dew Photography

Morning Dewdrops

Morningdew33 in Stunning Morning Dew Photography

Bejewelled

Morningdew40 in Stunning Morning Dew Photography

Morning Dew Leaf

Morningdew28 in Stunning Morning Dew Photography

Golden Globes – Feather

Morningdew37 in Stunning Morning Dew Photography

Morning Dew Bokeh

Morningdew35 in Stunning Morning Dew Photography

Morning Dew

Morningdew23 in Stunning Morning Dew Photography

Blue Wheels with Morning Dew

Morningdew34 in Stunning Morning Dew Photography

Dew Drops – GV

Morningdew49 in Stunning Morning Dew Photography

Black Velvet

Morningdew45 in Stunning Morning Dew Photography

Droplets on Blue Dragonfly

Morningdew39 in Stunning Morning Dew Photography

Early Morning Dew Flower

Morningdew15 in Stunning Morning Dew Photography

Rugiada del Mattino

Morningdew6 in Stunning Morning Dew Photography

Morning Dew Leaves

Morningdew20 in Stunning Morning Dew Photography

Morning Dew on Fressia Buds

Morningdew25 in Stunning Morning Dew Photography

Morning Dew on Rose Petal

Morningdew11 in Stunning Morning Dew Photography

Early Bright Morning Dew

Morningdew32 in Stunning Morning Dew Photography

DanDrops

Morningdew44 in Stunning Morning Dew Photography

Dewdrops at Seven a.m.

Morningdew4 in Stunning Morning Dew Photography

Baby Ducks in the Morning

Morningdew51 in Stunning Morning Dew Photography

Sleeping in Morning Dew

Morningdew47 in Stunning Morning Dew Photography

Golden Morning Dew Drops

Morningdew1 in Stunning Morning Dew Photography

Morning Sun

Morningdew2 in Stunning Morning Dew Photography

Caught In-Between

Morningdew5 in Stunning Morning Dew Photography

The Light Fantastic

Morningdew7 in Stunning Morning Dew Photography

Sparkling like Diamonds

Morningdew8 in Stunning Morning Dew Photography

Dew Droplet Refraction

Morningdew9 in Stunning Morning Dew Photography

Tiny Morning Dew

Morningdew10 in Stunning Morning Dew Photography

Morning Dew in Adelaide

Morningdew12 in Stunning Morning Dew Photography

Morning Dew Macro Plants

Morningdew13 in Stunning Morning Dew Photography

Morning Dew Bokeh

Morningdew16 in Stunning Morning Dew Photography

Morning Dewdrops

Morningdew18 in Stunning Morning Dew Photography

Macro Plants Morning Dewdrops

Morningdew19 in Stunning Morning Dew Photography

Kissed by the Morning Dew

Morningdew21 in Stunning Morning Dew Photography

Heavy Dewdrops

Morningdew22 in Stunning Morning Dew Photography

Morning Dew Umbrella

Morningdew24 in Stunning Morning Dew Photography

Morning Dew – Bokeh Cropped

Morningdew26 in Stunning Morning Dew Photography

Morning Dews

Morningdew27 in Stunning Morning Dew Photography

Morning Dewdrops

Morningdew29 in Stunning Morning Dew Photography

Dew Drop Single

Morningdew30 in Stunning Morning Dew Photography

Morning Dew Drop

Morningdew31 in Stunning Morning Dew Photography

The First Dew Drop

Morningdew36 in Stunning Morning Dew Photography

Sundew Magic

Morningdew42 in Stunning Morning Dew Photography

Dandelion Dewdrops

Morningdew43 in Stunning Morning Dew Photography

Drops, Drops, Drops

Morningdew46 in Stunning Morning Dew Photography

Morning dew

Morningdew48 in Stunning Morning Dew Photography

(ik)


Are You a Former Cutline or PressRow Theme User?

Sadly, the crew at WordPress.com have chosen to retire two of my old themes, Cutline and PressRow.

If you loved these themes and are sorry to see them go, don’t sweat it! Soon, I’ll be re-releasing both of these classic theme designs for free to everyone who uses the Thesis Theme Framework.

And thanks to the power of Thesis, these new versions of Cutline and PressRow will be more optimized, more flexible, and faster than their predecessors.

What is the Thesis Theme Framework?

Thesis is the ultimate theme—it’s a powerful template system that enables you to customize your design, tweak your SEO, and run a world-class website with ease.

While Cutline and PressRow were two separate themes, Thesis is a single framework that does it all. It runs underneath this site, my business site, and tens of thousands of others, and it can accommodate any design!

Thanks to this remarkable flexibility, I’ll be able to offer the Cutline and PressRow designs for free to Thesis users.

For those of you wondering, the Thesis Theme Framework is not available on WordPress.com blogs, as it requires a self-hosted version of WordPress from WordPress.org. If you’re a WordPress.com blogger who would like help moving to the beneficial world of self-hosting, please give me a shout in the comments!

How can you get Cutline and PressRow?

Now that Cutline and PressRow have been removed from the WordPress.com theme directory, I’ve decided to re-release these classic themes for free as skins for the Thesis Theme Framework.

These skins are still in development and will take time to complete, but if you want to be notified the second they’re done, simply enter your email in the box below, and I’ll be sure to contact you.

Please notify me when Cutline and PressRow are available for the Thesis Theme Framework!

Thinking about leaving WordPress.com?

Since you can no longer use Cutline or PressRow on WordPress.com, now may be the perfect time for you to become a WordPress.org user.

Personally, I think running a self-hosted version of WordPress is extremely beneficial because it gives you total control over your website and your data.

If you’re considering moving from WordPress.com to WordPress.org because of Cutline or PressRow and need help getting set up, please let me know in the comments so I can help you out!

Update: Here’s an article (including video!) that explains how to transfer your blog from WordPress.com to WordPress.org.


Creative and Effective Package Designs

Advertisement in Creative and Effective Package Designs
 in Creative and Effective Package Designs  in Creative and Effective Package Designs  in Creative and Effective Package Designs

The design on any product is what gives your potential customer the first impression of it. That is why it is very important that you break the customary rules and make your product stand out from the rest. A beautifully designed packaging will have huge appeal to your target market and it can influence the buyer’s decision. In today’s post, we have collected around 50 effective and creative package designs that will inspire you and perhaps make some realize how important it really is to value the hard work behind the designs on products out there in the market.

Creative Package Designs

Jooze

Packingdesign31 in Creative and Effective Package Designs

Porkinson Banger

Packingdesign35 in Creative and Effective Package Designs

Koberg Vilt

Packingdesign47 in Creative and Effective Package Designs

Colier

Packingdesign37 in Creative and Effective Package Designs

Packingdesign37b in Creative and Effective Package Designs

Coca-Cola Mystic

Packingdesign6 in Creative and Effective Package Designs

EarBudeez Earbud-Style Headphones

Packingdesign8 in Creative and Effective Package Designs

Packingdesign9 in Creative and Effective Package Designs

Wild Bag

Packingdesign18 in Creative and Effective Package Designs

DKNY Candy Apples Parfume

Packingdesign28 in Creative and Effective Package Designs

BYO

Packingdesign40 in Creative and Effective Package Designs

Panadol

Packingdesign44 in Creative and Effective Package Designs

Gloji Super Juice

Packingdesign46 in Creative and Effective Package Designs

Eco Coke Bottle Design

Packingdesign3 in Creative and Effective Package Designs

Ben Schlitter: 18 Questionable Songs

Packingdesign4 in Creative and Effective Package Designs

DB Export

Packingdesign5 in Creative and Effective Package Designs

Doritos Packaging Concept

Packingdesign1 in Creative and Effective Package Designs

Salomon Packaging

Packingdesign2 in Creative and Effective Package Designs

Coffee Cup Face Art

Packingdesign7 in Creative and Effective Package Designs

Bell TV

Packingdesign10 in Creative and Effective Package Designs

Apple Magic Mouse

Packingdesign11 in Creative and Effective Package Designs

Made of Frutz

Packingdesign12 in Creative and Effective Package Designs

Lukafe: Jail

Packingdesign13 in Creative and Effective Package Designs

Mixed Emotions

Packingdesign14 in Creative and Effective Package Designs

Zipp Infuzions

Packingdesign15 in Creative and Effective Package Designs

Porto Novo

Packingdesign16 in Creative and Effective Package Designs

Yuan Gao’s Pates

Packingdesign17 in Creative and Effective Package Designs

Scent Stories

Packingdesign19 in Creative and Effective Package Designs

Limite

Packingdesign20 in Creative and Effective Package Designs

Kjaer Weis Makeup

Packingdesign21 in Creative and Effective Package Designs

360 Paper Bottle

Packingdesign22 in Creative and Effective Package Designs

Camelia

Packingdesign23 in Creative and Effective Package Designs

Packaging Experiment

Packingdesign24 in Creative and Effective Package Designs

Acra

Packingdesign25 in Creative and Effective Package Designs

Lite2go

Packingdesign26 in Creative and Effective Package Designs

DKNY Fresh Blossom Rollerball Duo

Packingdesign27 in Creative and Effective Package Designs

Microsoft ARC Mouse

Packingdesign29 in Creative and Effective Package Designs

Elesee Perfume

Packingdesign30 in Creative and Effective Package Designs

Ping Energy Drink

Packingdesign32 in Creative and Effective Package Designs

Frolick Pet

Packingdesign33 in Creative and Effective Package Designs

Incase, Premium Messenger Bags

Packingdesign34 in Creative and Effective Package Designs

Panasonic Note – Stereo Earphones Headphones

Packingdesign36 in Creative and Effective Package Designs

Antismoke Pack

Packingdesign38 in Creative and Effective Package Designs

Sexy Gourmet Food

Packingdesign39 in Creative and Effective Package Designs

Pop-up Popcorn

Packingdesign41 in Creative and Effective Package Designs

EyePet

Packingdesign42 in Creative and Effective Package Designs

Yeo Valley Big Pots

Packingdesign43 in Creative and Effective Package Designs

Packaging Design

Packingdesign45 in Creative and Effective Package Designs

(ik)


Designing for iPhone 4 Retina Display: Techniques and Workflow

Advertisement in Designing for iPhone 4 Retina Display: Techniques and Workflow
 in Designing for iPhone 4 Retina Display: Techniques and Workflow  in Designing for iPhone 4 Retina Display: Techniques and Workflow  in Designing for iPhone 4 Retina Display: Techniques and Workflow

The iPhone 4 features a vastly superior display resolution (614400 pixels) over previous iPhone models, containing quadruple the 153600-pixel display of the iPhone 3GS. The screen is the same physical size, so those extra dots are used for additional detail — twice the detail horizontally, and twice vertically. For developers only using Apple’s user interface elements, most of the work is already done for you.

For those with highly custom, image-based interfaces, a fair amount of work will be required in scaling up elements to take full advantage of the iPhone 4 Retina display. Scaling user interfaces for higher detail displays — or increasing size on the same display — isn’t a new problem. Interfaces that can scale are said to have resolution independence.

In a recent article, Neven Mrgan described resolution independence: “RI [resolution independence] is really a goal, not a technique. It means having resources which will look great at different sizes.� If it’s a goal, not a specific technique, then what techniques exist? How has Apple solved the problem in iOS?

Fluid Layouts

While apps that take advantage of Apple’s native user interface elements require a lot less work when designing for the Retina display, we’re here to talk about highly custom, graphic-driven apps that need a fair amount of work to take full advantage of the Retina display.

While not strictly a resolution-independent technique, using a fluid layout can help an app grow to take advantage of a larger window or screen by adding padding or by changing the layout dynamically. A lot of Mac, Windows and Linux apps use this method, as do some websites.

This is partially how Apple handled the difference in resolution from iPhone to iPad — a lot of UI elements are the same pixel size, but padded to make use of the extra screen real estate. The status bar is a good example of this. It works because the pixel densities of the iPhone 3GS and iPad are similar (163 ppi vs 132 ppi).

Lockscreen in Designing for iPhone 4 Retina Display: Techniques and Workflow
Full view

Fluid layouts work when the change in density is minor, but aren’t any help with the iOS non-Retina to Retina display transition (163 ppi to 326 ppi). The image below demonstrates what would happen if an iPhone app was simply padded to cater for the higher resolution display of the iPhone 4. Buttons and tap areas would be the same size in pixels, but half the physical size due to the higher pixel density, making things harder to read and to tap.

Phone-app-fluid in Designing for iPhone 4 Retina Display: Techniques and Workflow
Full view

Just-in-time Resolution Independence

Another approach to handling widely different resolutions and pixel densities is to draw everything using code or vector-based images (like PDFs) at runtime. Without trying to stereotype anyone, it’s usually the approach engineering-types like. It’s clean, simple and elegant. It lets you design or code once, and display at any resolution, even at fractional scales.

Unfortunately, using vector-based images tends to be more resource-hungry and lacks pixel level control. The increase in resources may not be an issue for a desktop OS, but it is a considerable problem for a mobile OS. The lack of pixel level control is a very real problem for smaller elements. Change an icon’s size by one pixel, and you will lose clarity.

Timer-icon in Designing for iPhone 4 Retina Display: Techniques and Workflow

Neven emphasizes in his article that:

“…it is simply not possible to create excellent, detailed icons which can be arbitrarily scaled to very small dimensions while preserving clarity. Small icons are caricatures: they exaggerate some features, drop others and align shapes to a sharp grid. Even if all icons could be executed as vectors, the largest size would never scale down well.â€�

Although here he is talking exclusively about icons, his description is apt for most UI elements. The decisions involved in scaling are creative, not mechanical. Vector-based elements aren’t suitable for all resolutions, if you value quality.

Ahead-of-time Resolution Independence

The best quality results — and the method Apple chose for the iPhone 3GS to iPhone 4 transition — comes from pre-rendered images, built for specific devices, at specific resolutions: bespoke designs for each required size, if you will. It’s more work, but pre-rendering images ensures everything always looks as good as possible.

Apple chose to exactly double the resolution from the iPhone 3GS to the iPhone 4, making scaling even easier (different from the approach of Google and Microsoft — notice that this article is not relevant to the latest version of Microsoft’s mobile OS — proving yet again that controlling the entire stack has huge advantages).

Double in Designing for iPhone 4 Retina Display: Techniques and Workflow

Currently, there are three iOS resolutions:

  • 320 × 480 (iPhone/iPod touch)
  • 640 × 960 (iPhone 4 and iPod with Retina display)
  • 768 × 1024 / 1024 × 768 (iPad)

In a few years, it seems highly likely that the line-up will be:

  • 640 × 960 (iPhone/iPod touch with Retina display)
  • 1536 × 2048 / 2048 × 1536 (iPad with Retina display)
  • Some kind of iOS desktop iMac-sized device with a Retina display

There are significant differences between designing iPhone and iPad apps, so completely reworking app layouts seems necessary anyway — you can’t just scale up or pad your iPhone app, and expect it to work well or look good on an iPad. The difference in screen size and form factor means each device should be treated separately. The iPad’s size makes it possible to show more information on the one screen, while iPhone apps generally need to be deeper, with less shown at once.

Building Designs That Scale

Building apps for the iPhone 4 Retina display involves creating two sets of images — one at 163 ppi and another at 326 ppi. The 326 ppi images include @2x at the end of their filename, to denote that they’re double the resolution.

When it comes to building UI elements that scale easily in Adobe Photoshop, bitmaps are your enemy because they pixelate or become blurry when scaled. The solution is to create solid color, pattern or gradient layers with vector masks (just make sure you have “snap to pixel” turned on, where possible). While a little awkward at times, switching to all vectors does have significant advantages.

Before anyone mentions it, I’m not suggesting any of the methods are new; I’m willing to bet that most icon designers have been working this way for years. I’ve been using vector shapes for ages too, but the Retina display has changed my practice from using vector shapes only when I could be bothered, to building entire designs exclusively with vector shapes.

I usually draw simple elements directly in Photoshop using the Rectangle or Rounded Rectangle Tool. Draw circles using the Rounded Rectangle Tool with a large corner radius, because the ellipse tool can’t snap to pixel. Layer groups can have vector masks too, which is handy for complex compositing (option-drag a mask from another layer to create a group mask).

Iconpsd in Designing for iPhone 4 Retina Display: Techniques and Workflow
Full view

More complex objects get drawn in Adobe Illustrator to the exact pixel size, and then pasted into Photoshop as a shape layer. Be careful when pasting into Photoshop, as the result doesn’t always align as it should — it’s often half a pixel out on the x-axis, y-axis or both. The workaround is to zoom in, scroll around the document with the Hand Tool, and paste again. Repeat until everything aligns. Yes, it’s maddening, but the method works after a few attempts. Another option is to zoom in to 200%, select the path with the Direct Selection Tool, and nudge once, which will move everything exactly 0.5px.

Complex in Designing for iPhone 4 Retina Display: Techniques and Workflow
Full view

Even more complex objects requiring multiple colors get drawn in Illustrator to the exact pixel size, and then pasted into Photoshop as a Smart Object. It is a last resort, though — gradients aren’t dithered, and editing later is more difficult.

If you need to use a bitmap for a texture, there are three options: use a pattern layer, a pattern layer style, or build a bitmap layer at the 2× size and turn it into a Smart Object. I prefer to use pattern layer styles in most cases, but be warned: patterns are scaled using bicubic interpolation when you scale the entire document, so they become “softer.” The solution is to create two versions of each pattern, then to manually change pattern layer styles to the correct pattern after scaling — a little tedious, but totally do-able approach.

Delete in Designing for iPhone 4 Retina Display: Techniques and Workflow
Full view

Scaling Up

At this point, your document should be able to scale to exactly double the size, without a hitch.

Scaling2 in Designing for iPhone 4 Retina Display: Techniques and Workflow

I have a Photoshop Action set up that takes a History Snapshot, then scales to 200%. That means, previewing at the Retina display’s resolution is only a click away. If you’re feeling confident you’ve built everything well, you should be able to scale up, edit, then scale down and continue editing without degradation. If you run into trouble, a Snapshot is there to take you back. Using one document for both resolutions, means not having to keep two documents in sync — a huge advantage.

Actions2 in Designing for iPhone 4 Retina Display: Techniques and Workflow

A word of warning: layer styles can only contain integer values. If you edit a drop shadow offset to be 1 px with the document at 2× size, and then scale it down, the value will end up as 1 px because it can’t be 0.5 px (a non-integer value). If you do require specific changes to the 2× version of the Photoshop file, you’ll have to save that version as a separate file.

Exporting, Exporting, Exporting

Now for some bad news: exporting all the images to build an app can be extremely tedious, and I don’t have much advice here to assist you. As my documents act as full screen mockups, they’re not set up in a way that Photoshop’s Slice feature is any use. Layer comps don’t help either — I already have folders for each app state or screen, so switching things off and on is easy.

The best export method seems to be: enable the layers you’d like visible, make a marquee selection of the element, then use Copy Merged and paste the selection into a new document — not much fun when you have hundreds of images to export.

The problem is amplified when saving for the Retina display, where there are twice as many images and the 1× images must match the 2× images precisely.

The best solution I’ve come up with so far:

  • Build your design at 1×
  • Use Copy Merged to save all the 1× images
  • Duplicate the entire folder containing the 1× images
  • Use Automator to add @2x to all the filenames
  • Open each @2x image and run the “Scale by 200%” Photoshop action. This gives you a file with the correct filename and size, but with upscaled content
  • Scale your main Photoshop design document by 200%
  • Use Copy Merged to paste the higher quality elements into each @2x document, turn off the lower quality layer, then save for the Web, overwriting the file.

In some cases, Photoshop’s “Export Layers To Files” can help. The script can be found under the File menu.

Mac Actions and Workflows

All the Actions and Workflows that I use myself can be downloaded from the blog post link below. The Automator Workflows can be placed in your Finder Toolbar for quick access from any Finder window, without taking up any space in your Dock.

Download: Retina Actions and Workflows.zip

Promo-2x in Designing for iPhone 4 Retina Display: Techniques and Workflow

Fortunately, Apple chose to exactly double the resolution for the iPhone 4, and for using ahead-of-time resolution independence. As complex as the process is now, things would have been far worse if they had chosen a fractional scale for the display.

Related Posts

You may be interested in the following related posts:

(rs) (ik) (vf)


© Marc Edwards for Smashing Magazine, 2010. | Permalink | Post a comment | Add to del.icio.us | Digg this | Stumble on StumbleUpon! | Tweet it! | Submit to Reddit | Forum Smashing Magazine
Post tags: , , , , ,


10 Things a Successful Online Community Can’t Live Without

Online communities range from discussion boards to image or video sharing, or to just chatting and messaging. There are plenty of elements that are the key to the success of these online communities, and without them, many of these communities will not be as popular or as successful as they are today.

Despite all these different types of communities, they all generally share many different elements or guidelines or rules that are followed to make them as successful as they are today. We cover ten elements or things that have been determined as ten elements or things that a successful online community cannot live without.

Design, Design, and Design

The design of a community is such a huge element or factor that really makes or breaks a community, and to bring design into example, we discuss Google’s design and its affect on us.

We all have a favorite search engine whether be it Google, Bing, or Cuil. What really keeps us loyal to these services or search engines are many factors, results, relevancy, and many others, however, one key element that hinders our decision despite that mentioned would be design.

Google users love Google for their simplistic and straightforward design, the background color works well with the foreground colors, and what we came for is available straight away and the main focus of the search engine. Similarly, for online communities, you can have the best of people on these communities; however, if the design is unbearable people including ourselves begin to find an alternate community instead.

Design does not just relate to the way things are laid out and what is in focus or not, it additionally relates to the type of design that is provided based on the online community. For example, if you frequent a gaming discussion board , you expect to see a gaming like and exquisite design, but you land to only see a generic design in place, as a viewer, you are less intrigued into staying with that community as it does not express the gaming dedication or feel it tries to purvey.

Therefore, make sure the design layout, color scheme, and theme all fits in with the type of online community and the audience you are trying to target, as it is indeed a key to making an online community successful.

Content

Successful online communities do not begin with a plethora of content available, but instead, it is built with content overtime and on the initial availability of the online community.

With that said, successful online communities’ reach where they are today through their content and by staying focused on the category, topic, or subject matter they have chosen initially. By expanding their subject or core focus to other categories, a community may no longer target its intended audience, but instead trying to target a set of audiences, and in the end, running too thin, reaching failure.

Tools to Make it a Community

An online community cannot live without the tools it needs to be classified as an online community. Eliminate core tools for discussion such as user-to-user communication, or the proper methods of getting discussions posted, the community will quickly fall apart as it becomes difficult for community members to communicate.

Evolution

As a general rule in successful online communities or online communities in general, users or community members love to see the communities they participate in evolve, this includes the addition of new community members, new tools to convey messages, as well as the evolution in the design, always aimed toward improvement and to keep community members satisfied.

Community members always want to feel that the folks behind the community care about the community members rather than for their own benefit, and to show them this, changing and adding new elements to improve the community gives them this satisfaction, and without such actions, a successful online community cannot be where it is today.

Activity

Online communities thrive on activity, without it the communities slowly change, and are used less causing once active members, to begin to find an alternate community. Therefore, assuring your community is active is all in the way you market and reach new potential members, of which should be done often despite how successful an online community may be, as members who may be loyal today, may leave the next.

Response and Feedback

A community is built around response and feedback, and without it, there is no satisfaction provided or given to fulfill community wants and needs. Therefore, many successful online communities constantly respond to user or member feedback to keep them as continued and loyal members to the community rather than search for an alternate that actually responds to user or member feedback.

One Step Ahead

Many successes to online communities are due to communities being one-step ahead from their competitors. Without this step forward and always satisfying their users’ wants and needs before they need it or request it, they keep their users or members at the edge of their seats all the time, and wanting to continue to be part of the community to continue to wait to see what you have next for them. By not being a step ahead in the game, communities risk their continued success rate greatly.

Widgets

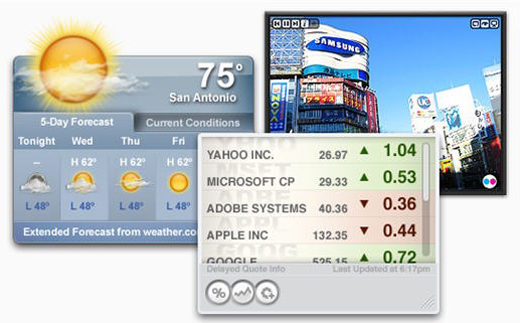
In today’s world, every user or community member wants to integrate their other favorite tools or communities or social networking services with your community, and without this connection, users sometimes feel disconnected from the rest of the internet world. With that said, many successful online communities continue to be successful due to having these connections or widgets with other services or social networks their members or users request.

Good Search Engine Optimization

Online communities are generally built around user generated content, and because user generated content is never known until made available, it becomes slightly more difficult to be able to optimize the text for search engines. However, with some good optimization improvements, it can definitely be made possible.

Without good search engine optimization, online communities generally do not expand, and if they do not expand, they do not become as successful as envisioned, or they may lose traffic and community members due to the cause of changing techniques and lesser search engine optimization improvements. With that said, always assure your online community is greatly optimized for search engines, as it is a key to success.

Multi-Platform Availability

Online communities are all about being available across multiple platforms as that is a key to their growth and expansion, which ultimately leads to their success. Without making your online community available across multiple platforms, its success rate is risked greatly as it becomes limited to where it can be accessed and utilized.


  •   
  • Copyright © 1996-2010 BlogmyQuery - BMQ. All rights reserved.
    iDream theme by Templates Next | Powered by WordPress