Archive for July, 2011

Responsive Web Design Techniques, Tools and Design Strategies

Advertisement in Responsive Web Design Techniques, Tools and Design Strategies
 in Responsive Web Design Techniques, Tools and Design Strategies  in Responsive Web Design Techniques, Tools and Design Strategies  in Responsive Web Design Techniques, Tools and Design Strategies

Back in January, we published an article on responsive design, “Responsive Web Design: What It Is and How to Use It.� Responsive design continues to get a lot of attention, but considering how different it is from the “traditional� way of designing websites, it can be a bit overwhelming for those designers who have yet to try it.

To that end, we’ve compiled this round-up of resources for creating responsive website designs. Included are tutorials, techniques, articles, tools and more, all geared toward giving you the specific knowledge you need to create your own responsive designs.

Responsive Design Techniques

CSS Transitions and Media Queries
Elliot Jay Stocks provides insight into the combination of CSS media queries and CSS transitions. The basic premise is this: you use media queries to design responsive websites that adapt in layout according to browser width, and you constantly resize your browser to see how the website performs, but every time a query kicks in, there’s a harsh jump between the first style and the second. Why not use some simple CSS transitions to smooth the jump by animating the resize? A nice case study.

Responsive-design-116 in Responsive Web Design Techniques, Tools and Design Strategies

Responsive Data Tables
Chris Coyier and Scott Jehl are experimenting with responsive design techniques for displaying data tables. By default, data tables can be quite wide, and necessarily so. You could zoom out and see the whole table, but then the text size would be too small to read. You could zoom in to make it readable, but then you’d have to scroll both vertically and horizontally (sad face) to browse the table. One solution is to reformat the table for better readability. Another is to display a pie graph from the data. Yet another is to adapt the table into a mini-graphic for narrow screens (rather than interfering much with the content when the full table is displayed).

Responsive-design-105 in Responsive Web Design Techniques, Tools and Design Strategies

Responsive Navigation Menus: Convert a Menu to a Dropdown for Small Screens
Chris Coyier describes another technique for converting a regular row of links into a dropdown menu when the browser window is narrow. When the user is on a small screen and clicks the dropdown, they’ll get an interface to select an option that is nice and big and easy to choose. Obviously much better than displaying a tiny link.

Responsive-design-131 in Responsive Web Design Techniques, Tools and Design Strategies

CSS Media Queries and Using Available Space
A tutorial from CSS-Tricks that discusses how to make subtle changes with media queries and how to use media queries in a single style sheet. For instance, if you have a fluid-width design in which the sidebar is 35% of the width of the page, depending on the width of the browser window, you could say, “If the browser is really narrow, do this. If it’s wider, do this. If it’s really wide, do this.â€� In the article, you’ll learn how to modify a list of links according to the browser’s viewport.

Mediaq in Responsive Web Design Techniques, Tools and Design Strategies

Responsive Images, Responsive Videos

Fluid Images
Fluid images are a central aspect of a responsive design. This article by Ethan Marcotte gives a thorough overview on creating them using the classic img { max-width: 100%; } code snippet, as well as details to get you started.

Fluidimages in Responsive Web Design Techniques, Tools and Design Strategies

Responsive Image: Experimenting With Context-Aware Image Sizing
An alternative approach to fluid images by Filament Group. This technique allows designers to create responsive layouts that serve different image sizes at different resolutions. Effectively, it allows designers to create mobile-optimized images for smaller screens, and then serve higher-resolution versions to larger screens. Filament Group has developed this technique that uses .htaccess files and JavaScript to serve up different sized images based on the screen width. An alternative solution is to use tools like TinySrc which allows you to merely prefix all large images in your source code with a TinySrc URL, and the tool does the rest.

Filament1 in Responsive Web Design Techniques, Tools and Design Strategies

Responsive Images and Context-Aware Image Sizing
Craig Russell has developed a technique that uses a server-side script (in PHP) to serve up images of several different resolutions. The idea is that within the PHP script, a nested array is used that lists image files and their relative percentage scales. In HTML, the image’s src attribute would be set to get the requested image’s id, but with no scale specified. A JavaScript calculates the percentage width of the image relative to the maximum width of the container, and this figure is then appended to the end of the src attribute as the scale parameter. The comments in the article contain some nice ideas and suggestions on how the technique could be improved.

Responsive-design-101 in Responsive Web Design Techniques, Tools and Design Strategies

Responsive Images Right Now
Harry Roberts’ idea is to use the img element for the smaller of the two images, the image that you want mobile users to download. You would also have a containing div to which you apply the large version of the image as a background through CSS. You then hide the img from desktop users, and show them the large CSS background, and hide the background image from mobile users and just serve them the smaller inline image.

Responsive-design-110 in Responsive Web Design Techniques, Tools and Design Strategies

Responsive Images Using CSS3
Nicolas Gallagher’s method relies on the use of @media queries, CSS3-generated content and the CSS3 extension to the attr() function. By combining the content property with the CSS3 extension to attr(), you are able to specify that an attribute’s value should be interpreted as the URL part of a url() expression. In this case, it means you will be able to replace an image’s content with the image found at the destination URL, stored in a custom HTML data-* attribute.

Responsive-102 in Responsive Web Design Techniques, Tools and Design Strategies

Responsive Images Using Cookies
Keith Clark suggests using cookies to serve smaller images to mobile users. Whenever a browser requests a file from a server, it automatically forwards any cookie data along with the request. If we use JavaScript to populate a cookie with the current screen’s dimensions, all subsequent requests made by the browser will pass this data to the server. In other words, the server would know the screen size of the device that is asking for the file.

Responsive-103 in Responsive Web Design Techniques, Tools and Design Strategies

Responsive Images With ExpressionEngine
John Faulds presents a technique for responsive images that is different from the techniques presented above. It involves querying the device’s user agent string to determine whether it is mobile, and then setting a global variable that can then be used in templates to modify the size of the image output. Basically, only one image gets sent to the browser, but that image is different depending on whether you’re viewing the page on a mobile or desktop device.

Responsive-design-118 in Responsive Web Design Techniques, Tools and Design Strategies

CSS: Elastic Videos
Nick La applies the max-width: 100%; snippet to videos and presents techniques that make HTML5 videos and object- and iFrame-embedded videos responsive. For the latter, the trick is very simple. Just wrap the embedding code in a div container, and specify a 50% to 60% padding-bottom. Then, specify the child elements (iFrame, object embed) and a 100% width and 100% height, with absolute positioning. This will force the embedded elements to expand full width automatically. Initially discovered by Thierry Koblentz.

Responsive-design-107 in Responsive Web Design Techniques, Tools and Design Strategies

Resizeable Images (At Full Resolution!)
A quick tutorial from CSS-Tricks on resizing images while maintaining resolution.

Resizeableimages in Responsive Web Design Techniques, Tools and Design Strategies

Responsive Email Newsletters

Optimizing Your Email for Mobile Devices With the Media Query
Wide emails often require horizontal scrolling, especially when there’s a large image. This case study by Campaign Monitor explains how emails can be optimized for mobile devices using media queries and offers a couple of useful techniques and snippets to be used right away.

Responsive-104 in Responsive Web Design Techniques, Tools and Design Strategies

Responsive Design for Email, the Largest Mobile Audience
Another interesting case study that shows how the development team behind Beanstalk applied screen-size-specific media queries to target styles, and what design decisions were made to make the mobile email experience better.

Responsive-design-133 in Responsive Web Design Techniques, Tools and Design Strategies

Media Queries in HTML Emails
This article covers using media queries to target specific mobile email clients.

Emailmediaqueries in Responsive Web Design Techniques, Tools and Design Strategies

Guide to CSS Support in Email
Designing an HTML email that renders consistently across major email clients can be time-consuming. Support for even simple CSS varies considerably between clients, and even different versions of the same client. Campaign Monitor has put together a guide to save you the time and frustration of figuring it out for yourself. With 24 different email clients tested, it covers all of the popular applications across desktop, Web and mobile email.

Responsive-design-137 in Responsive Web Design Techniques, Tools and Design Strategies

Responsive Design Tools

You can build a responsive design from scratch, or you can use some of the tools listed below to speed up and smooth out the process.

Respond.js
Scott Jehl’s fast and lightweight polyfill for min-width and max-width CSS3 media queries (for IE 6 to 8 and more). css3-mediaqueries-js is another script that enables IE 5+, Safari 2 and Firefox 1+ to transparently parse, test and apply CSS3 media queries.

Responsive-design-134 in Responsive Web Design Techniques, Tools and Design Strategies

WebPutty: Scientific Progress CSS Editing
This tool is a Web-based CSS editor with auto-save feature and a real-time preview of your website. WebPutty also has CSS selector highlighting and SCSS support (for Sass and LESS), as well as Compass support. To use the tool, just embed a link tag at the end of your website’s head tag.

Webputty in Responsive Web Design Techniques, Tools and Design Strategies

Debugging CSS Media Queries
In responsive Web design, we’re working with different states, widths and viewport sizes. Johan Brook shares a quick tip for indicating (with pure CSS) which media query has kicked in. The article also provides a mixin for developers using Sass. A demo is available as well.

Responsive-105 in Responsive Web Design Techniques, Tools and Design Strategies

Responsive Design Testing
This tool is for everyone who needs a quick and easy way to test their website design in multiple screen widths. Change the defaultURL variable at the top of the responsive.js file to your own site and navigate your website from within the frames.

Matt-Kersley in Responsive Web Design Techniques, Tools and Design Strategies

Responsive Containers: Selector Queries
This JavaScript by Andy Hume allows you to add selector queries and responsive containers to your design. Essentially, you can apply different class values to an HTML element based on its width.

Responsive-106 in Responsive Web Design Techniques, Tools and Design Strategies

Resize My Browser
If you need your browser to display content in a certain window size this is what you have been looking for. Just click on the size you need and check out what your size looks like. Does not work in Chrome and Opera due to issues with the “ResizeTo” event.

Resize in Responsive Web Design Techniques, Tools and Design Strategies

Media Query Bookmarklet
A handy tool that shows you exactly what size the viewport has and which media query just fired. Drag it to your bookmarks bar and have it ready when needed.

Responsive-109 in Responsive Web Design Techniques, Tools and Design Strategies

Responsivepx
Use the information this little gadget provides in your media queries to create responsive designs.

Responsivepx in Responsive Web Design Techniques, Tools and Design Strategies

ProtoFluid
A tool for rapid prototyping of responsive design. You can prototype CSS on a variety of popular device sizes, orientations and browsers, be they phones (BlackBerry Torch, Google Nexus One, iPhone, Motorola Droid), tablets (BlackBerry Playbook, iPad, Samsung Galaxy Tab, Dell Streak), monitors or televisions (720p, 1080p). You can preview designs right in the browser and use your development tools like Firebug. You might want to check an alternative tool ScreenFly as well.

Protofluid in Responsive Web Design Techniques, Tools and Design Strategies

Fluid Grid Calculator
Harry Roberts has developed a calculator and generator of fluid grids for your responsive designs. Just provide the number of columns, the width of one column and the width of the gutters, and the tool will generate a fluid grid system in CSS for you. Handy!

Responsive-design-102 in Responsive Web Design Techniques, Tools and Design Strategies

Free HTML5/CSS3 WordPress 3.1+ Theme With Responsive Layout: Yoko
Yoko is a modern and flexible WordPress theme. With the responsive layout based on CSS3 media queries, the theme adjusts to different screen sizes. The design is optimized for big desktop screens, tablets and small smartphone screens. To make your blog more individual, you can use the new post formats (like gallery, aside or quote), choose your own logo and header image, customize the background and link color.

Release in Responsive Web Design Techniques, Tools and Design Strategies

Scherzo, a Responsive WordPress Theme
This WordPress theme is a fine example of responsive design, displaying nicely on almost all devices and screens.

Responsive Design Templates

320 and Up
320 and Up works on the “tiny screen first� principle, whereby designs are created for mobile screens first, and then expanded for tablets, desktops, and large screens. It works well as an extension to HTML5 Boilerplate and as a standalone kit.

320andup in Responsive Web Design Techniques, Tools and Design Strategies

Media Queries for Standard Devices
Here is a useful template for media queries for standard devices: empty placeholders for targeting devices and attributes that you might be interested in when making responsive designs.

Responsive-design-120 in Responsive Web Design Techniques, Tools and Design Strategies

Mobile Boilerplate
Here is a customizable template for creating rich, high-performance mobile Web apps. You’ll get cross-browser consistency among A-grade smartphones, and fallback support for legacy BlackBerry, Symbian and IE Mobile. You’ll also get offline caching for free, fast button clicks, a media query polyfill and many common mobile Webkit optimizations.

Boiler in Responsive Web Design Techniques, Tools and Design Strategies

Skeleton: Beautiful Boilerplate for Responsive, Mobile-Friendly Development
Skeleton is a small collection of CSS and JavaScript files that can help you rapidly develop websites that look beautiful at any size, be it a 17-inch laptop or an iPhone. Skeleton is a grid that is responsive right down to mobile. It is well organized and well structured and provides most basic styles as a foundation.

Responsive-design-128 in Responsive Web Design Techniques, Tools and Design Strategies

Responsive Design Frameworks

1140 CSS Grid
1140 CSS Grid is optimized to work on screens ranging from the size of mobiles to 1280 pixels wide. It’s a simple flexible grid system that uses media queries for smaller screens, essentially stacking columns on top of one another.

1140cssgrid in Responsive Web Design Techniques, Tools and Design Strategies

inuit.css
This CSS framework is built to provide a solid foundation for designs on smaller screens (such as tablets) and tiny screens (such as phones) straight out of the box with minimal effort. It also has a custom grid system builder for creating fluid grid systems.

Responsive-1241 in Responsive Web Design Techniques, Tools and Design Strategies

Flurid
Flurid is a liquid grid layout with up to 16 columns.

Flurid in Responsive Web Design Techniques, Tools and Design Strategies

FluidGrids
FluidGrids is a fluid grid framework that creates layouts based on 6, 7, 8, 9, 10, 12 or 16 columns.

Fluidgrids in Responsive Web Design Techniques, Tools and Design Strategies

Less Framework 4
A CSS grid system for creating adaptive layouts. It includes four basic layouts (including tablet, mobile and wide mobile), with three sets of typography presets.

Lessframework4 in Responsive Web Design Techniques, Tools and Design Strategies

Fluid Grid System
This fluid grid framework includes a typographic grid and baseline grid.

Fluidgridsystem in Responsive Web Design Techniques, Tools and Design Strategies

Tiny Fluid Grid
Tiny Fluid Grid helps you generate your own fluid grid with 12, 16 or 24 columns, minimum and maximum widths, and percentage-based gutters.

Tinyfluidgrid in Responsive Web Design Techniques, Tools and Design Strategies

Responsive Design Workflow and Strategies

The Responsive Designer’s Workflow
Luke Wroblewski’s conference notes on Ethan Marcotte’s presentation about applying responsive Web design principles and workflows to the redesign of a major newspaper website. Among other things, Ethan explains how he approaches the responsive design methodology, what the design process looks like and how prototyping is done in the context of responsive design.

Responsive-design-104 in Responsive Web Design Techniques, Tools and Design Strategies

The Goldilocks Approach to Responsive Web Design
The Goldilocks Approach stresses device-independent layouts that look perfect regardless of the device they’re viewed on.

Goldilocks in Responsive Web Design Techniques, Tools and Design Strategies

Content Choreography
Read up on how to properly plan your site to live up to todays standards. Begin to choreograph content proportional to size to serve the best possible experience at any width.

Trentwalton1 in Responsive Web Design Techniques, Tools and Design Strategies

Structured Content First
In this presentation, Stephen Hay discusses a couple of troubles you might run into when structuring your content and argues that properly structured content is portable to future platforms. Stephen suggests that we think about creating and designing structured content first that caters to the lowest common layout denominator, whether this be a small screen or a text browser. This content should be able to go anywhere.

Stephen-Hay in Responsive Web Design Techniques, Tools and Design Strategies

Design for a Target Experience First
Another interesting perspective on a responsive designer’s workflow; Nathan C. Ford focuses on experience of its users first and then derives user scenarios and media queries from it. “There are goals for sites that reach beyond simple readability, where a lack of features can actually diminish the experience. I am working on such a project now. Our approach has been to peruse the research and tailor an optimal experience for the most likely user scenarios. Working out from there, we judicially edit and hone for each media query.”

Responsive-115 in Responsive Web Design Techniques, Tools and Design Strategies

More Responsive Design, Please
This article by Jason Things covers responsive design based on a layout/content/capability/user intent scheme, which sheds interesting new light on the challenges that responsive design can create. It’s a well thought out piece and is certainly worth a read.

Scheme in Responsive Web Design Techniques, Tools and Design Strategies

Breaking Development
Luke Wroblewski took notes at the Breaking Development Conference while Stephen Hay talked about the realities of designing for different device experiences.

Bildschirmfoto-2011-07-21-um-13 42 40 in Responsive Web Design Techniques, Tools and Design Strategies

Patterns for Multiscreen Strategies
Have a look at this simple but effective slideshow to get an idea of which core factors play a role in multiscreen concepts.

Patterns in Responsive Web Design Techniques, Tools and Design Strategies

Responsive Web Design from the Future
According to Kyle Neath, responsive web design is about a lot more than the size of your screen. This talk is about about how GitHub handles links, the url bar, partial page updates, and explains why Kyle thinks the HTML5 history API is the most important thing to happen to front end development since Firebug. An inspiring presentation.

Responsive-1131 in Responsive Web Design Techniques, Tools and Design Strategies

Developing a Progressive Mobile Strategy
In this presentation, Dave Olsen presents a progressive mobile strategy that consists of audience strategy, content strategy and platform strategy. Dave argues that to develop a sustainable and scalable mobile strategy, you need to answer the questions, “What value will the targeted audiences get from this content?� and “How do we develop solutions to handle both mobile and native now, as well as the devices of the future?� An interesting presentation.

Responsive-design-112 in Responsive Web Design Techniques, Tools and Design Strategies

How to Use CSS3 Media Queries to Create a Mobile Version of Your Website
In this Smashing Magazine article, Rachel Andrew explains how, with a few CSS rules, you can create an iPhone version of your website using CSS3 — one that will work now. You’ll see a very simple example and learn the process of adding a small device style sheet to a website to show how easily we can add mobile-specific style sheets to existing websites. You may want to consider reading Aaron Gustafson’s article “Adaptive Layouts With Media Queriesâ€� and Emily Lewis’ piece “Respond to Different Devices With CSS3 Media Queries” as well.

Responsive-design-126 in Responsive Web Design Techniques, Tools and Design Strategies

Discussions and Points of View on Responsive Design

While not tutorials per se, the articles here give you valuable insight into why you should use responsive design techniques (and when you maybe shouldn’t use them).

Responsive by Default
Andy Hume explains what in his opinion responsiveness is all about. It’s what a website does when it’s loaded into an unknown browser on an unknown device by an unknown individual. It’s “how you deal with “the most hostile software development environment ever imaginedâ€� (via Douglas Crockford). Like progressive enhancement it’s a strategy that frees you to work with the web rather than fight against it.” An interesting point of view.

Responsive-114 in Responsive Web Design Techniques, Tools and Design Strategies

Responsive Web Design or Separate Mobile Site? Eh, It Depends
An interesting article discussing the pros and cons of responsive designs vs. dedicated mobile websites.

Ehitdepends in Responsive Web Design Techniques, Tools and Design Strategies

The Case Against Responsive Web Design
It seems only fair to include some dissenting opinions here about when responsive design is and is not appropriate. This article discusses why responsive design doesn’t always make sense from a user experience perspective. Take a look in the comments section, too. Luke Jones has a similar opinion.

Against in Responsive Web Design Techniques, Tools and Design Strategies

A Responsive Mind
A discussion on Jeremy Keith’s blog about the necessary parts of a responsive design and how to effectively create different layouts based on different screen sizes. Examples are included.

Responsive Enhancement
An excellent introduction to responsive design as a way of thinking rather than as a tool or technique. Jeremy Keith argues that responsive Web design can’t be tacked on to the end of an existing workflow. Instead of pixel perfection, we should be thinking of proportion perfection. An inspiring read.

Mobile-First Responsive Web Design
Mobile First Responsive Web Design is a combination of philosophies and strategies with the aim to achieve a wider application of best practices in the area.

Where are the Mobile First Web Designs?
In this article Jason Grigsby presents the findings from his study on responsive designs, their features and appearance as well as general remarks on the state of art of Responsive Web Design.

Further Resources

Here are some additional resources for creating responsive designs that don’t fit neatly into the categories above.

Media Queries
A growing collection of websites that use media queries.

Mediaqueries in Responsive Web Design Techniques, Tools and Design Strategies

Responsive Web Design, by Ethan Marcotte
This book, written by Ethan Marcotte and published by A Book Apart, is a fantastic resource for learning how to design responsive websites. It covers the basics of the responsive Web, flexible grid systems, flexible images and media queries, and it gives insight into how to create responsive designs.

Responsive-120 in Responsive Web Design Techniques, Tools and Design Strategies

The Big Web Show Episode #9: Responsive Web Design
Jeffrey Zeldman and Dan Benjamin sit down with Ethan Marcotte for episode 9 of The Big Web Show to discuss responsive design, among other topics.

Last Click

The Latest in HTML5
This slideshow covers some techniques and lesser-known HTML5 gems that could get implemented in browsers in the near future: among other things, server-side media queries with JavaScript and form-factor detection.

Matchmedia in Responsive Web Design Techniques, Tools and Design Strategies

Would you like to see more round-ups like this one on SM?


(al)


© Smashing Editorial for Smashing Magazine, 2011.


Outstanding Text Effects Tutorials in Illustrator

Advertisement in Outstanding Text Effects Tutorials in Illustrator
 in Outstanding Text Effects Tutorials in Illustrator  in Outstanding Text Effects Tutorials in Illustrator  in Outstanding Text Effects Tutorials in Illustrator

Adobe Illustrator is a powerful tool that you can create fluffy, vague, sparkling, gelatinous, glossy, glittery, retro and revolutionary effects with. Creating a particular text effect in Illustrator is not that difficult now; thanks to the availability of huge number of tutorials that guide you through each step.

Here we have gathered a collection of around 50 amazingly helpful tutorials that let you create breathtaking typographic effects in Illustrator. Some of them also use Photoshop to give the text effect its fully refined look. Let’s have a look at this collection.

Text Effects in Illustrator

Create a Poster Theme Illustration in Illustrator
This following tutorial lets you create beautiful poster theme illustrations simply, using Adobe Illustrator.

Texteffectstuts47 in Outstanding Text Effects Tutorials in Illustrator

How to Create a Neon Text Effect Using Adobe Illustrator
Create appealing and tempting neon text effects by using Gradient Mesh, 3D Modeling, Art Brushes and Transparency palette. Let’s begin!

Texteffectstuts41 in Outstanding Text Effects Tutorials in Illustrator

How to Create Colorful Neon Text with Adobe Illustrator
This tutorial teaches you some quick tips on how to create a colorful neon text effect. In this tutorial, you will learn the use of thick font and the Round Any Corner Script to create letter shapes and other techniques to create neon text effect.

Texteffectstuts1 in Outstanding Text Effects Tutorials in Illustrator

Creating a custom Font : Understanding the Dynamics of Blend Tool
This tutorial is designed to help you create a custom Font, while at the same time accepting the dynamics of the Blend Tool.

Texteffectstuts40 in Outstanding Text Effects Tutorials in Illustrator

How to Create a Colorful, 3D Text Effect
This tutorial is shared here to let you learn the technique of creating some colorful and appealing 3D texts.

Texteffectstuts36 in Outstanding Text Effects Tutorials in Illustrator

Create an Airport Time Table Type Effect
In this quick tutorial, you will learn to create an airport timetable text effect. Creating such an effect is ideal for websites, posters and even logos.

Texteffectstuts19 in Outstanding Text Effects Tutorials in Illustrator

How to Create a 3D Sketch Text Effect
This tutorial lets you learn how you can play with the 3D options in Illustrator to create 3D letters while also transforming them into a sketch text. Add any color that you like as the transparency allows you to place it on any background.

Texteffectstuts2 in Outstanding Text Effects Tutorials in Illustrator

Create a Jar Illustration and Splashy, Purple Text Effect
This tutorial walks you through creating a jar illustration with a splashy purple text effect. You will see how different layered shapes and opacities are used in this tutorial and how the paths and the Pathfinder tools are used to enhance the result and give your text dimension and style.

Texteffectstuts30 in Outstanding Text Effects Tutorials in Illustrator

Create Colorful, Layered Paper Type in Illustrator
Let’s create some vividly colored illustrations with layered text and ribbons. Here, you will learn to use Illustrator effects expansively to optimize your work.

Texteffectstuts32 in Outstanding Text Effects Tutorials in Illustrator

How To Create a Cool Chrome Text Effect in Illustrator
The following tutorial helps you get the skills required to create cool retro chrome text effects by using Illustrator. This tutorial teaches you all the steps from beginning to end.

Texteffectstuts38 in Outstanding Text Effects Tutorials in Illustrator

How to Create a Retro Style Textured Logo
This tutorial helps you learn to create a retro vector seal logo by using Illustrator with Ryan Quintal. This extremely easy to follow tutorial lets you create an awesome final effect.

Texteffectstuts3 in Outstanding Text Effects Tutorials in Illustrator

How to Create a Paper Style Alphabet using Illustrator 3D
With this, you will learn to create a paper style alphabet and the shadows of them by using 3D modeling. This tutorial is perfect for creating logo designs.

Texteffectstuts4 in Outstanding Text Effects Tutorials in Illustrator

Create a Chalkboard Type Treatment
This tutorial lets you create amazing chalkboard type treatments by using some gradients, a bristle brush, and some freebies from Vector Mill.

Texteffectstuts23 in Outstanding Text Effects Tutorials in Illustrator

Learn to Create a Variety of Script Lettering
This tutorial showcases three unique approaches to create different script lettering styles. The tutorial starts with a simple basic script and leads you to more advanced techniques.

Texteffectstuts5 in Outstanding Text Effects Tutorials in Illustrator

How to Create an Entangled Lettering Illustration
Creating a perfect entangled lettering illustration is what you will learn in this tutorial. You can also learn casting shadows and highlighting through abstract color shapes.

Texteffectstuts6 in Outstanding Text Effects Tutorials in Illustrator

Create a Variety of 3D Lettering Effects for Poster Design
This tutorial teaches you different techniques of creating simple 3D lettering effects in the context of poster design.

Texteffectstuts7 in Outstanding Text Effects Tutorials in Illustrator

Create a Green Viscous Text Effect
This tutorial helps you learn the use of existing font and 3D tools of illustrator to add dimension and create a green viscous text effect.

Texteffectstuts8 in Outstanding Text Effects Tutorials in Illustrator

How To Create a Simple Sticker Text Effect
This tutorial showcases the technique of using text and the Round Any Corner script to create a simple sticker effect. Such text effects can be used in graphics, including shapes and symbols.

Texteffectstuts9 in Outstanding Text Effects Tutorials in Illustrator

Create a Furry Calligram in Illustrator
Here you will learn to create your own calligram by manipulating a typeface, rendering fur and by adding dog features and various details.

Texteffectstuts10 in Outstanding Text Effects Tutorials in Illustrator

Learn to Create a Variety of Beveled Lettering
This tutorial is designed to teach you different techniques of creating beveled lettering styles. The tutorial starts with the least complex and moves on to the most polished and professional look.

Texteffectstuts11 in Outstanding Text Effects Tutorials in Illustrator

Cool Typography with the Blend Tool in Illustrator
Here you will use Illustrator’s Blend tool first and then use Photoshop for some final retouches in order to create cool typography.

Texteffectstuts13 in Outstanding Text Effects Tutorials in Illustrator

Create a Top Gun Badge on Illustrator
Here, you will see how to create a vector badge and then make it look more appealing by adding some features. Simple to execute.

Texteffectstuts14 in Outstanding Text Effects Tutorials in Illustrator

Tron Legacy Tutorial
In this tutorial, you will use Adobe Illustrator, Adobe Photoshop and Cinema 4D. This is an interesting tutorial that helps you learn all three of these programs simultaneously.

Texteffectstuts15 in Outstanding Text Effects Tutorials in Illustrator

Vintage Badge in Illustrator and Photoshop
In this tutorial you will see how to create a vintage badge by using Illustrator and Photoshop. Take a look!

Texteffectstuts16 in Outstanding Text Effects Tutorials in Illustrator

Grungy 3D Text In Illustrator
Use Illustrator to create appealing grungy 3D text with some smart shadow techniques.

Texteffectstuts17 in Outstanding Text Effects Tutorials in Illustrator

Create a Silky Ribbon Text Effect
This tutorial teaches you to use the Pen and Gradient tools in order to create a swirling ribbon text effect. You can also use this effect to create different shapes and scrolls.

Texteffectstuts18 in Outstanding Text Effects Tutorials in Illustrator

How to Create a Glassy Text Effect in Illustrator
In this tutorial, you will see how to create a splendid glassy text effect by using Illustrator. Here you will learn some clever techniques to enhance your skills.

Texteffectstuts20 in Outstanding Text Effects Tutorials in Illustrator

Create a Mummy Text Effect
This guide helps you give your text some classic mummy treatment by using a few gradients and the Appearance panel.

Texteffectstuts21 in Outstanding Text Effects Tutorials in Illustrator

Create a Polished Raised-Type Treatment
Learn to create a polished, lifted-type treatment by using the Appearance panel, some gradients and transforms. You can also apply the treatment to other fonts and vector elements as well.

Texteffectstuts22 in Outstanding Text Effects Tutorials in Illustrator

Create a Reusable Retro Type Treatment
Here you will see how to create retro type treatments by using some powerful Illustrator features and texture effects, Warp effects, and some simple layering.

Texteffectstuts24 in Outstanding Text Effects Tutorials in Illustrator

Create a Glossy Smooth Text Effect
This guide lets you discover how to create a glossy smooth text effect by using multiple fills and strokes with various blending modes and different opacity settings.

Texteffectstuts26 in Outstanding Text Effects Tutorials in Illustrator

3D Golden Text Effect
This tutorial will be great for beginners who want to create professional 3D text effects in Adobe illustrator. Here, you will see how to create text using 3D extrude and the techniques to clean up the broken shapes and then apply glow to the 3D text.

Texteffectstuts28 in Outstanding Text Effects Tutorials in Illustrator

Golden Text with Diamonds
This tutorial showcases the use of the appearance palette and scatter brushes to create this stylized text with diamonds. Several other useful techniques will also be taught in this tutorial that will help you in your future endeavors. So let’s get started!

Texteffectstuts29 in Outstanding Text Effects Tutorials in Illustrator

How to Add Decorative Glamour to Your Ordinary Script Font
Learn to add glamour to your ordinary scripts in simple to follow steps and add some extra sparkle to your ordinary font.

Texteffectstuts31 in Outstanding Text Effects Tutorials in Illustrator

How to Make a Flesh Ripping Zombie Type Treatment
Follow the artist’s steps and create flesh ripping zombie characters and type treatments for this blood-curdling illustration.

Texteffectstuts33 in Outstanding Text Effects Tutorials in Illustrator

Creating an Environmentally Friendly Green Type Treatment
This tutorial lets you create some cool and soothing environmentally friendly green type treatments that you can apply to your different projects.

Texteffectstuts34 in Outstanding Text Effects Tutorials in Illustrator

How to Create Candy-Cane Typography With Photoshop and Illustrator
Learn how to craft some lip smacking Candy-Cane type by using Illustrator and Photoshop and create the appeal that you always wanted to harness.

Texteffectstuts35 in Outstanding Text Effects Tutorials in Illustrator

How To Create Detailed Gothic Linework Typography
This step by step explanation demonstrates the design process for an amazing gothic typographic design.

Texteffectstuts37 in Outstanding Text Effects Tutorials in Illustrator

Multi-Stroke Tips for Adobe Illustrator
In this tutorial, learn to add multiple strokes to objects in Illustrator using the Appearance panel.

Texteffectstuts39 in Outstanding Text Effects Tutorials in Illustrator

Produce a Glowing Neon Open Sign Using Illustrator CS5
Here you will see how neon tubes are produced in the Illustrator world by simply altering a path and adding stroke colors with Gaussian blur. This will allow you to produce our own glowing neon open sign in Illustrator CS5.

Texteffectstuts42 in Outstanding Text Effects Tutorials in Illustrator

Create a Bubble Text Effect
Use different tools such as Ellipse, Rectangle, Rectangular Grid and Twirl along with some basic effects to create this Bubble Text Effect.

Texteffectstuts44 in Outstanding Text Effects Tutorials in Illustrator

Stylish text effect tutorial using Illustrator
Here you will see how to use Illustrator to create stylish and elegant text effects with a subtle vintage look that can be applied to any specific typeface.

Texteffectstuts45 in Outstanding Text Effects Tutorials in Illustrator

Create a Simple Blood Text Effect
This is an extremely easy to follow tutorial that will teach you how you can create simple blood text effect.

Texteffectstuts46 in Outstanding Text Effects Tutorials in Illustrator

Create a folded paper text effect
Create a simple folded paper text effect by watching this tutorial and also see how to improvise the final look.

Texteffectstuts48 in Outstanding Text Effects Tutorials in Illustrator

Make Grunge Type with Live Trace and the Pathfinder
This tutorial aids you in creating a grunge type effect by simply creating a vector texture with Live Trace first and then applying it to the text.

Texteffectstuts49 in Outstanding Text Effects Tutorials in Illustrator

How to Create a Piped Frosting Text
This tutorial will help you learn how to create a paste text effect. You will also learn the use of different tools to create the text effect that can be used to demonstrate a piped frosting effect.

Texteffectstuts50 in Outstanding Text Effects Tutorials in Illustrator

How to Create a Gummy Text Effect
Here you will see how to use the Offset Path function and various other coloring techniques to create cool and cute gummy text effects.

Texteffectstuts51 in Outstanding Text Effects Tutorials in Illustrator

How to Create a Zodiac Themed Graphic Style
This particular tutorial helps you learn the basic techniques to create a complex graphic style, using only the Appearance palette and commands from the Effect menu. This lets you create designs based on zodiac signs. Let’s get started!

Texteffectstuts52 in Outstanding Text Effects Tutorials in Illustrator

How to Create Smoky Brushes and Type In Illustrator CS4
Here you will see how the smoky brushes and type are created in Illustrator. You will be amazed to see the realistic results.

Texteffectstuts53 in Outstanding Text Effects Tutorials in Illustrator

You may also want to consider our previous posts:

(rb)


How To Sell Your Designs Without The Sales Pitch

Advertisement in How To Sell Your Designs Without The Sales Pitch
 in How To Sell Your Designs Without The Sales Pitch  in How To Sell Your Designs Without The Sales Pitch  in How To Sell Your Designs Without The Sales Pitch

Let’s face it: sales make the world go round. But as a Web designer, you’re concerned more with fonts, color, hierarchy and images than with the sales process. Some believe that designs sell themselves; while this may be true for a few designers, it is certainly not the case for most.

Whether you’re selling a prospective client on a website redesign or a potential client on a new home page, you have to demonstrate your design skills and show how your design will help them meet their goals. When it comes down to it, Web design is more about function than art.

Smalllostbystuartconner in How To Sell Your Designs Without The Sales Pitch

Without any kind of sales background, having to sell our designs to a client can suddenly make us feel lost and far from our comfort zone. Image Credit

Whether you are a sole proprietor or a lead designer at a large firm, you are always selling your work. You may be selling a concept to a client or your boss, but when it comes down to it, you’re selling it to someone. And what are you selling? You’re selling ingenuity, a concept, usability, design harmony: you’re selling the creative. And because design is somewhat subjective, this sale is harder than most others.

If you learn how to sell yourself (without a sleazy sales pitch) you will be able to sell your designs more easily. This means fewer revisions, happier clients, more referrals, and a higher quality of work.

IStock 000005119272XSmall1-300x299 in How To Sell Your Designs Without The Sales Pitch

What To Do If You Don’t Know How To Sell

As a Web designer, you focus on what you do best: designing. But many designers get so caught up in the creative process that they fail to consider a business perspective. That is, they cannot articulate how their service will truly benefit the client. Without this ability, you will have a much more challenging time selling your services and designs to prospective clients.

So, what to do? Incorporate sales tactics without becoming a sales person. Follow these tips, starting with the initial meeting with the potential client.

Know Their Business

As you meet with the client, ask about their needs and expectations, and try to understand exactly what they want. You will refer back to this information in all of your meetings with the client, and it will reinforce your design when you review it with them.

Break down clients into different categories: start-up, established, service- or product-based, business-to-business sales, business-to-consumer, etc. This will help you select specific questions for each client.

Research what their existing website does right and wrong (if they have one). What does it have going for it? Where is it lacking? People appreciate honesty, but don’t offend.

A few areas to investigate:

  • How many sales and visitors?
    If it’s an e-commerce website, how much sales are generated each month. How many unique visitors come to the website?
  • What is the conversion rate?
    How many visitors convert into customers? What is the value of the average order?
  • How many repeat customers?
    How many new customers return to make purchases? How often?

When asking these questions, think more in business terms than in design terms. The client isn’t really hiring you to design a website: they’re hiring you to increase their sales or generate more leads. If you can connect with them on this level, you will find that selling your design will be much easier.

Sell the Sizzle

The client is now intrigued and wants to learn more about your work. So, compare your portfolio of designs to their existing website (showcasing your newest work), and explain how your concepts can help them meet or exceed their goals. You could try flipping back and forth between website designs to emphasize the difference in quality.

Explain the key design elements, such as conversion-centric items and usability enhancements, and outline the major money- or lead-generating components. Explain how these elements will increase the client’s bottom line. If you can connect your design strategy to the real needs of the client, the design will have sold itself before you have even quoted a price!

Sell the Benefits

Cite the latest studies, statistics, industry trends, etc. Some people respond best to hard evidence; facts and figures.

Include the latest research to back up your design strategy. Use industry magazines, reports, benchmarks and case studies.

Paint a Picture

Help them visualize the new design with fresh ideas and examples. Use their own products, categories, services and content to help them visualize what you will do.

Discussing Price

Few of your clients will care about costs. They simply want a return on their investment. That’s right: people are willing to spend money if they know they will get it back many times over.

Your job is to demonstrate clearly that your product or service represents the safest and most secure purchase decision rather than merely being the least expensive or highest quality.

Our customers today are the most experienced in customer history. They know that there is usually a close correlation between higher price on the one hand and greater security and after-sales satisfaction on the other. Your task is to make this differential clear in your sales presentation, especially when positioning you product or service against lower-priced competition.

– Factors of Risk in Selling, Brian Tracy

Using the information gathered in the research stage, crunch the numbers and estimate how your design will increase conversions, leads, etc. Break it down into dollars and cents, so that the client can grasp the cost and benefit and you can make a convincing case for the investment.

Roi-300x249 in How To Sell Your Designs Without The Sales Pitch

Formulating A Proposal Or Contract

A true staple of the design process: the contract. This defines the scope of your services. Here’s what to include:

  • The process
    Clearly explain or document the design process, from prototype to production. Include everything from market research to wireframing and user testing. Break down your methodology so that the client understands it.
  • Services to be provided
    List all items to be included in the design, from the preliminary research to the favicon. Be sure to put a limit on relevant items (e.g. stock photography).
  • Client expectations
    Clearly articulate what you expect from the client: for example, content, images, photography, turnaround time on deliverables and other assets. Include deadlines and the consequences of missing them.
  • The design strategy
    Explain how many revisions are allowed and what’s included in one. Also, define how revisions above and beyond the specified limit are handled.
  • Buffer time
    To play it safe, account for hours above and beyond what you think the design will take. Due diligence and research don’t always catch special cases. When you encounter one, having buffer time to make changes and additions helps a lot. Very rarely do I work on a project that doesn’t require this buffer.
  • Hourly rate
    Tie in all these items with your hourly rate. Define your hourly rate for extra revisions, additional stock photography, etc. Now, when the project burns through your quoted hours and buffer time, you can fall back on the hourly rate.

What To Avoid

Knowing what to avoid is key to pitching prospective clients. Even with a strong pitch, not following the guidelines below could derail your effort.

Don’t Accept Every Client

Yes, this sounds like blasphemy, but it is very important when growing your business. Specialization truly is the key to success in design. Know who your ideal client is: e-commerce, social network, brochure website, start-up, small business, medium-sized business, large enterprise, non-profit;the list goes on. Know your strengths: lead generation, splash page, brochure website, etc.

Identify who you work with best? For whom do you achieve the best results? Focus on that market. Pass along to another firm any leads that do not meet your criteria (and maybe get a kickback for it). You will grow your business much more effectively this way.

Few firms do well by catering to all. This might work when you are starting out, but as you grow and land bigger clients, you will need to spend your time on projects that propel your design skills and company in the right direction.

Carve out a niche for yourself, and become the best in that niche. That sharp focus will attract more quality business than you would if you are all over the board.

Don’t be afraid to turn down clients or pass them onto a friend. If they don’t match your criteria, you most likely won’t be able to serve them best. Both you and the client will have lost.

Don’t Provide a Design Sample or Mock-Up

Prospective clients will often ask you to submit a sample design or mock-up for their website. They want to compare your work to that of other companies from which they are getting proposals, and they want a tangible product to make a decision. Don’t do it!

The reason is simple: you do not know the client’s needs yet. You haven’t delved into their business reality or market demographics, so you would be shooting from the hip.

Don’t devalue your service by sending a sample before getting a clear and comprehensive picture of your client’s needs and business structure. Gaining this understanding could take weeks, but it is critical when designing UIs.

Don’t Focus on Your Designs’ Prettiness or Awards

Pretty designs are fun, and awards boost the ego like nothing else, but they don’t usually give prospective clients what they need: results. Instead, focus on what your design will achieve for the client: increased sales, leads, sign-ups, page views and so on.

Don’t get me wrong: a good clean design will definitely help you in the sales process, as will design accolades and awards. But don’t think they will close the deal. Use them to reinforce your pitch or to show secondary benefits to the actual results you will achieve.

Be Cautious of Start-Ups

Ahh, the ever-popular start-up. I think every designer has invested some of their hard-earned money into developing a website for one new idea or another. But start-ups that make it are few and far between. The more start-ups you deal with, the more you will lose when their business plan (or lack thereof) doesn’t work as expected in six months to a year.

Many start-ups take a while to flush out their business plan, because they lack direction and focus. Expect much more hand-holding with these clients than with established businesses.

If you specialize in start-ups, then develop a methodology catered to their needs.

Never Ever Over-Promise and Under-Deliver

This should go without saying, but some designers are so anxious to close a deal that they sell themselves short and set the client’s expectations too high. If this happens, you will be hard-pressed to deliver a solution on time, within the specs and on budget.

Sticking to your niche helps you to set realistic expectations and to over-deliver them. Simply stated: sell what you know, and do what you know. You will get fewer surprises, and I guarantee you will end up with much better designs.

When in doubt, ask an associate or friend for a quote or to review your proposal. Make sure your time estimates are accurate and that you are charging accordingly.

Other Sales Strategies

Listening and note-taking skills (the things we were taught in school) are indispensable; unless you have a photographic memory. Take notes in every meeting with a client, and log them somewhere. Listen to your client, and try to understand their needs. Ask for clarification when you get lost.

Always send a list of references, even if the client doesn’t ask for it. It’s a nice touch and builds credibility. I also like to mention that once the project is completed, we would like to add their name and testimonial to our reference list.

Incorporate a few of these tips into your meetings. You (and the client) will benefit from them instantly.

Further Resources

(al)(rb)


Lessons Learned: Productivity Tips For Running A Web Design Business

Advertisement in Lessons Learned: Productivity Tips For Running A Web Design Business
 in Lessons Learned: Productivity Tips For Running A Web Design Business  in Lessons Learned: Productivity Tips For Running A Web Design Business  in Lessons Learned: Productivity Tips For Running A Web Design Business

It didn’t work out as you expected, did it? The freelance life was supposed to give you more time with the family and free you from that incompetent boss. You even thought you might be better off financially. Instead, you’re working longer hours and under constant stress, worrying about various aspects of your business.

To relieve the pressure of entrepreneurial life and avoid burning out, freelancers and business owners need strategies. In this post, I’ll share some tactics that have helped me be more in control of my business, my projects and life in general. I hope they help you, too.

Let’s begin by putting some solid plans in place.

You Don’t Have Time Not To Plan

For a business owner, being reactive is easy. We spend our whole time fighting the most intense fire, while worrying about what the future has in store. To cut stress levels and take control of our business, we need to put a few basic plans in place.

Take, for example, the ongoing concern about where our next job will come from. Most of us just “hope” that something will turn up. This passive response can leave us victims of circumstances and full of anxiety.

We need a marketing plan that ensures a flow of business. This plan should account for the following questions:

  • Who is your target audience?
    If you take a scattershot approach to marketing, your voice will get lost in the noise of the Web. But if you target a group, like real estate agents, then you have a better chance of making an impact.
  • What differentiates you?
    With so many other Web designers out there, what makes you different? Is it your expertise in a technology, a sector or a particular user group? Is it your design style, or perhaps the way you approach projects? Whatever it is, be sure you can articulate it.
  • What channels will you use to reach your audience?
    Are there forums you should take part in or blogs you should write for? Should you be attending certain conferences or offering to write for industry publications?
  • What regular tasks do you need to complete to keep your name out there?
    How many posts will you write for industry blogs per year? How often will you take part in forums where your audience congregates? How frequently will you send out newsletters to prospective customers?

This last point is where the real danger is. The best plans are often reduced to nothing when things get busy. When you’re under pressure, marketing is the first thing to get pushed out. But pushing it out will result in worry and potentially less work down the road.

Evernote in Lessons Learned: Productivity Tips For Running A Web Design Business
Evernote is a great tool for recording long-term plans for your business. It is always available on your desktop, the Web and your mobile phone, so you can easily jot down new ideas. Large view.

This approach applies not only to marketing. You should have plans in place for all major areas of your business, from finance to training. Without them, your subconscious will worry about whether these areas of your business are doing well.

Sticking to a plan is tough, but that’s where routine can help.

Create A Routine

Both the blessing and curse of being your own boss is that you can set your own schedule. On the one hand, working when we want and scheduling around our family lives is great. The downside is that we are left with the sense that we should always be working.

Some say the answer to this problem is to set a rigid routine: start and finish work at the same time every day, as if you were in an office. However, this undermines the main reason for being self-employed: flexibility.

Instead, I opt for a time-independent routine. I do certain things every day, but I don’t insist that they happen at specific times. For example, I always start and end my work day by reviewing my task list and clearing emails. This helps me mentally prepare for the day and gets me into work mode. Once I have shut down at the end of the day, you won’t find me picking up work later in the evening.

Another tactic is my Friday review. Every Friday morning, I step back from the pressing business of the day and review where I stand with all of my projects and broader aims. Carrying out this weekly review gives me confidence that nothing will get missed in the whirlwind of daily life.

Fantasical-1-1 in Lessons Learned: Productivity Tips For Running A Web Design Business
Fantastical is a great application for managing your routine, including a weekly review. Large view.

For me, having a routine and carrying out these rituals of starting up, shutting down and reviewing weekly build confidence that I am in control and doing enough to keep my business on track.

Another crucial element in maintaining this sense of control is my task list.

One List To Rule Them All

To succeed in your business, to work less and to overcome that nagging sense of worry, you need to maintain control. Unfortunately, maintaining control is hard when tasks are coming at you from so many directions. Just a few of those tasks might be:

  • A check from a client has arrived by post and needs to be cashed.
  • You’ve received an email about a bug on a website that you recently launched.
  • You’d like to try a new CSS technique that you found in an article.
  • An angry client calls to say they are unhappy with your design.
  • A great idea for a Web app pops into your head as you’re driving to the supermarket.
  • You’ve scribbled action items into a notebook during a client meeting.

These tasks need to get done, but the items associated with them are scattered in different places. For example, you need to cash that check, but where did you put it again?

With no definitive list of all the things you have to do, there is only one place left to store this information: in your head.

Unfortunately, we forget stuff. We know we aren’t capable of remembering so many details, and so we worry. Worse still, our subconscious constantly reminds us of everything we need to do, and so we end up endlessly going over the same things — over and over again.

The solution is simple: write it down. Carry one list with all of the tasks you have to do. When you get that check, add a task for cashing, and note where you’ve put the check. If you attend a meeting and jot down action points, don’t leave them buried in your notebook. Add them to your task list, which you will be checking daily as part of your routine.

Things in Lessons Learned: Productivity Tips For Running A Web Design Business
Things is one of many list apps that allow you to take your task list with you wherever you go, via the desktop, iPhone and iPad apps. Large view.

Having a single list that has all of your tasks will bring you peace of mind and make you considerably more efficient, because you won’t be wasting time tracking down emails and notes of what you have to do.

Speaking of email, almost all business owners seem to complain about this, but few do anything to solve the problem.

Solving Email Problem

Most email clients check email every five minutes. That is nearly 100 interruptions in an average working day. This constant ping of your email client instills a sense of pressure that is, in fact, usually unjustified.

After all, the majority of email we receive is either spam or non-urgent items such as newsletters. But every time that “New mail” message pops up, we feel compelled to check whether it is an urgent request from a client. This causes us to lose the flow of our work and creates a slight sense of unease that can accumulate throughout the day.

Here is a radical suggestion: turn off those notifications, and check your email only once or twice a day! I know what you’re thinking, but I promise, it is possible. Let me explain how.

As mentioned above, the majority of email either can wait or is just junk. You probably receive only a handful of emails a day (maybe even less) that need urgent action. You could probably say right now who they would be from and what they would be about.

Your computer should be telling you only about those urgent emails so that you don’t need to keep checking.

The answer is a service called AwayFind. With AwayFind, you can specify which topics and people you want to be notified instantly about, what can wait, and how to receive notifications, with options for everything from text messages to iPhone updates. This one service frees you from having to check email, enabling you to focus on what’s important.

You may be wondering how AwayFind is different from Priority Inbox in Gmail. While Priority Inbox is great, it suffers from two weaknesses:

  • It doesn’t allow you to specify what is important.
    While Gmail’s algorithms for predicting important email are good, if you’re waiting for an important email from someone, you can’t trust Gmail to flag it, and thus you won’t stop worrying.
  • You’re still required to check your email.
    Priority Inbox does not take care of email the way AwayFind does. You still suffer from the constant ping of incoming mail, and you are not freed up to close the email client.

Awayfind in Lessons Learned: Productivity Tips For Running A Web Design Business
With AwayFind, you no longer need to constantly check email. Large view.

Of course, when you do check email, the junk is waiting for you. Spam filters help, but you’re still left with all of those emails that you signed up for but don’t want anymore or can’t remember subscribing to.

For this, check out Unsubscribe.com. After signing up, tell the service what email you no longer wish to receive, either by using one of the plug-ins for major email clients or by forwarding the message to the service. Unsubscribe.com then does its best to unsubscribe you and to pursue those who continue sending you junk.

Unsubscribe in Lessons Learned: Productivity Tips For Running A Web Design Business
Unsubscribe.com has dramatically reduced the number of unwanted email I receive. Large view.

I have to say that Unsubscribe.com has made a phenomenal difference. I have gone from several hundred emails a day to a few dozen, and the number is going down all the time.

By combining Unsubscribe.com, AwayFind and the “one list to rule them all,” you can reach email nirvana: an empty inbox. Nothing is more satisfying or calming than one of those. All of your emails will have been unsubscribed, deleted, filed, delegated or turned into a task. Nothing is left to gnaw away at your subconscious, leaving you to wonder whether you have dealt with it.

Obviously, there are plenty of other techniques for managing email. For instance, you could start your emails with a subject line that clearly identifies the topic, perhaps including a status category: [Info], [Action], [Time-sensitive], [Low priority]. If your message can be expressed in few words, just put it in the subject line, followed by [EOM] (end of message). This saves the recipient from having to open the message. Also, ending a note with NNTR (no need to respond) is a wonderful act of generosity.

Of course, you’ll need to be sure that the recipient understands the acronyms, so perhaps you could add a short explanation in your signature. These and other guidelines are covered in the “10 Rules to Reverse the Email Spiral,” which might come in handy when you’re replying to your next email.

With email out of the way, you can finally focus on the work that needs to get done. As you will find, though, this is hard to do.

Finding Your Focus

We often use email as an excuse for our lack of productivity, when really it is a distraction for avoiding work. Like spending time on Twitter, Facebook, YouTube and indeed the whole Web, checking email is easier than getting stuff done.

Unfortunately, staying focused on a task is hard. We need to train ourselves to do this effectively.

One way to do this is the Pomodoro technique. According to this simple method, we work in concentrated blocks before taking a break for five minutes, after which we do another “sprint.”

A good starting point is to try working for 25 minutes, and then take a 5-minute break. Over time, you will find that you can increase these 25-minute blocks to something more substantial. You’ll also enjoy the challenge of seeing how many sprints you can fit into a day.

Pomodoro in Lessons Learned: Productivity Tips For Running A Web Design Business
There are many applications to support the Pomodoro technique. My personal favourite is simply named Pomodoro. Large view.

Not only will this make you more productive, but by tracking how many sprints you have done in a day, you also get the peace of mind knowing that you are doing enough work. Nothing is more satisfying than knowing you have done six hours of distraction-free work in a day. Too often, we work for 10 hours or more and yet are unsure by the end of it exactly how much we have accomplished, because so much of that time was wasted reading email, answering phone calls and surfing the Web. If you have done six hours of uninterrupted sprints, then you’ll feel guilt-free when you sneak off early to play with the kids.

Of course, it is not just about how many hours you work, but about how productive you are. Fortunately, there are ways to work less but produce more.

Work Less, Produce More

As business owners, we are paid not for the hours we work, but for what we deliver, so we have to be as efficient as possible. Doing more in less time is an article in itself. But here is one principle that has served me well: recycle.

We are so busy putting out the latest fire that we fail to plan for the future. If you’re coding, say, a news listing for a website, you will probably be in such a hurry that you fail to mark it up in a way that could be reused in your next project.

Also, we often complain that we don’t have time to market ourselves because we regard that as “extra work.” But in many cases, it is just a matter of documenting what we are working on.

Let me give you a real-world example. I needed to redesign my personal website. I also needed to launch the second season of our podcast. I thought I didn’t have time for both, until it occurred to me that the second season could be about the redesign process of my website. My redesign of the website could be recycled into an episode for the show. What’s more, this process inspired tweets, forum conversations and improvements in the overall working processes of our company.

Whether you are writing a blog post, designing a website or coding an app, ask yourself whether a bit of extra work could turn it into something that serves another purpose.

Snippets in Lessons Learned: Productivity Tips For Running A Web Design Business
Reusing code through tools like Espresso is just one way to be more efficient. Large view.

Code is often recycled, but you could just as easily reuse design elements, client presentations and even responses to common objections from clients. On this last point, see my post “Where Are My Rounded Corners“: I got so fed up from having the same conversation with clients about progressive enhancement that I decided to write a document that I could just hand out. You can also use pre-written templates and resources such as Spec Work template and Wee Nudge to communicate common problems, issues and misconceptions to your clients.

By recycling, you can significantly cut your workload and your stress.

What Are Your Stress-Busting Techniques?

I have only touched the surface of worries for freelancers. We are under so much pressure that it can feel overwhelming at times. Yet we can do many more things to improve. With that in mind, let’s continue the conversation in the comments. What stresses you most, and what stress-busting techniques do you recommend?

(al)


© Paul Boag for Smashing Magazine, 2011.


A Roundup of Valuable Twitter Tools

Advertisement in A Roundup of Valuable Twitter Tools
 in A Roundup of Valuable Twitter Tools  in A Roundup of Valuable Twitter Tools  in A Roundup of Valuable Twitter Tools

It is hard to argue against the value of Twitter these days, especially for businesses and professionals looking to network and stay ahead of the curve. Like the throngs of designers and developers that have flooded this social media outlet’s streams and sapped its API since its inception. And with so many amazing tools available to expand on, and enhance the overall user’s experience, Twitter is becoming even more useful and handy than ever before.

Today we have gathered several valuable resources that can help our readers take their Twitter experience to the next level. To get more out of this powerful business tool than some new followers and potential clientele connections. Hopefully you will find some new apps to dive into through the post, and perhaps even revisit some you had lost touch with. Enjoy!

The Tools

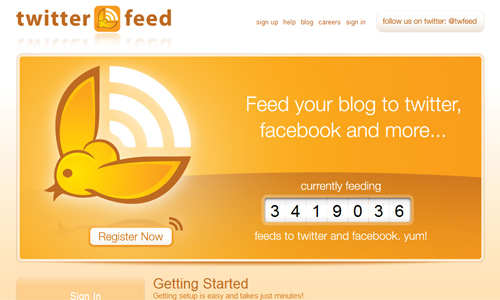
Twitterfeed allows you to automatically send your blog posts to Twitter whenever your RSS feed is updated.

Twitterfeed in A Roundup of Valuable Twitter Tools

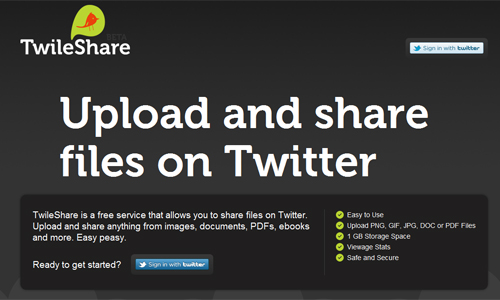
Twileshare allows you to upload and share PNG, GIF, JPG, DOC or PDF files on Twitter.

Twilshare in A Roundup of Valuable Twitter Tools

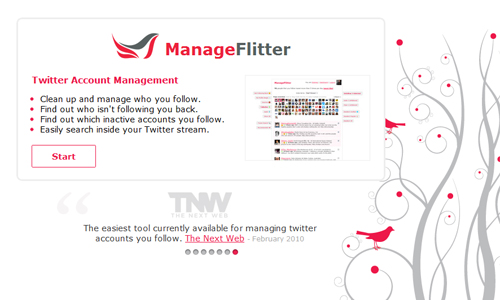
ManageFlitter is a Twitter account manager that allows you to manage who you follow, see who isn’t following you back, find inactive accounts you follow, and easily search inside your Twitter stream.

Manageflitter in A Roundup of Valuable Twitter Tools

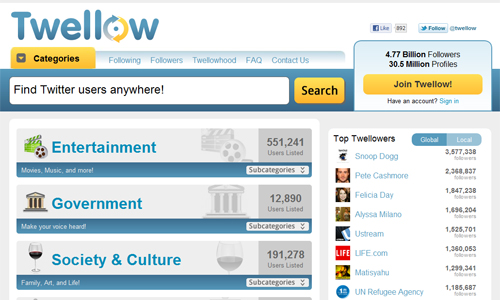
Twellow is the yellow pages of Twitter. Find people to follow with similar interests and add your own info to gain new followers.

Twellow in A Roundup of Valuable Twitter Tools

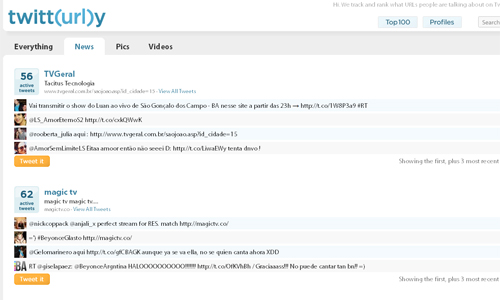
Twitturly tracks and ranks the urls people are tweeting. According to the site “Whether people link directly to the final URL, use TinyURL, Snipurl (snurl), or any other URL shortening service, we always count the “votes” correctly because our spiders actually visit every single site before it gets displayed here.”

Twitturly in A Roundup of Valuable Twitter Tools

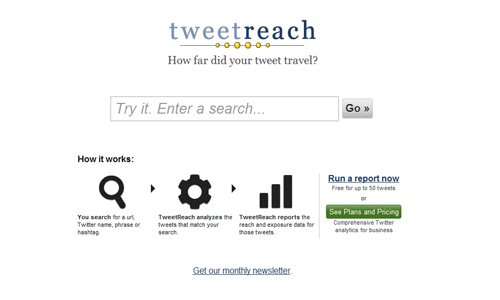
Tweet Reach tells you how far a tweet has traveled. You search for a url, Twitter name, phrase or hashtag and get reports on the reach and exposure data for those tweets.

Tweetreach in A Roundup of Valuable Twitter Tools

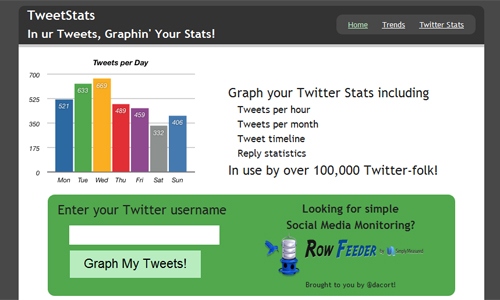
TweetStats shows you the stats of a twitter account in graph form.

Tweetstat in A Roundup of Valuable Twitter Tools

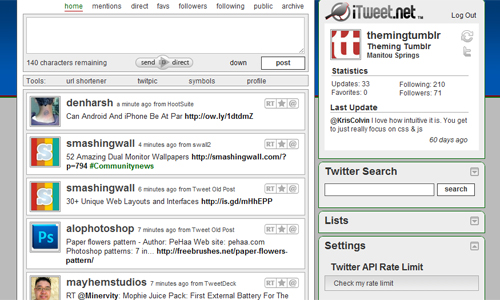
iTweet is an alternative Twitter interface with many enhanced features making it superior to the default Twitter ui.

Itweet in A Roundup of Valuable Twitter Tools

Bird Herd makes it easy for groups, teams and brands to update a single Twitter account by sending a direct message to the group twitter account.

Birdherd in A Roundup of Valuable Twitter Tools

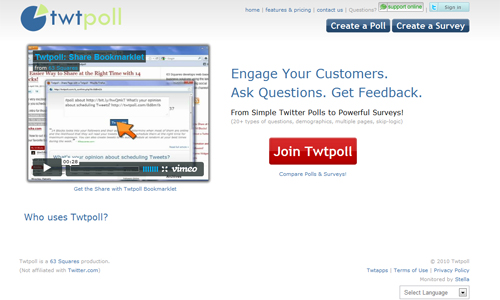
Twtpoll lets you set up polls to engage with and get feedback from your followers.

Twtpoll in A Roundup of Valuable Twitter Tools

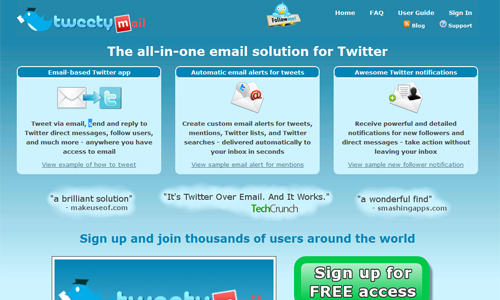
TweetyMail lets you manage your twitter account from your mailbox. You can send tweets and direct messages, follow users, get alerts and notifications and more.

Tweetymail in A Roundup of Valuable Twitter Tools

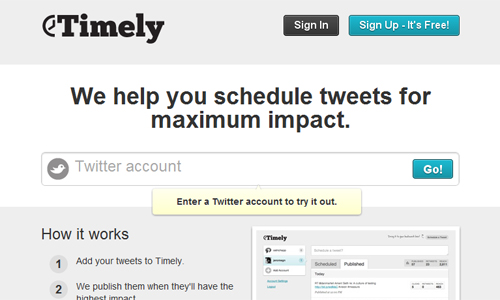
Timely schedules your tweets for maximum impact. You simply add your tweets to Timely and they publish them when they will have the highest impact.

Timely in A Roundup of Valuable Twitter Tools

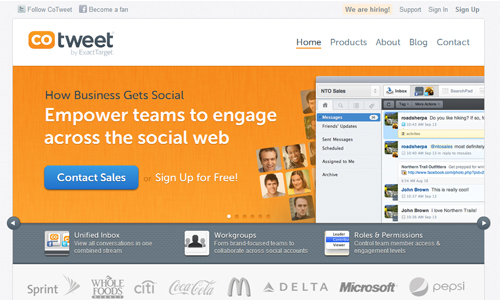
CoTweet is a comprehensive Web-based social media engagement, management and reporting solution that helps companies of all sizes engage, track and analyze conversations about their brands across the most popular and influential social communities today, Twitter and Facebook.”

Cotweet in A Roundup of Valuable Twitter Tools

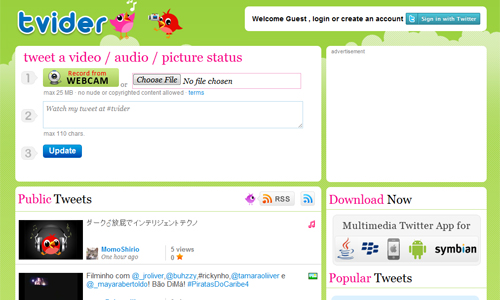
Tvider lets you share video, audio and images on Twitter.

Tvider in A Roundup of Valuable Twitter Tools

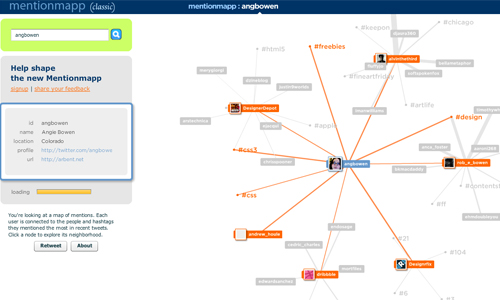
Mentionmapp allows you to enter a Twitter username and get a visual map of the people you interact with and the people and hashtags they mentioned the most in recent tweets.

Mentionmapp in A Roundup of Valuable Twitter Tools

(rb)


  •   
  • Copyright © 1996-2010 BlogmyQuery - BMQ. All rights reserved.
    iDream theme by Templates Next | Powered by WordPress