Author Archive

Create a St. Patrick’s Day Postcard in Adobe Illustrator


Today we will be creating a design fit for any number of St. Patrick’s Day uses. In this tutorial you will find useful information on how to create a pile of golden coins and a Pilgrim hat. There is one very convenient way to create a hat in Adobe Illustrator. It includes 3D effect Revolve. Revolve is a very handy tool which will create 3D objects in just a few steps. However, it has one flaw. It creates too many anchor points that can be an obstacle in the printing process. We will try to avoid that and to create our illustration with simple tools, such as the Pen Tool (P), Ellipse Tool (L) and Rectangle Tool (M).

So let’s get this started!

This is what we will be creating.

Creating the Hat

Let’s break the creation process into a few parts. First, we’ll create the Crown. So, grab the Pen Tool (P) from the Tool Panel and create the shape as it is shown in the picture below.

As you can see, the right side of the shape is a little bit longer than the left side. Besides that, the new shape looks a little bit deformed. The reason for drawing a shape like this is the perspective. When you are using 3D effects you don’t have to think about perspective. Software will think about that and perspective will be included automatically. Sometimes, drawing the illustration manually can be tricky. You have to be aware of the existence of the perspective, which will give your illustration a realistic look. This is something we should keep in mind.

Next part of the hat is the Brim. Grab the Ellipse Tool (L) and create one larger ellipse for the Brim,

and, one smaller one for the top of the hat.

This is the basic shape of the hat. Select all the elements and rotate the hat as it shown on the picture below.

We will apply a radial gradient to the top of the hat.

Creating Details

You’ll probably agree that the Brim is too thin. Let’s create the thickness.

Select the larger ellipse and duplicate it (Ctrl / Cmd + C, Ctrl / Cmd + F). Nudge the copy downwards for 2 - 3 pixels. Feel free to adjust the anchor points until you make a perfect match.

Apply the linear gradient as it’s shown on the picture below.

Let’s create some edge highlights.

Duplicate the smaller ellipse on the top of the hat twice (Ctrl / Cmd + C, Ctrl / Cmd + F). Nudge one of the copies upwards, select both copies and under the Pathfinder Panel hit the Minus Front button.

Set the Fill color to #939598.

Repeat the previous step for the larger ellipse.

Creating a Hatband

It is time to create a ribbon with a buckle. This is the final detail that will complete our hat construction.

Grab the Pen Tool (P) from the Tool Panel and create a shape as it is shown below.

Make sure to create the bold sides of the ribbon. This way it looks like the ribbon is going around the Crown.

Apply a nice linear gradient. Make sure to create a small highlight on the left side of the ribbon, as a result of the influence of light.

We have to create an edge for the ribbon as well. It will give the illustration a certain depth.

Duplicate the green ribbon (Ctrl / Cmd + C, Ctrl / Cmd + F) twice. Nudge one of the copies downwards for 1 pixel. Select both of the copies and under the Pathfinder Panel hit the Minus Front button.

You will end up with something like this.

We have to adjust the new shape a little bit. There are some anchor points that spoil the shape we have just created. Just grab the Delete Anchor Points Tool (-) and remove the excess anchor points.

With the Direct Selection Tool (A) adjust the handler of the anchor points to perfect the shape.

A linear gradient will help us to emphasize the thickness of the ribbon.

For creating the buckle we will need the Rounded Rectangle Tool. Create a rounded rectangle like below.

Under the Object select Path > Offset Path. Set the value for the Offset to -20.

As you can see, we have created a smaller rectangle with sharp corners, but we need a rectangle with rounded corners. Under the Effect select Stylize > Round Corners. Set the value for Radius to 10 pt.

In order to be able to use the new rounded rectangle we have to expand the shape (Object > Expand Appearance).

Select both rectangles and under the Pathfinder Panel hit the Minus Front button. You should end up with something like this.

This is the basic shape of the buckle. Let’s do some adjustment for creating the necessary depth.

Duplicate (Ctrl / Cmd + C, Ctrl / Cmd + F) the pink shape and change the color to blue (for easier manipulation). Nudge the copy downwards for 1 -2 pixels.

Let’s apply nice linear gradients.

To make it more realistic we will create nice edge highlights, just like we did for the hat.

Select the front shape of the buckle, duplicate it twice (Ctrl / Cmd + C, Ctrl / Cmd + F) and nudge one of the copies for 1 pixel downwards and for 1 pixel to the right. Select both copies we have just created and under the Pathfinder Panel hit the Minus Front button. Set the Fill color of the highlight to #FFF9AE.

Group (Ctrl / Cmd + G) all the elements, rotate the buckle and place it on the hat.

A small shadow that the buckle is casting on the ribbon will benefit the semi-realistic look we are trying to achieve.

Just duplicate the buckle (Ctrl / Cmd + C, Ctrl / Cmd + F), Ungroup it (Shift + Ctrl / Cmd + G) and under the Pathfinder Panel hit the Unite button.

Make sure to place the new shape underneath the buckle and nudge it for few pixels to the right.

Duplicate the green ribbon (Ctrl / Cmd + C, Ctrl / Cmd + F). Select both new shapes and under the Pathfinder Panel hit the Intersect button.

Set the Fill color of the new shape to #0D350E.

With some light reflections our hat is complete.

Grab the Pen Tool (P) from the Tool Panel and create a shape like the one shown in the picture…

…and apply a linear gradient.

Do the same for the brim.

Creating the Golden Coins 

It is time to make a “fortune”. We will create a shiny pile of coins.

Grab the Ellipse Tool (L) from the Tool Panel and create an ellipse.

Holding the Alt / Opt key on the keyboard click on the ellipse and drag it upwards (don’t forget to hold the Shift key for straight dragging). This way we are making a copy of the ellipse.

Grab the Rectangle Tool (M) from the Tool Panel and create a rectangle as it shown on the picture below.

Make sure to match endpoints properly.

When you are done adjusting the position of the anchor points, select the red rectangle and the blue ellipse and under the Pathfinder Panel hit the Unite button. It will convert these two shapes into one.

Bring to front (Shift + Ctrl / Cmd + ]) the green ellipse and start to apply some nice gradients.

Select the ellipse and under Object select Path > Offset Path. Set the value for Offset to -1.5 pt.

Apply a linear gradient.

Duplicate (Ctrl /Cmd + C, Ctrl / Cmd + F) the smaller ellipse. Grab the the left middle point of the selection box and move it just a little bit to the right side (so-calling non-uniform scale). Apply a linear gradient to this ellipse too.

Group (Ctrl / Cmd + G) all the elements. Duplicate (Ctrl / Cmd + C, Ctrl / Cmd + F) the coin many times and place the copies in a big pile.

Place the hat on the top of the pile, as shown.

Apply a green radial gradient to the background.

As you can see, something is missing. We can’t leave the illustration like this. It looks like the hat and the coins are floating in the air. Some shadows will fix that.

We will have to create a shadow for each coin.

Choose one coin and duplicate it (Ctrl / Cmd + C, Ctrl / Cmd + F). Ungroup the copy (Shift + Ctrl / Cmd + G) and under the Pathfinder Panel hit the Unite button. Set the Fill color of the new shape to #10340D. Send it behind the coin (Ctrl / Cmd + [) and rotate to look as it shown on the picture below.

Repeat the previous step for each coin that is touching the surface.

We have to create a shadow for the hat as well. Grab the Ellipse Tool (L) and create an ellipse like pictured. Make it sure to set the hat on the top of the ellipse. This way you’ll be able to find the right angle and position for the new shadow.

Select the pile of coins and duplicate it (Ctrl / Cmd + C, Ctrl / Cmd + F). Ungroup (Shift + Ctrl / Cmd + G) the copy we have just made and under the Pathfinder Panel hit the Unite button. You should end up with something like this.

Select the white ellipse and the pink shape and under the Pathfinder Panel hit the Intersect button. Set the Fill color to #FF4200 and lower the Opacity to 30%.

For the other part of the shadow we will once again need the Pen Tool (P). Create a shape as it’s shown on the picture below. Set the Fill color to #1A3219.

We will create a tiny border in order to give the illustration a postcard feel. Select the background and under the Object select Path > Offset Path. Set the value for Offset to -10. Remove the Fill color and set the Stroke to 5 pt.

Under Object hit the Expand button. It will turn the closed path into the editable path. Apply a linear gradient like the one below.

And…voila! Our illustration is finished.

Conclusion

There are many ways to realize a good idea, but sometimes it is not that simple to choose the right technique to create a great looking illustration. Adobe Illustrator is not the type of software which will automatically generate the effect based on given instructions. Most of the things you have to plan well, to find a way to create the illusion of something that actually does not exist. It includes turning flat shapes into a 3D illustration just by using the right color gradients or a wised placed shadow. With a creative idea and the right technique a good result will be guaranteed.

Thank you for following along.

(rb)


Adobe Illustrator Tutorial: Create a Cute Halloween Ghost


Use of the Mesh Tool is one of the best techniques for achieving a semi-realistic look for an illustration. Today we will demonstrate how to use this great Adobe Illustrator feature for creating a cute little ghost. The only colors we are going to use are white and different shades of gray. So, It might be little tricky to transform this floating bedding into the cute little ghost. We will have to find a way to create the illusion of the wrinkled sheet. The Mesh Tool will help us a lot to achieve that.

Our final result should look like this:

So, let’s get down to business!

Creating the Ghost’s Body

First, we will create the shape of the ghost. There are two methods to do that. If you have a tablet you can draw it very easily. If not, the Pen Tool (P) is always available. Select it from the Tool Panel and draw the curvy path, something  similar to this:

We will need to divide this shape. This will actually create the inner side of the floating bedding. With the Pen Tool (P) create a curve which we’ll use to divide the large shape.

Select the path and the blue shape and under the Pathfinder Panel hit the Divide button.

Ungroup (Shift + Ctrl / Cmd + G) the shape we have just created and change the Fill color of the lower part. This way we have the idea what our ghost should look like.

At this moment we are pretty much done with the shape of the ghost.

When it comes to coloring we will try to keep it simple, by using gray colors from the Swatch Panel.

Time for the Mesh Tool

We have to realize that creating gradients for irregular shapes is not that simple. The Mesh Tool (U) will help us to do that. We will have to “divide� the blue shape in order to define some highlights and shadows. During the dividing process we will create new anchor points and paths. For each anchor point we will have to define the Fill color. This will create nice transitions between colors. Some transitions will be smooth and some very sharp, depending on what we are trying to achieve.

Grab the Mesh Tool (U) and click on the blue shape. It will create paths with anchor points as is shown on the picture below.

On the following pictures you can keep track of creating the new anchor points.

These are some of the possible anchor points. Later on we will create some more. First, we will apply some colors in order to monitor our creating process, just to make sure that we are going to right direction.

To assign the colors to the anchor points grab the Direct Selection Tool (A) from the Tool Panel, select each individual anchor point and select the color from the Swatch Panel. You may think that this is a lot of work, but at the end it will pay off.

Continue with applying colors.

Continue applying colors. Feel free to experiment and to try out different combinations.


Larger Preview

You should end up with something like this (or maybe with something even better):

You may notice that we have a shadow on the right side of the sheet. Left side is slightly highlighted (like the light is coming from upper left corner). Besides that, there is some roughness caused by the light source. We have managed to represent all of that by using the Mesh Tool (U).

Creating the Fabric Wrinkles

Now, we have to create some fabric wrinkles. Fabric wrinkles tell us a lot about the position of the body. Gravity is something we should keep in mind as well. It dictates how our bed sheet will behave.

Grab the Add Anchor Point Tool (+) from the Tool Panel and add few anchor points on the right ‘shoulder’ of our ghost. With the Direct Selection Tool (A) try to raise new anchor points and to adjust the handlers in order to form a smooth corner.

Before

After

Do the same for the left lower part of the linen.

Before

After

You should end up with something like this.

As you can see on the previous picture, our wrinkles don’t quite give the illusion that there is something going on, yet. We have to find a way to avoid a flat look for the illustration and to create an illusion of 3D. The Mesh Tool (U) will help us again. There is just one thing you should keep in mind. With the Mesh Tool (U) we are defining gradients between two anchor points. It’s up to us to make the color transition as smooth as possible.

Grab the Mesh Tool (U) from the Tool Panel and apply a few more anchor points. Add anchor points like you can see on the picture below.

In order to create a realistic wrinkle we will assign light gray colors to some of the anchor points.

On the pictures below you can see the information about color applying.

We will do the same thing for the right shoulder. Just make sure to add important anchor points. Each wrinkle has a highlighted part and a shadow. We will try to represent the influence of the light, which will allow us to create an illusion of a 3D look.

Let’s apply some colors, like we did in previous steps.

During our creation process we’ve created a few anchor points and paths we didn’t need at first, but now we can use them.

With alternate combinations of light gray and dark gray colors we are achieving the impression of a wrinkled sheet.

On the pictures below you can find more information about color details.

This is how our ghost looks right now.

Let’s improve our ghost a little bit more. We have some curves in the lower area, but it doesn’t look realistic. To make it properly we’ll have to highlight some parts.

If we take a look, the network of the paths and the anchor points in that field looks like this.

Let’s make some minor changes. Just grab the Mesh Tool (U) and add a new anchor point. We will apply a nice light gray color in order to create a highlight.

This has created a highlight for the raised part of the sheet. But we will need some shadows as well. Apply a slightly darker gray color, as is shown on the pictures below.

There is one more thing we can do. Let’s focus one the raised part of the bedding. We could add a small part of the inner side of the sheet and make it visible.

Grab the Pen Tool (P) from the Tool Panel and draw the shape as you can see on the picture below.

Make sure to match the lower side of the new shape and the lower edge of the sheet. It’s supposed to be lined up.

Duplicate (Ctrl / Cmd + C, Ctrl / Cmd + F) the red shape of the ghost. Select both shapes, green and the copy we have just created and under the Pathfinder Panel hit the Intersect button. It will create a shape like this.

Let’s make it fit into the illustration. Apply the radial gradient as you can see on the picture below.

Select the lower part of the illustration (the part that actually represents the inside of the sheet) and set the Fill color to #F1F2F2.

Under the Object select Path > Offset Path. Set the value for Offset to -2. Apply the radial gradient as is shown on the picture below.

Creating the Eyes

Since we are creating a cute ghost we will create big confused eyes to make it more interesting.

Grab the Ellipse Tool (L) from the Tool Panel and create the ellipse. Duplicate it (Ctrl / Cmd + C, Ctrl / Cmd + F) and holding a Shift key on the keyboard move it to the right side. Make sure to scale down the copy.

Select both ellipses and under the Pathfinder Panel hit the Unite button. It will turn our ellipses into one shape. Under the Object select Path > Offset Path. Set the value for Offset to -2.

Let’s apply some colors. Set the Fill color of the larger shape to #BCBEC0 and apply the radial gradient to the smaller shape. This way we are creating an illusion that someone is really under the sheet.

With the Ellipse Tool (L) create two circles, one bigger and one smaller. Set the Fill color to #414042.

Select both of them and under Object select Path > Offset. Set the value for Offset to -3. Change the Fill color to black (#000000).

We need just two white ellipses for the reflection. Select all eye elements and Group them (Ctrl / Cmd + G).

With minor adjustments and some polishing our cute ghost is done!

The Final Word

Some graphic artists are using the Mesh Tool in combination with a reference image. The image is helping a lot. This way you have a preview of the object you are creating. You are able to follow all the paths, shapes, highlights and shadows. If you don’t have a reference image you can always make a quick sketch or a complete drawing to use as a guide.

In this Illustrator tutorial we did it just with help of our imagination. The main purpose of this tutorial was to demonstrate how the Mesh Tool can be very useful in creating irregular gradients. As you could see, all paths and anchor points are quite editable (you can change the number, position and the angle of anchor points) so there is not much room for making mistakes. I encourage you to try this technique by creating different kinds of illustrations, and, do not hesitate to post your results.

Hope you like our little ghost. Thank you for following along.

(rb)


Create a Corn Cob in Adobe Illustrator


In this very interesting tutorial we will have the opportunity to create something unusual. We will create a Corn Cob by using Adobe Illustrator. We will use some great tools such as Blend Tool, Envelope Distort and of course the Pen Tool. Blend Tool will help us to create the grains, Envelope Distort will help us to form the cob and we will practice the usage of Pen Tool by creating beautiful green leaves.

Let’s get down to business!

Grains

Create new illustrator document with 500 x 500 pixels in size.

For the start grab the Rounded Rectangle Tool from the Tool Panel and create the shape as it shown on the picture below.

Apply radial gradient.

Let’s make a small reflection on the top. Under the Object select Path > Offset Path. Set the value for Offset to -2.

Apply a nice linear gradient and using the up arrow key on the keyboard nudge the new shape for the few pixels upwards. Group (Ctrl / Cmd + G) the grain.

Now we have to create the smaller grain for the top of the cob. Duplicate (Ctrl / Cmd + C, Ctrl / Cmd + F) the grain we already have, scale it down and holding the Shift key keyboard (for straight dragging) drag the scaled copy upwards.

Select both grains and under the Object select Blend > Make.

This will create the row of grains. Select Object > Blend > Blend Options. For the Spacing set the Specified Steps. In this case we will set the value for the Specified Steps to 46.

Expand the row of the grains (Object > Expand) and duplicate it (Ctrl / Cmd + C, Ctrl / Cmd + F). Move the copy to the right and rotate it a bit, as it shown on the picture below.

Let’s distort our rows a little bit. Select the left row of the grains and under the Object select Envelope Distort > Make with Warp. Under the Style select Bulge (Vertical) and set the value for the Bend to 1%.

We have to distort the right row of grains as well. Select it and under the Object select Envelope Distort > Make with Warp. This time set the Style to Arc (Vertical). Set the value for Bend to -1%. This will bend the row to the left side. Under the Object select Expand.

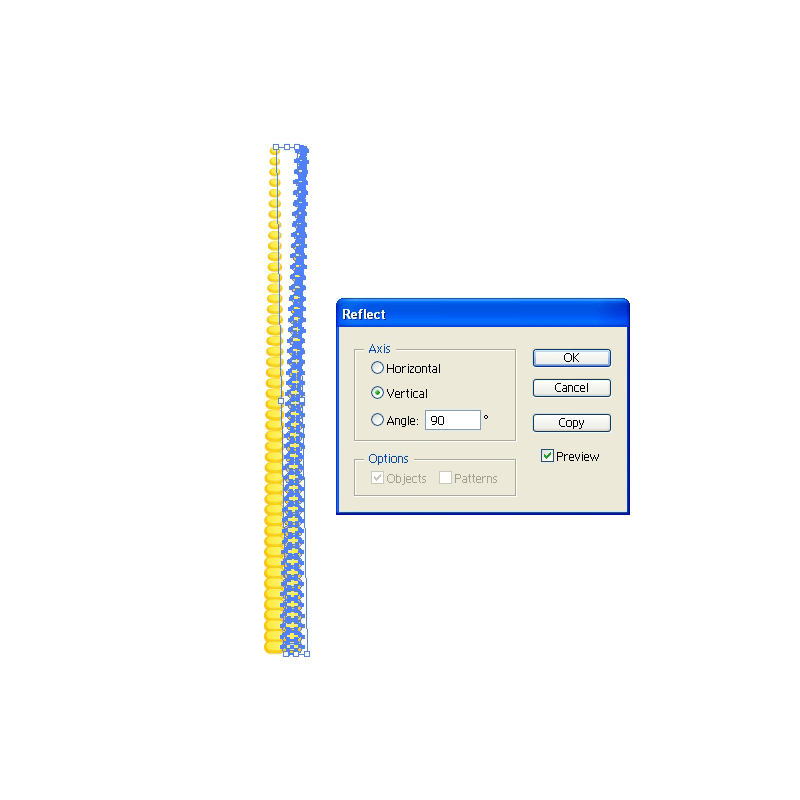
Reflection will help us to create more grains . Under Object select Transform > Reflect. Set the Axis to Vertical and hit the Copy button. This will create a mirror image. Place the reflected copy on the left side.

Create a copy ( Ctrl / Cmd + C, Ctrl / Cmd + F) of the left and the right row and place them as it shown on the picture below. Feel free to scale down the end rows by using non-uniforme scale.

Group (Ctrl / Cmd + G) the grains. Grab the Pen Tool (P) from the Tool Panel and draw the shape as it shown on the picture below. Set the Fill color to #FFE73B.

Under the Object select Path > Offset Path. Set the value for Offset to -10.

Take a good look at the shape we have just created. You will notice it contains more anchor points then the larger shape. Grab the Delete Anchor Point Tool (-) and remove some of the anchor points. Feel free to adjust the handlers of the anchor points in order to create nice and round corners.

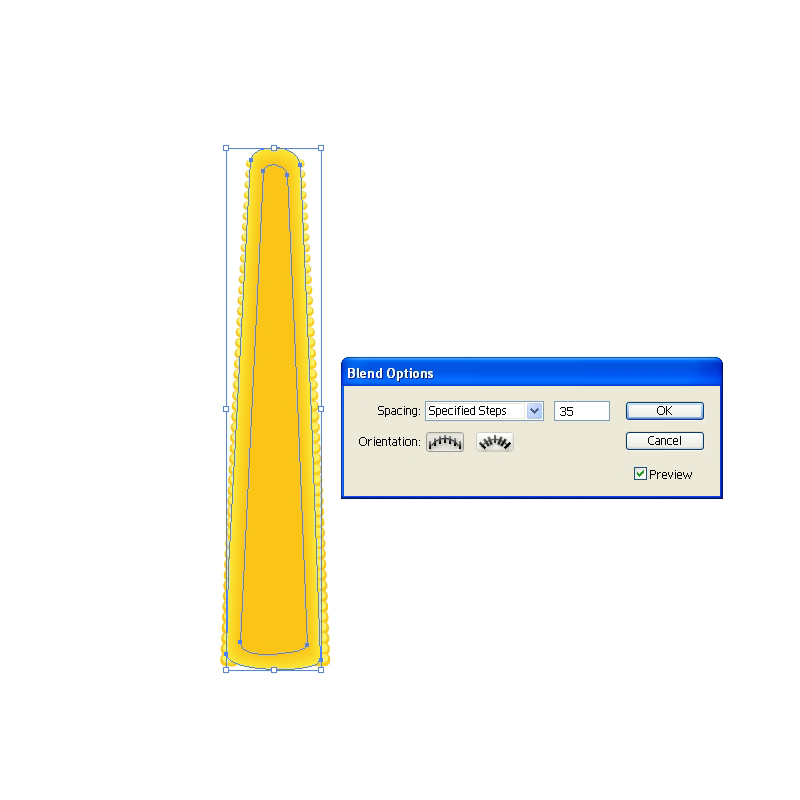
Set the Fill color of the smaller shape to #FBC415. Select both shapes and under the Object hit Blend > Make. Bring up the Blend  Option box and under Specified Steps set the number to 35. This will create a nice color transition.

Send the blanded object behind the grains (Shift + Ctrl / Cmd + [).

Blend Tool is amazing Illustrator feature. You can create a color transition for the objects with irregular shape. There is just one thing you should keep on mind. Make sure to create two objects or paths with the exact same number of anchor points. That way you will ensure that each anchor point of one object (path) has the correspondent anchor point on the other object (path).

Leaves

In this part we will exercise drawing with Pen Tool (P). Get ready for creating nice curved paths and combining some shapes inside Pathfinder Panel.

Let’s start!

Grab the Pen Tool (P) from the Tool Panel and draw the shape as it shown on the picture below.

Apply a nice green radial gradient.

Duplicate (Ctrl / Cmd + C, Ctrl / Cmd + F) the leaf and create a small curved path. Select the copy of the leaf and the path and under the Pathfinder Panel hit Divide button

Ungroup (Shift + Ctrl / Cmd + G) the new shape and remove the lower part of divided leaf. Apply linear gradient as it shown on the picture below.

Hereafter we will try our best to create nice details which will make our leaves more interesting.

With the Pen Tool (P) create the path as it shown on the picture below.

Duplicate (Ctrl / Cmd + C, Ctrl /Cmd +F) the shape of the leaf. Select the copy of the leaf and the path from the previous step and under the Pathfinder Panel hit Divide button. Ungroup (Shift + Ctrl / Cmd + G) the new shape, remove the larger part of the shape and apply green radial gradient.

Grab the Ellipse Tool (L) from the Tool Panel and create a small black circle. With Direct Selection Tool (A) select the lower anchor point and drag it downwards (don’t forget to hold a Shift key on the keyboard for straight dragging). With Convert Anchor Point Tool (Shift + C) turn that anchor point into the sharp corner. This way we’ve created a brush that will help us to improve our leaf.

Grab the new shape and drag it to the Brush Panel. In the New Brush Panel check the New Art Brush and hit OK button.

Make sure to set the Colorization Method to Tint in the Art Brush Option Panel. This way you’ll be able to set the Fill color of the brush to any color you like.

Now when we have the brush let’s create some interesting paths for our leaf. Grab the Pen Tool (P) from the Tool Panel and create a small arc.

Apply the brush we have created few steps earlier.

You will notice that the black shape we have just created overlap the upper part of the leaf . To fix this we will have to expand the brush (Object > Expand Appearance). Create the copy of the upper part of the leaf, select both objects and under the Pathfinder Panel hit the Intersect button.

Apply a nice linear green gradient.

Use the same technique try to improve the illustration by creating interesting details. Just make nice curves and apply the brush. After expanding, apply nice green colors and gradients. You should end up with something similar like this.

Grab the Pen Tool (P) again and create the shape as it shown on the picture below.

Apply a green radial gradient.

Duplicate (Ctrl / Cmd + C, Ctrl / Cmd + F) the new leaf twice. Nudge one of the copies downwards for 1 pixel and select them both. Under the Pathfinder Panel hit the Minus Front button.

Set the Fill color of the new shape to dark green (#0F4C1A). This way we’ve created a thickness for the leaf.

Create another copy of the leaf (Ctrl / Cmd + C, Ctrl / Cmd + F). We have to divide this shape to half. Grab the Pen Tool (P) and create a path as it shown on the picture below.

Select the copy of the leaf and the blue path and under the Pathfinder Panel hit Divide button. It will divide the leaf to half. Ungroup (Shift + Ctrl / Cmd + G) the leaf, delete the lower part and apply the linear green gradient to the upper part.

Few more details and the leaf is ready. Duplicate (Ctrl / Cmd + C, Ctrl / Cmd + F) the large shape of the leaf  twice. Rotate one of the copies (you can scale it up as well). Select both of the copies and under the Pathfinder Panel hit the Minus Front button. Apply radial green gradient.

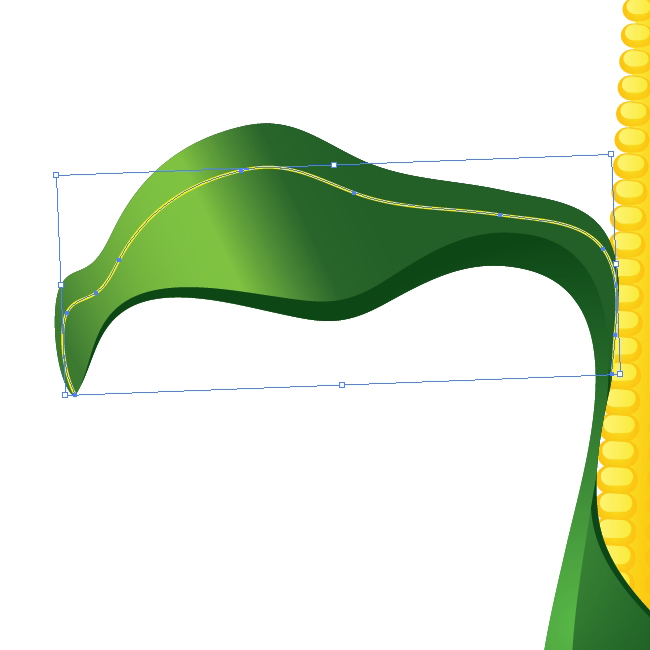
With the Pen Tool (P) create the path as it shown on the picture below.

Apply the brush we’ve created earlier.

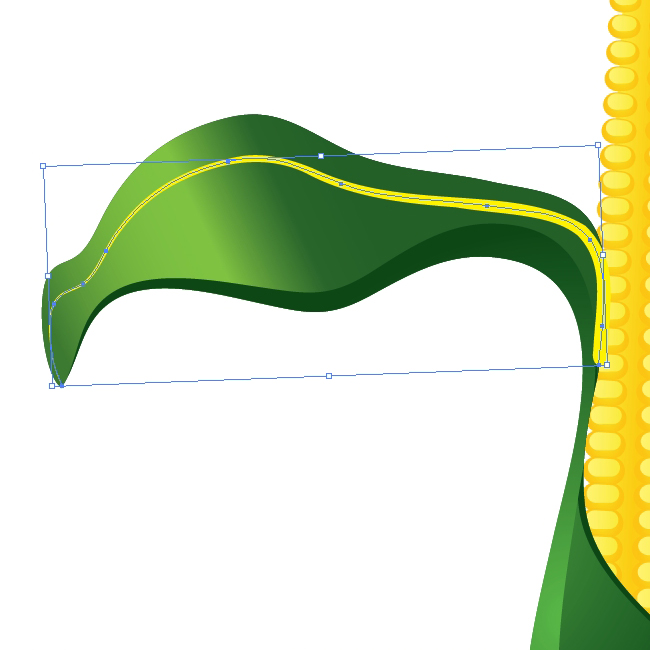
Let’s turn the path into editable shape. Under the Object select Expand Appearance. You will notice that the shape we have just created overlap the leaf. To fix that we will have to create a copy of the upper part of the leaf. Hit the well known shortcut to do that (Ctrl / Cmd + C, Ctrl / Cmd + F). Select the copy of the leaf and the yellow shape and under the Pathfinder Panel hit the Intersect button.

Apply nice radial green gradient

Creating a Water Drop

Select the Ellipse Tool (L) from a Tool Panel and create an ellipse. Apply nice radial white-green gradient. We are using a combination with green color because the water drop is semi-transparent and green color is reflecting from the leaf.

With the Ellipse Tool (L) create another, smaller ellipse and place it as you see on the picture below. For this ellipse we will use linear white-green gradient.

Select the larger ellipse and duplicate it (Ctrl/Cmd+C, Ctrl/Cmd+F). Set the Fill color to #206128 and nudge it for 3 pixels to the right. This will be the shadow that the water drop creates on the leaf.

Select all the three ellipses and Group them (Ctrl / Cmd + G). Place it on the leaf.

Use the same technique and create few more leaves with nice details.

And voila!

Conclusion

With the combination of different kinds of techniques, and with some nice colors and gradients we have created quite a neat Corn Cob. The Blend Tool was quite useful in creation process. We have learned how to use the Blend Tool in order to create nice and smooth color transitions. The Autumn is coming, so I am quite sure you’ll find this illustration very useful. If you have any comments or questions feel free to post them in the comment section below, I would be glad to answer them. I hope you like this tutorial as much as you liked Circus Tent and Piggy Bank tutorials. Thank you for following along.

(rb)


Create a Medieval Knight Shield in Adobe Illustrator

Advertisement in Create a Medieval Knight Shield in Adobe Illustrator
 in Create a Medieval Knight Shield in Adobe Illustrator  in Create a Medieval Knight Shield in Adobe Illustrator  in Create a Medieval Knight Shield in Adobe Illustrator

Today we will will go through creation process of a Medieval Knight Shield in Adobe Illustrator. We will try to create nice, shiny Shield that can be used as the website icon or a company  logo. Creation process is quite simple. All we have to do is to use simple shape as ellipse, to distort it a little bit and to combine it with other shapes. Beside that we will get the chance to play with nice metal gradients, trying to create an impression of the light reflection on the shiny metal.

In the end, our shield should look something like this:
0371 in Create a Medieval Knight Shield in Adobe Illustrator

Now let’s get down to work!

Combining Elements in Order to Create the Shape of the Shield

Set the new illustrator document in 500 x 500 pixels in size.
0011 in Create a Medieval Knight Shield in Adobe Illustrator

Grab the Ellipse Tool (L) from the Tool Panel and create the ellipse.
0022 in Create a Medieval Knight Shield in Adobe Illustrator

To distort the ellipse grab the Direct Selection Tool (A) from the Tool Panel and click on the lower anchor point. Hit the down arrow key on the keyboard to nudge the anchor points downwards for the few pixels.
0032 in Create a Medieval Knight Shield in Adobe Illustrator

Select the Convert Anchor Point Tool ( Shift + C ) from the Tool Panel and click on the nudged anchor point. It will make a sharp corner.
0042 in Create a Medieval Knight Shield in Adobe Illustrator

Use the Add Anchor Point Tool (+) to add the anchor point as it shown on the picture below.
0052 in Create a Medieval Knight Shield in Adobe Illustrator

With the Direct Selection Tool (A) remove few anchor points. Set the Fill color to none and for the Stroke color chose any color you like.
0063 in Create a Medieval Knight Shield in Adobe Illustrator

Under the Object select Transform > Reflect. Set the Axis to Vertical and hit the Copy button. This way we will reflect the path we have just created.
0072 in Create a Medieval Knight Shield in Adobe Illustrator

Holding the Shift key on the keyboard move the reflected path to the right. With the Direct Selection Tool (A) select lower endpoints and under the right click hit Join.
0082 in Create a Medieval Knight Shield in Adobe Illustrator

Grab the Pen Tool ( P ) from the Tool Panel and close the path.
0092 in Create a Medieval Knight Shield in Adobe Illustrator

Grab the Ellipse Tool (L) from the Tool Panel and create the ellipse. Place it as it shown on the picture below.
0102 in Create a Medieval Knight Shield in Adobe Illustrator

Select both objects and under the Pathfinder Panel hit the Minus Front button.
0113 in Create a Medieval Knight Shield in Adobe Illustrator

We have to do the same thing to the right side. But instead to trying to do exact the same thing and to create symmetrical shield we will simple divide our object to half, remove the right side and reflect the left side.

Grab the Line Tool (/) from the Tool Panel and create the vertical line (hold the Shit key on the keyboard for straight dragging). Select both objects and align them under the Align Panel by hitting Horizontal Align Center. After that hit a Divide button under the Pathfinder Panel. It will divide the Shield exactly to half. Remove the right side of the Shield.
0124 in Create a Medieval Knight Shield in Adobe Illustrator

Under Object select Transform > Reflect. Set the Axis to Vertical and hit the Copy button. Move the reflected part to the right until the middle parts meet. Under the Pathfinder Panel hit the Unite button. It will create the final shape of our Shield.
0133 in Create a Medieval Knight Shield in Adobe Illustrator

Applying Gradients

Select the Shield and under the Object select Path > Offset Path. Set the value for Offset to -10. It will create the scaled copy of the Shield.

0142 in Create a Medieval Knight Shield in Adobe Illustrator

Let’s apply a nice metal linear gradient to our Shield. Under the Swatch Panel open the Swatch Library. You can find amazing source of the metal gradients. Chose one of them and apply it to our Shield. In case you don’t like them feel free to adjust some of those gradients or to create your own metal linear gradient.

0153 in Create a Medieval Knight Shield in Adobe Illustrator

0163 in Create a Medieval Knight Shield in Adobe Illustrator

Select the red shape and under the Object select Path > Offset Path. Set the value for Offset to 2.

0172 in Create a Medieval Knight Shield in Adobe Illustrator

Apply linear gradient to the new shape as well. It will represent the inner part of the metal frame,

0182 in Create a Medieval Knight Shield in Adobe Illustrator

and the red radial gradient for the color of the Shield.

0192 in Create a Medieval Knight Shield in Adobe Illustrator

Select the Ellipse Tool (L) from the Tool Panel and create a small circle for the screw.

0202 in Create a Medieval Knight Shield in Adobe Illustrator

Scale it down and place it on the metal Part of the Shield. Duplicate the circle ( Ctrl / Cmd + C, Ctrl / Cmd + F ), set the Fill color to #58595B, nudge it downwards for 1 pixel and send it backward ( Ctrl / Cmd + [ ). It will be a tiny shadows from the screw. Group the circles.

0213 in Create a Medieval Knight Shield in Adobe Illustrator

Duplicate ( Ctrl / Cmd + C, Ctrl / Cmd + F ) the screw six more times in order to create enough of them for the entire Shield.

0222 in Create a Medieval Knight Shield in Adobe Illustrator

Creating Details

Roughly speaking, our Shield is done. At this point we have to try our best to improve the illustration as much as possible. First, we will create the reflection for the metal part of the Shield.

Select the largest part of the Shield and under Object select Path > Offset Path. Set the value for Offset to -1.

0232 in Create a Medieval Knight Shield in Adobe Illustrator

Select the Ellipse Tool (L) from the Tool Panel and create a big ellipse. Place it as it shown on the picture below. Select the blue ellipse and the scaled shape of the Shield we’ve made in previous step and under the Pathfinder Panel hit the Intersect button.

0242 in Create a Medieval Knight Shield in Adobe Illustrator

You should end up with something like this.

0253 in Create a Medieval Knight Shield in Adobe Illustrator

Select the inner part of the Shield, as it show on the picture below, and under the Object select Path > Offset Path. Set the value for Offset to 1.

0263 in Create a Medieval Knight Shield in Adobe Illustrator

0273 in Create a Medieval Knight Shield in Adobe Illustrator

Select the shape we have just created and the blue shape and under the Pathfinder Panel hit the Exclude button.

0284 in Create a Medieval Knight Shield in Adobe Illustrator

Ungroup ( Shift / Ctrl + Cmd + G ) the new shape and remove the lower part. Apply the same gradient we have used for the larger part of the Shield. You should end up with something like this.

0293 in Create a Medieval Knight Shield in Adobe Illustrator

Now we will change the gradient a little bit. Make sure to set the lower part of the reflection to light gray color. It will create a nice illusion of light reflection.

0302 in Create a Medieval Knight Shield in Adobe Illustrator

Let’s do create a similar reflection for the red part of the Shield.

Grab the Ellipse Tool (L) from the Tool Panel, create the ellipse and place it as it shown on the picture below.

0312 in Create a Medieval Knight Shield in Adobe Illustrator

Duplicate the red part of the Shield ( Ctrl / Cmd + C, Ctrl / Cmd + F ) and holding the Shift key on the keyboard select the gray ellipse as well. Under the Pathfinder Panel hit the Intersect button.

0333 in Create a Medieval Knight Shield in Adobe Illustrator

Set the Fill color of the new shape to white (#FFFFFF) and lower the Opacity to 5%.

0342 in Create a Medieval Knight Shield in Adobe Illustrator

Duplicate ( Ctrl / Cmd + C, Ctrl / Cmd + F ) twice the red shape. Scale them up and rotate both of them. Select them and under the Pathfinder Panel hit the Minus Front button. Set the Fill color of the new shape to white (#FFFFFF). You should end up with something like this.

035a in Create a Medieval Knight Shield in Adobe Illustrator

0353 in Create a Medieval Knight Shield in Adobe Illustrator

Create one more copy ( Ctrl / Cmd + C, Ctrl / Cmd + F ) of the red part of the Shield. Select it together with the white shape we’ve created in previous step and under the Pathfinder Panel hit the Intersect button.

0361 in Create a Medieval Knight Shield in Adobe Illustrator

Lower the Opacity of the new shape to 15%. Under the Object select Transform > Reflect. Set the Axis to Vertical and hit the Copy button. Move the reflected shape to the left and place it as it shown on the picture below.

0371 in Create a Medieval Knight Shield in Adobe Illustrator

There are many different shapes of the Medieval Shield you can create. Just feel free to be creative. Try out some other colors as well.

0382 in Create a Medieval Knight Shield in Adobe Illustrator

The Conclusion

There are many ways to create a nice shiny Medieval Shields. The great thing about creation process is that you can use different shapes and forms and to combine them in order to create nice Shields. Using the same technique try to create a Medieval Shield in perspective. Applying reflections, highlights and shadows will lead to professional look of the illustration. I hope you like this tutorial. If you have any questions or comments please post them in the comments section below. Thank you for following along!

(rb)


How to Create a Circus Tent in Adobe Illustrator

Advertisement in How to Create a Circus Tent in Adobe Illustrator
 in How to Create a Circus Tent in Adobe Illustrator  in How to Create a Circus Tent in Adobe Illustrator  in How to Create a Circus Tent in Adobe Illustrator

Today we will be learning how to create a cute circus tent in Adobe Illustrator. Get ready to use some basic tools such as Pen Tool and some quite useful Pathfinder features. We will create colorful balloons and flowers as well. The illustration can be used for multiply purpose such as Birthday invitations, Circus posters, etc.

Let us move from words to deeds!

This is what we’ll be creating.

Preview-image1 in How to Create a Circus Tent in Adobe Illustrator

Creating the Lower Part of the Circus Tent

Create a new Illustrator document with 500 x 500 pixels in size.

0011 in How to Create a Circus Tent in Adobe Illustrator

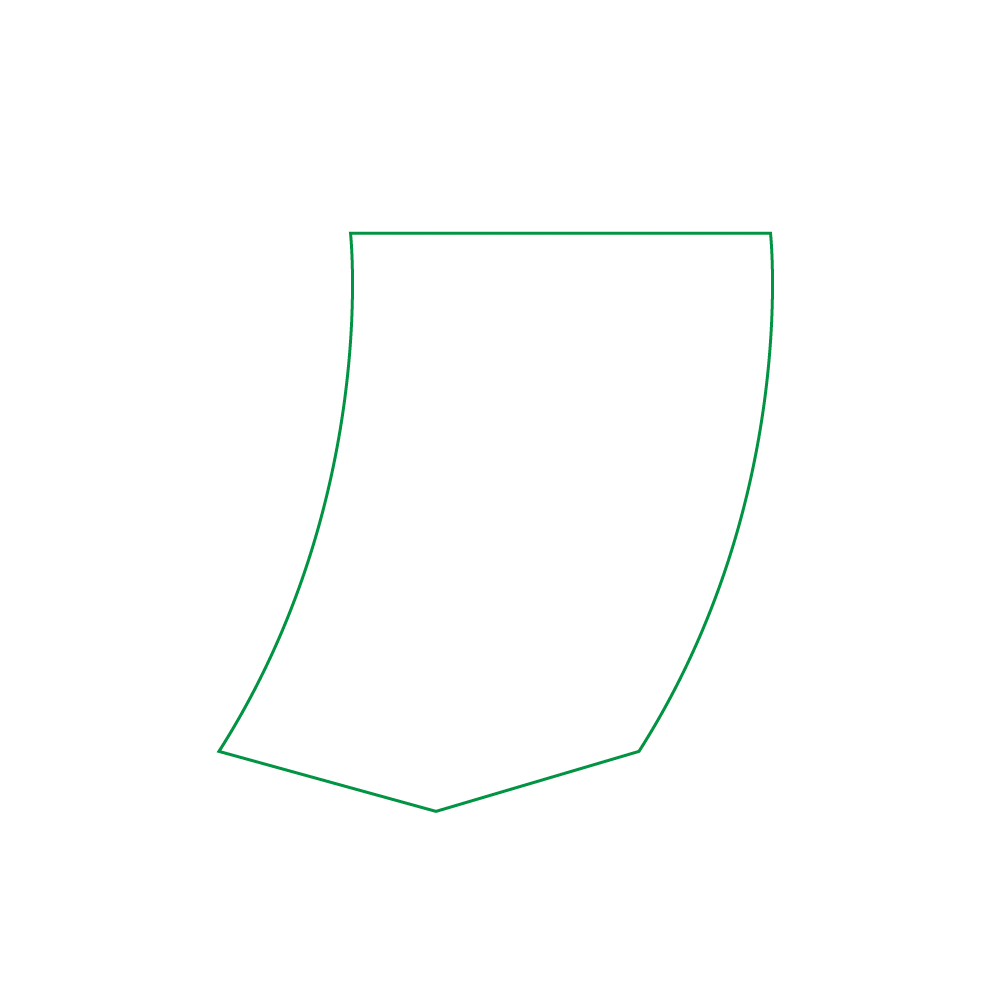
For the start, grab the Pen Tool (P) from the Tool Panel and create the path as it shown on the picture below.

0021 in How to Create a Circus Tent in Adobe Illustrator

Holding the Alt key on the keyboard select the path and move it to the right. Don’ t forget to hold the Shift key for the straight dragging. This way we will create the copy of the path. You should end up with something like this.

0031 in How to Create a Circus Tent in Adobe Illustrator

Select the Pen Tool (P) again and click on the end points of these paths in order to create a shape like this.

0041 in How to Create a Circus Tent in Adobe Illustrator

Select the Add Anchor Point Tool (+) and add the anchor point as it shown on the picture below.

0051 in How to Create a Circus Tent in Adobe Illustrator

We need to nudge this anchor point few pixels downwards. To do that select the anchor point we’ve just created with Direct Selection Tool (A) and hit the down arrow key on the keyboard.

0062 in How to Create a Circus Tent in Adobe Illustrator

Let’s create a nice arc. Grab the Convert Anchor Point Tool ( Shift + C ) from the Tool Panel, click on the new anchor and drag it to right. Don’t forget to hold the Shift key on the keyboard for straight dragging.

0071 in How to Create a Circus Tent in Adobe Illustrator

Creating the Stripes

Let’s create nice stripes for the tent.

Grab the Pen Tool (P) from the Tool Panel and create the path as it shown on the picture below.

0081 in How to Create a Circus Tent in Adobe Illustrator

We have to create the copy of this path. Hold the Alt key on the keyboard and click on the path. Holding the Shift key on the keyboard (for straight dragging) move the copy to the right.

0091 in How to Create a Circus Tent in Adobe Illustrator

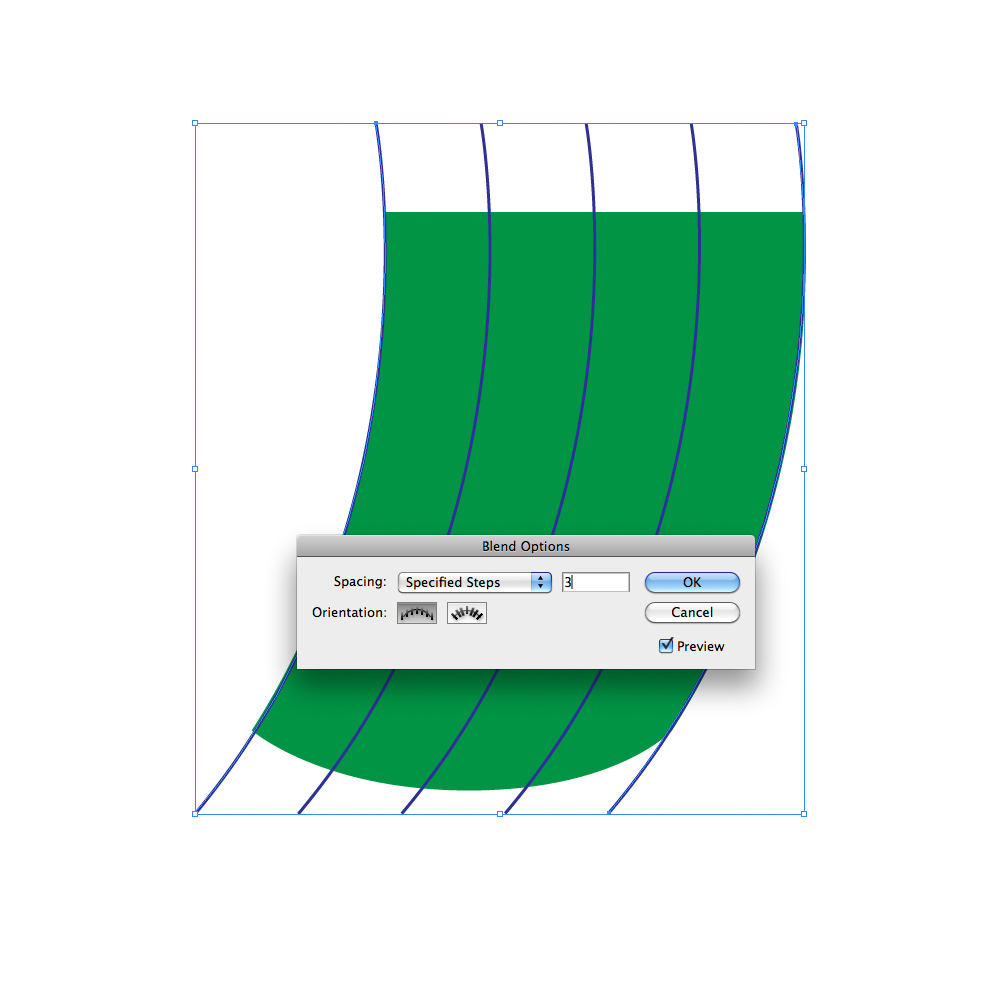
Select both paths and under the Object select Blend > Make.

0101 in How to Create a Circus Tent in Adobe Illustrator

Under the Blend Options set the Spacing to Specified Steps and the value to 3.

0112 in How to Create a Circus Tent in Adobe Illustrator

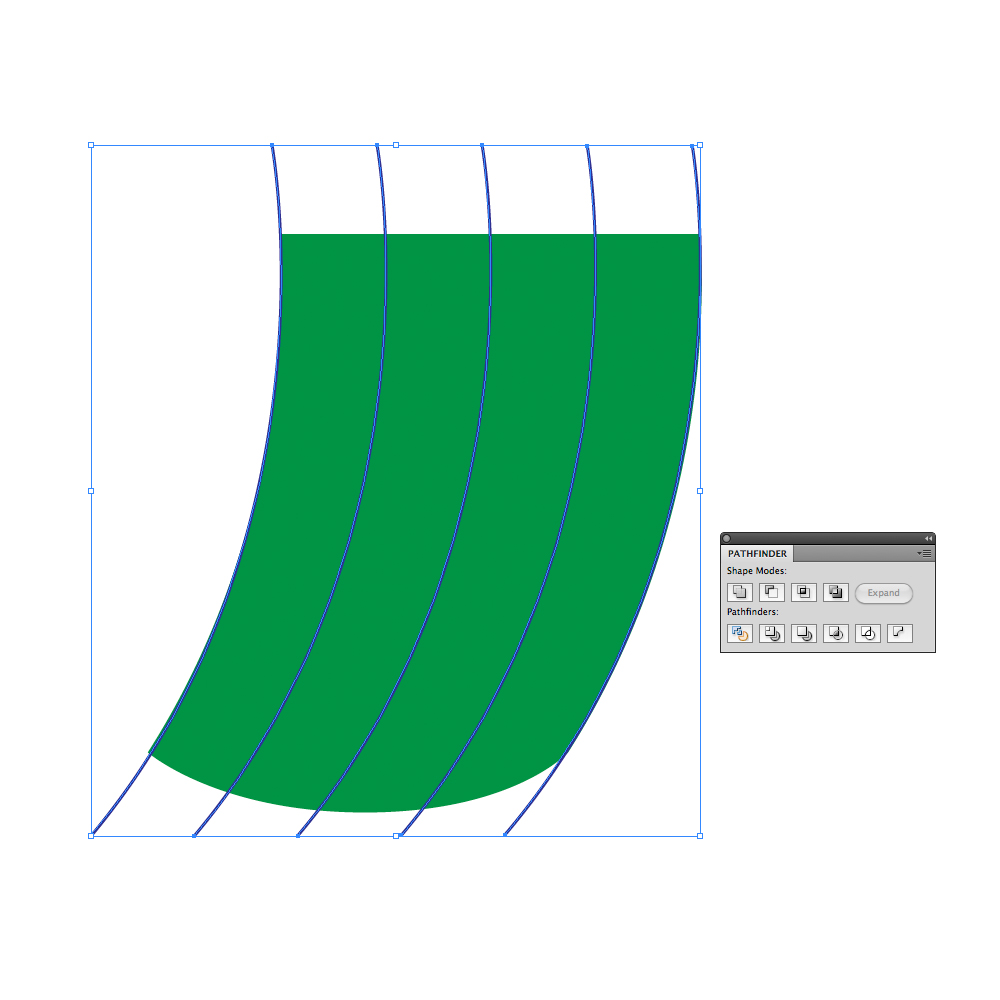
Under the Object select Expand and Ungroup ( Shift + Ctrl / Cmd + G ) the paths. Select all the elements we’ve created so far and under the Pathfinder Panel hit Divide button.

0123 in How to Create a Circus Tent in Adobe Illustrator

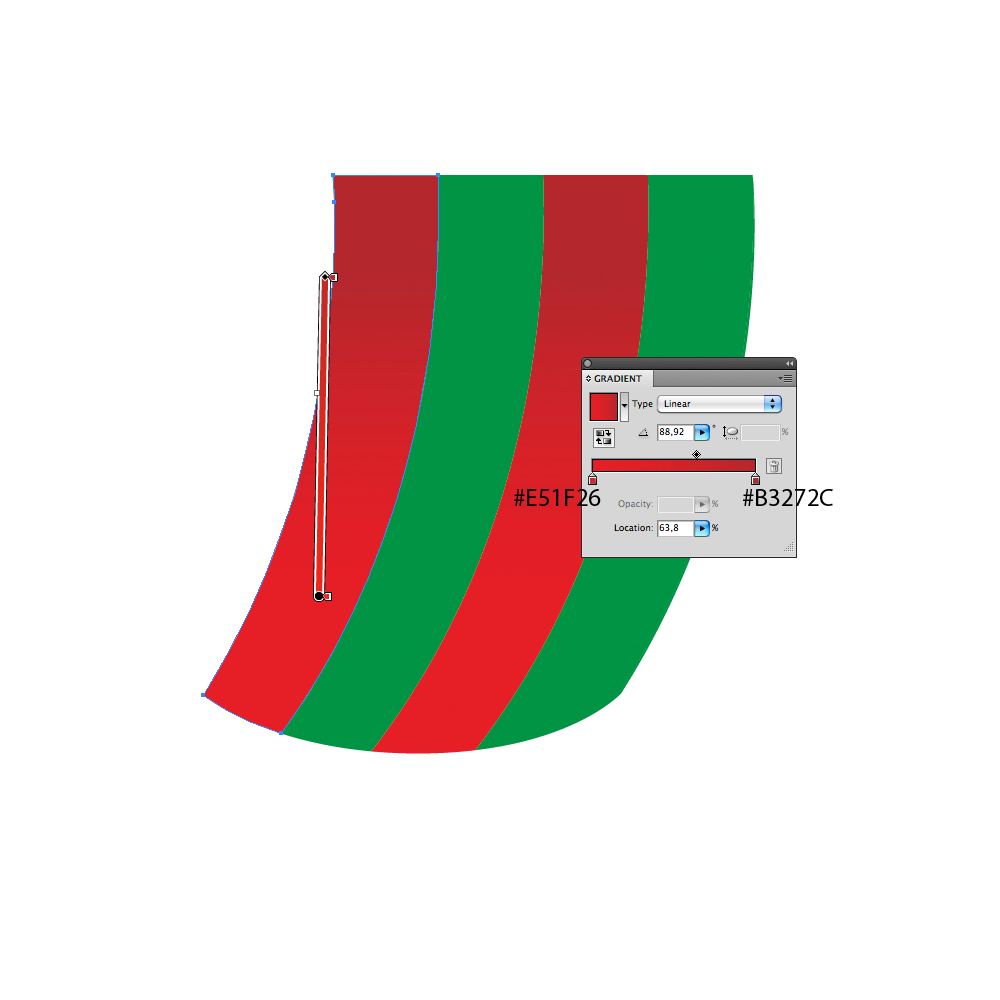
Ungroup ( Shift + Ctrl / Cmd + G ) the shape we have created. We will apply nice linear gradients to the stripes.

0132 in How to Create a Circus Tent in Adobe Illustrator

We will do the same for white stripes.

0141 in How to Create a Circus Tent in Adobe Illustrator

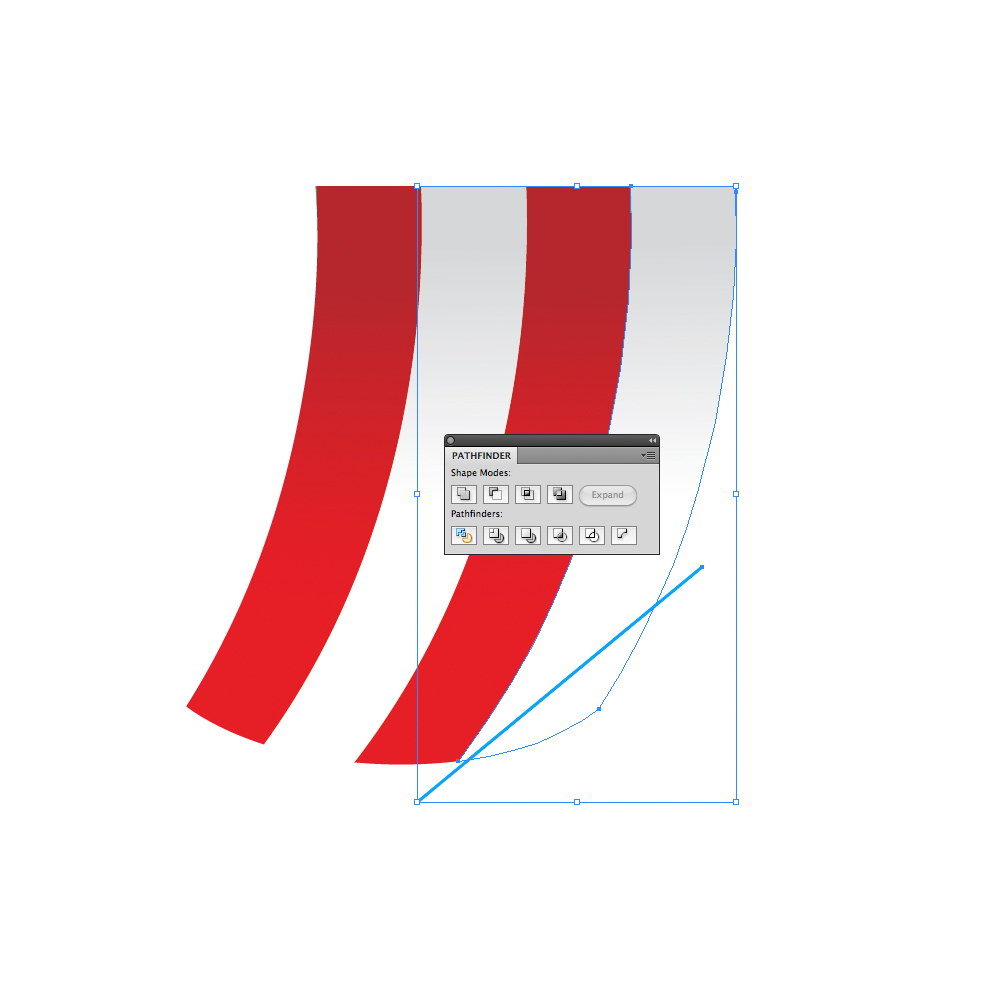
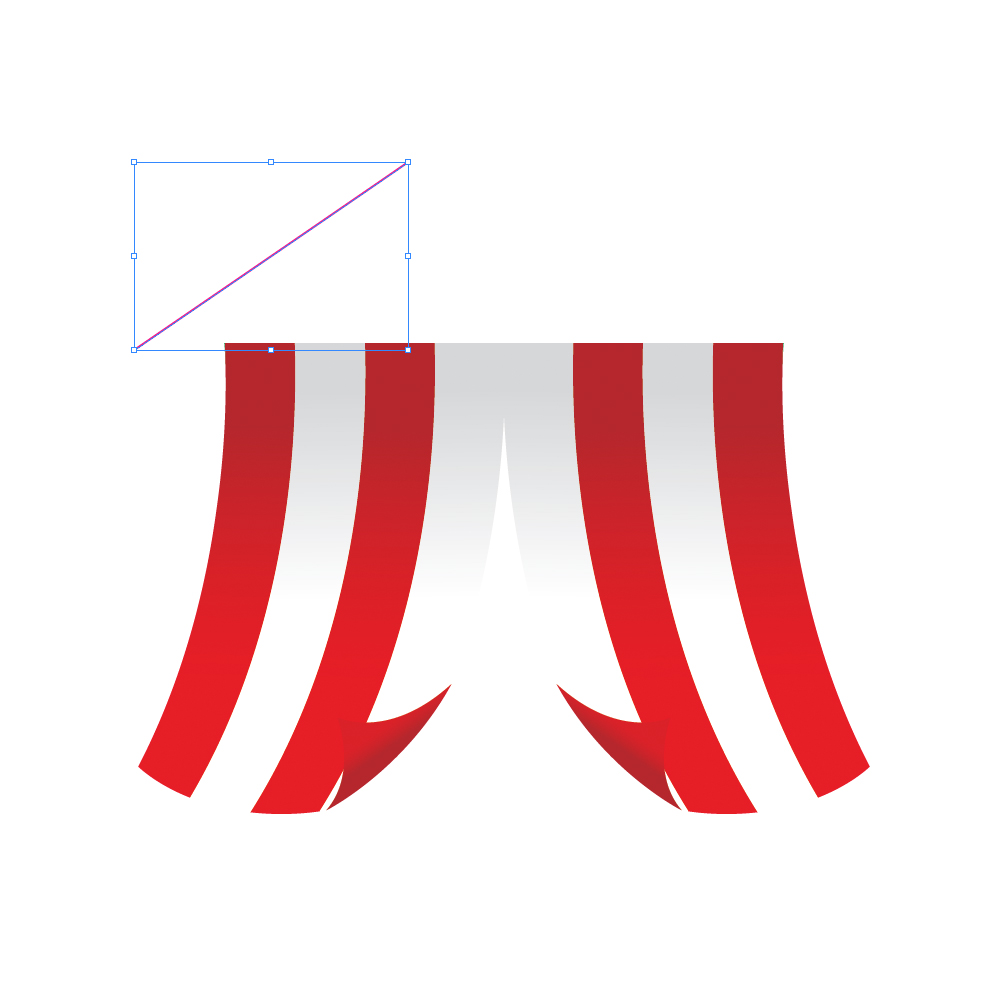
Now we will create a folded part of the tents side. Grab the Line Tool (/) from the Tool Panel and create the line as it shown on the picture below.

0152 in How to Create a Circus Tent in Adobe Illustrator

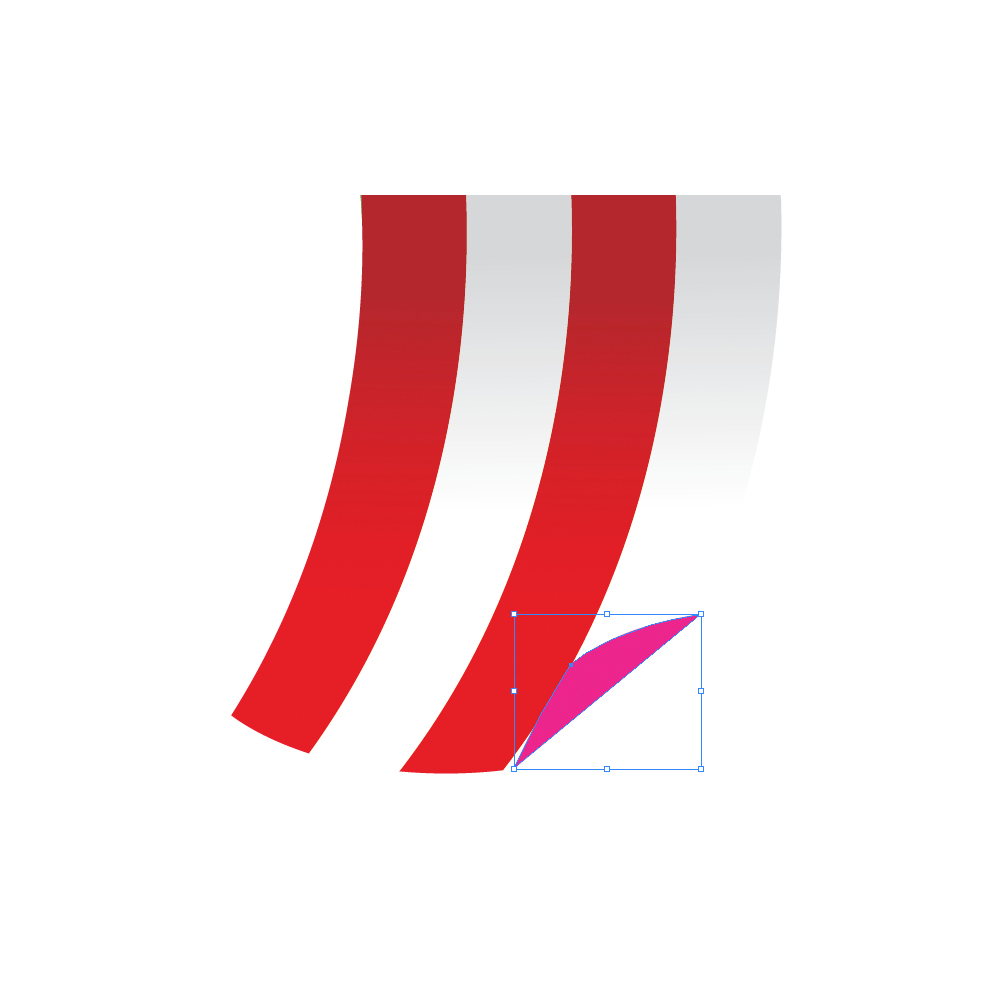
Select the white strip and the line and under the Pathfinder Panel hit Divide button.

0162 in How to Create a Circus Tent in Adobe Illustrator

Ungroup ( Shift + Ctrl / Cmd + G ) divided strip and rotate the small part for 135 degrees.  You should end up with something like this.

0171 in How to Create a Circus Tent in Adobe Illustrator

We have to adjust a bit the folded part. To do that grab the Direct Selection Tool (A) from the Tool Panel and adjust the position of the anchor points and angle of the handles.

0181 in How to Create a Circus Tent in Adobe Illustrator

With the linear gradient we will create an illusion of curled side of the tent.

0191 in How to Create a Circus Tent in Adobe Illustrator

Select all the elements we have created so far an Group them ( Ctrl / Cmd + G ). Under the Object select Transform > Reflect. Set Axis to Vertical and hit the Copy button. It will create an mirror image. Just move it to the right as it shown on the picture below.

0201 in How to Create a Circus Tent in Adobe Illustrator

0212 in How to Create a Circus Tent in Adobe Illustrator

Group ( Ctrl / Cmd + G ) all the elements.

Creating the Upper Part of the Tent

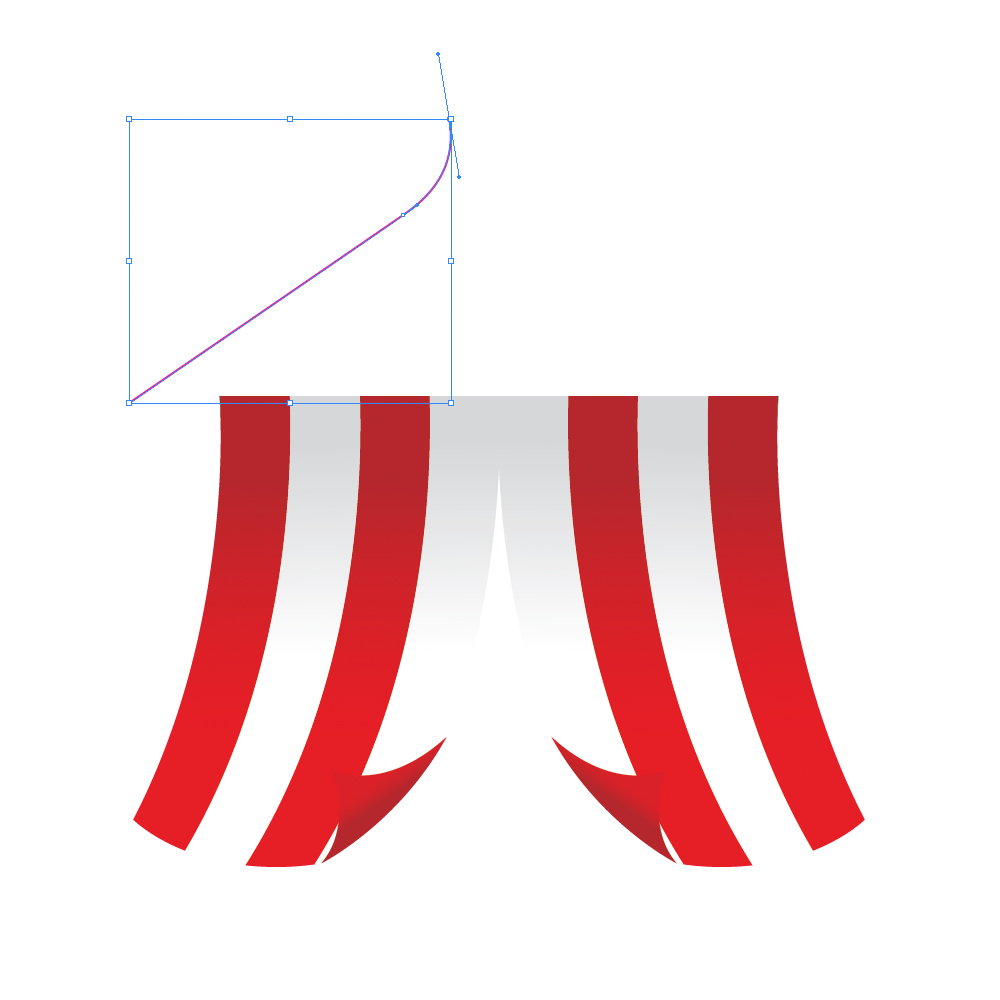
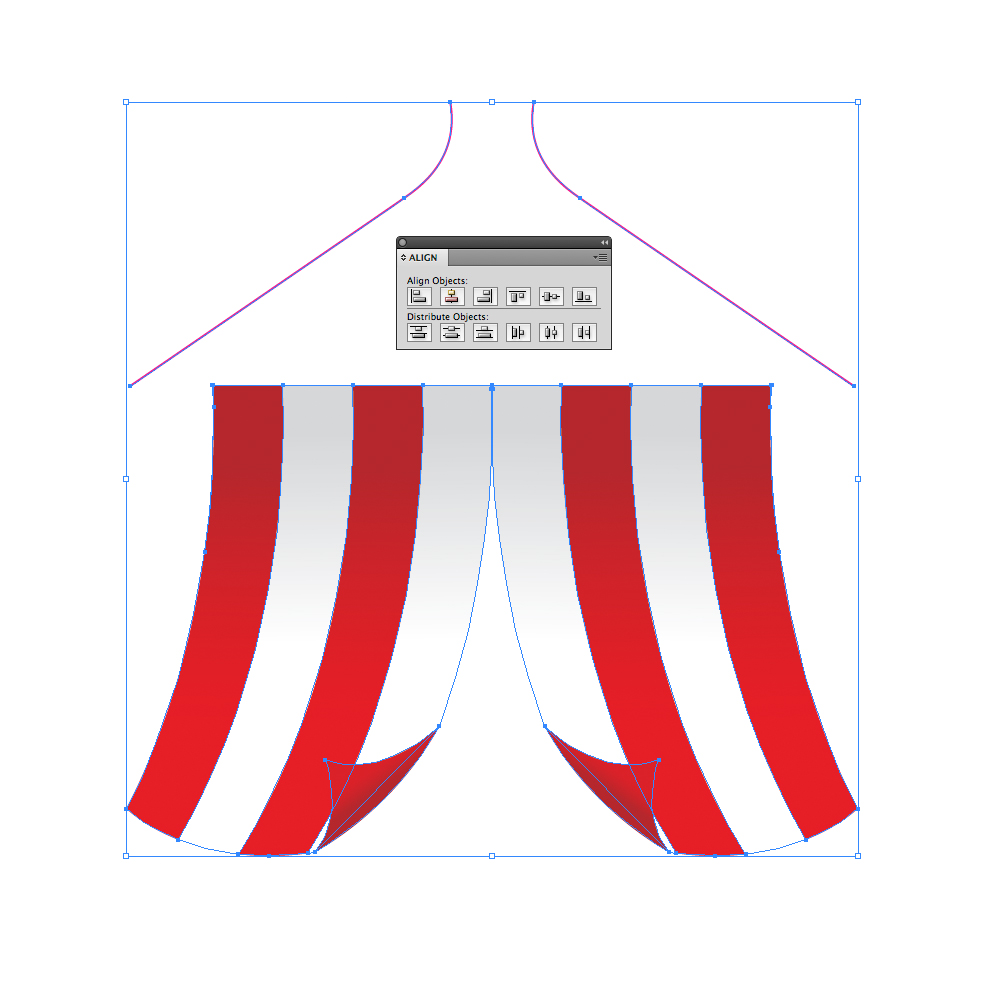
Now we have to create the upper part of the tent. Grab the Pen Tool (P) from the Tool Panel and create the path as it shown on the picture below.

0221 in How to Create a Circus Tent in Adobe Illustrator

0231 in How to Create a Circus Tent in Adobe Illustrator

Under the Object select Transfer > Reflect. For the Axis select Vertical and hit the Copy button. Place the copy on the right side. Select both paths and Group ( Ctrl / Cmd + G ) them. Select all the the objects and under the Align Panel hit the Horizontal Align Center.

0241 in How to Create a Circus Tent in Adobe Illustrator

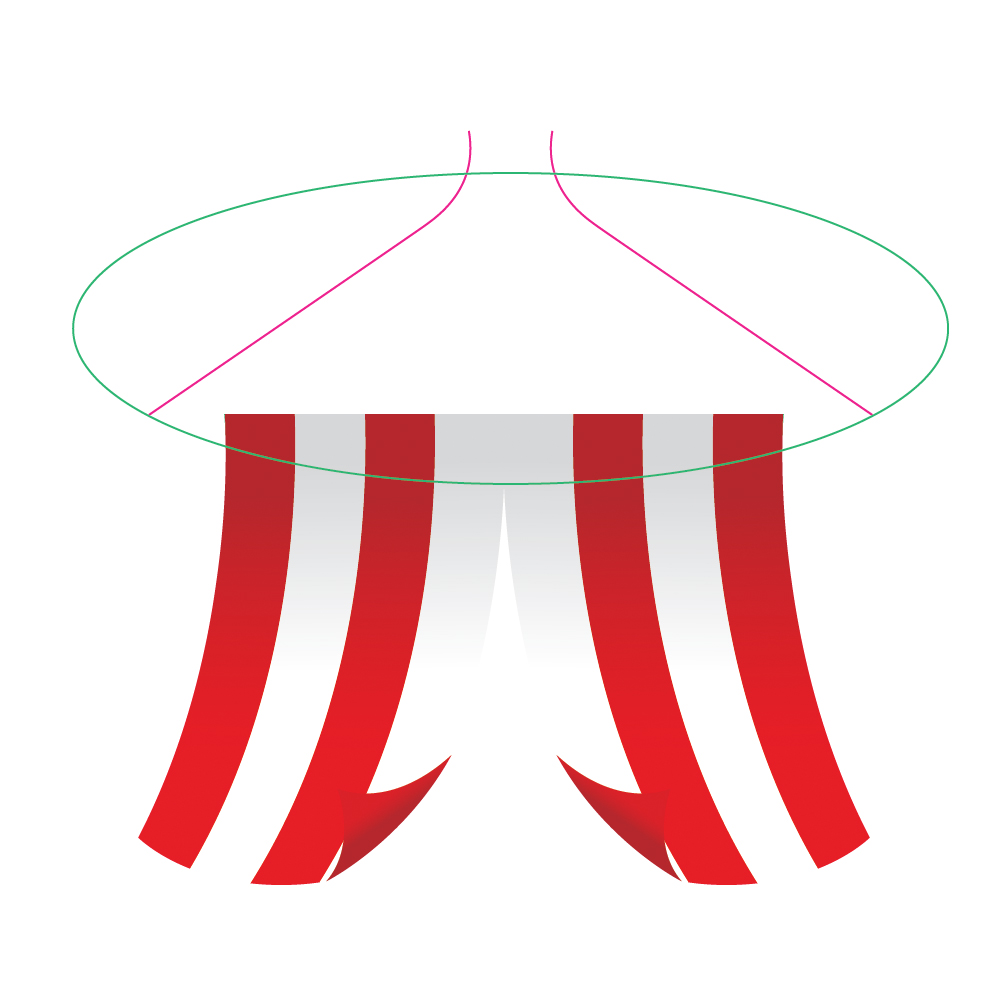
Grab the Ellipse Tool (L) from the Tool Panel and create the ellipse.

0252 in How to Create a Circus Tent in Adobe Illustrator

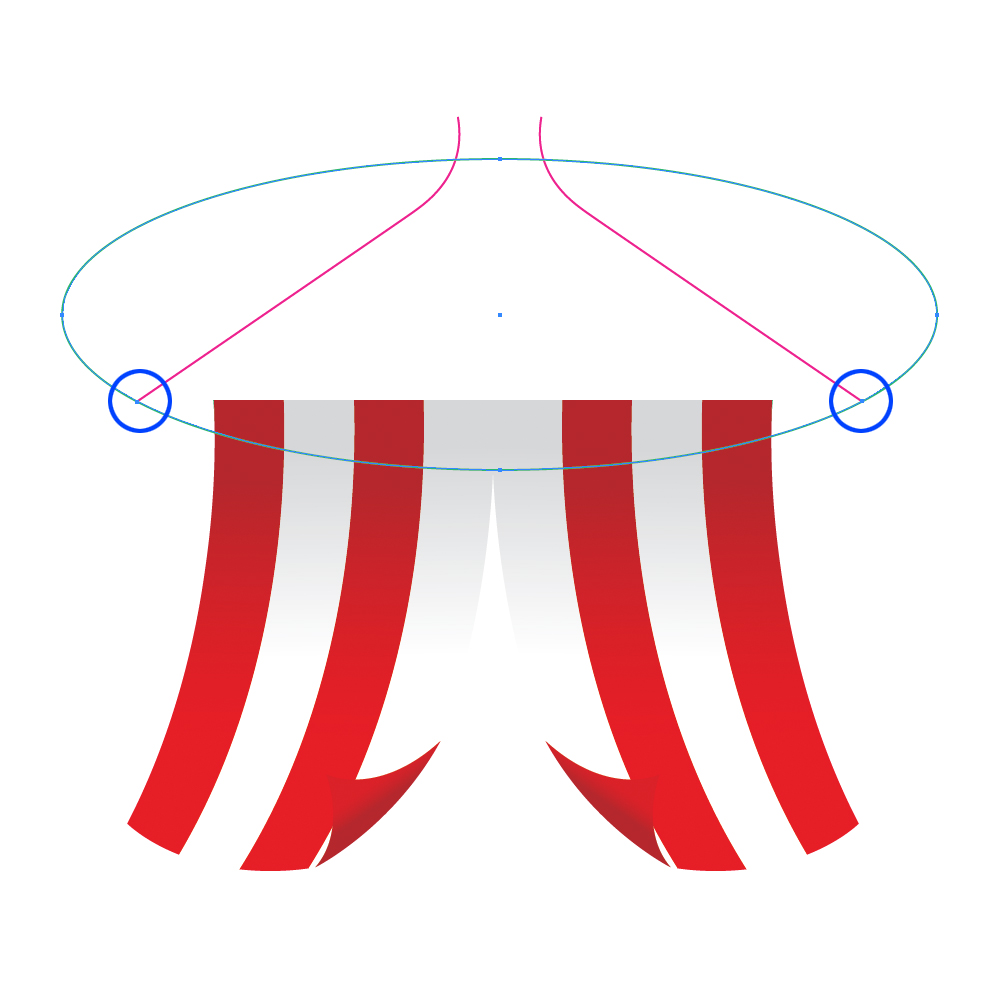
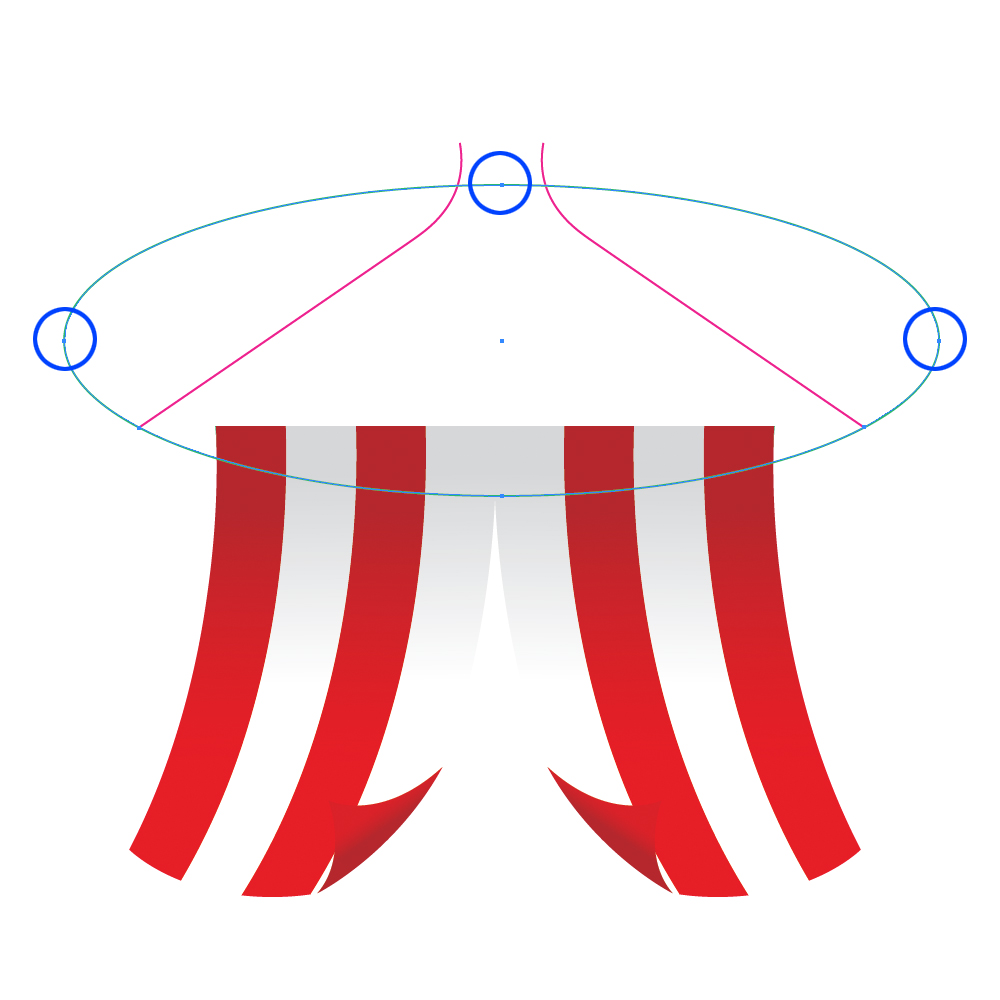
Now we will have to add and to remove some anchor points. Select the Add Anchor Point Tool (+) from the Tool Panel and add two anchor points to the ellipse.

0262 in How to Create a Circus Tent in Adobe Illustrator

Grab the Direct Selection Tool (A) from the Tool Panel, select anchor points we don’t need and hit Delete key on the keyboard.

0272 in How to Create a Circus Tent in Adobe Illustrator

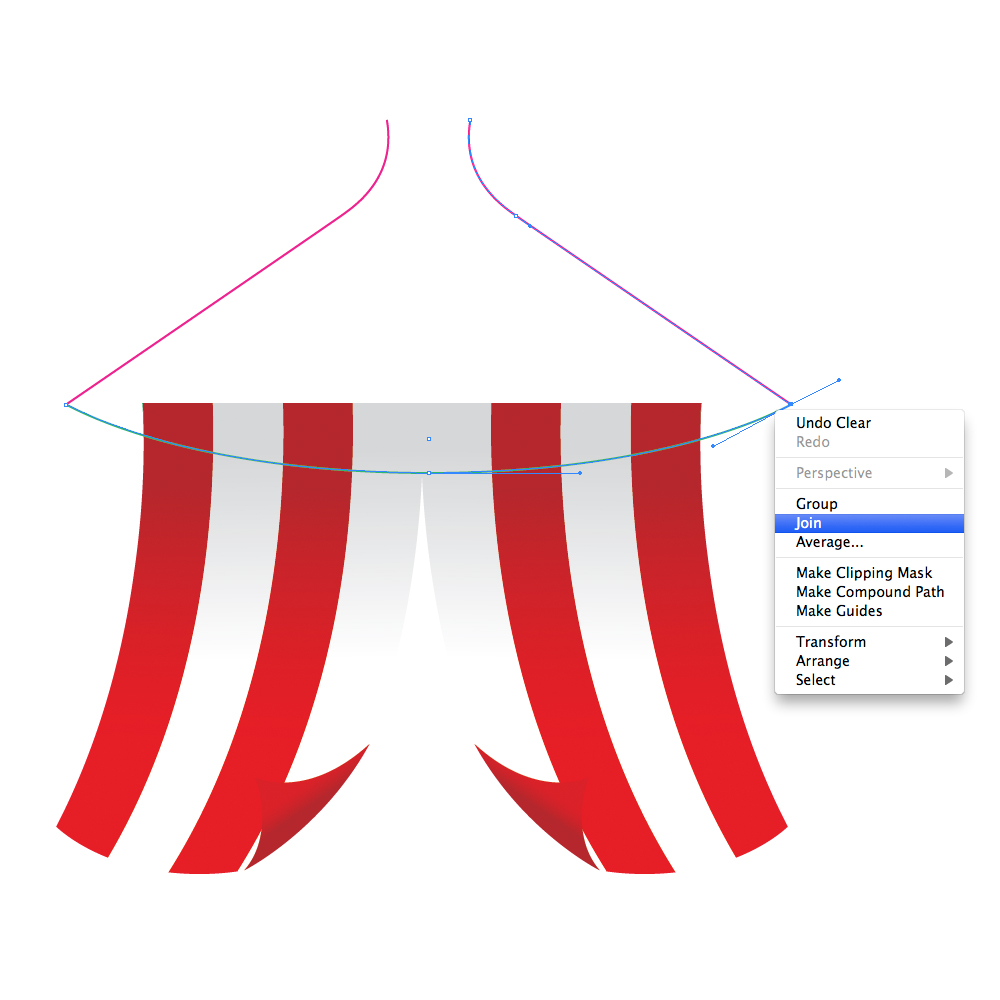
Withe Direct Selection Tool (A) select endpoints and under the right click hit the Join. Do that for the both sides of the upper part of the tent.

0283 in How to Create a Circus Tent in Adobe Illustrator

With the Pen Tool (P) close the path.

0292 in How to Create a Circus Tent in Adobe Illustrator

Let’s create red and white stripes for the upper part of the circus tent as well.

Duplicate ( Ctrl / Cmd + C, Ctrl / Cmd + F ) the green shape twice. Move one of the copy upwards.

0301 in How to Create a Circus Tent in Adobe Illustrator

Select both copies we have made and under the Pathfinder Panel hit the Intersect button.

0311 in How to Create a Circus Tent in Adobe Illustrator

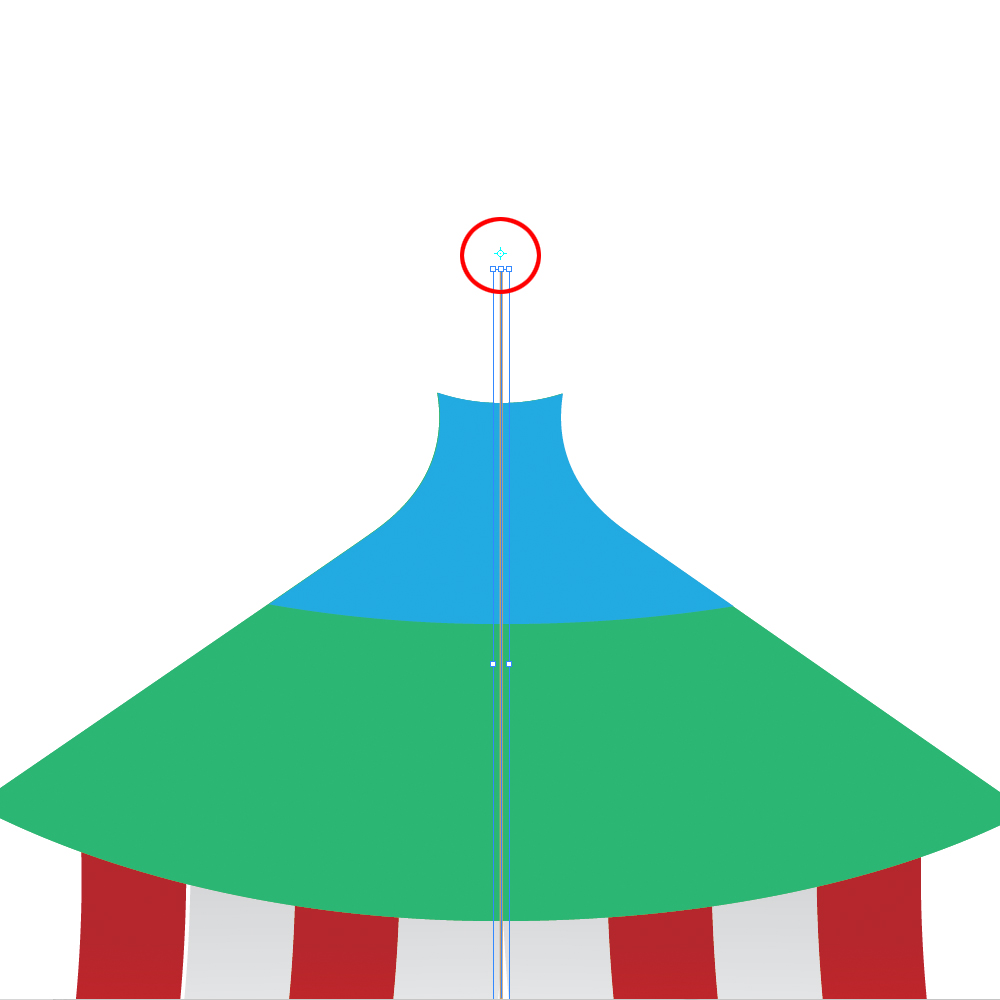
Grab the Line Tool (/) from the Tool Panel and create a Vertical line. Hold the Shift key on the keyboard for the straight dragging.

0321 in How to Create a Circus Tent in Adobe Illustrator

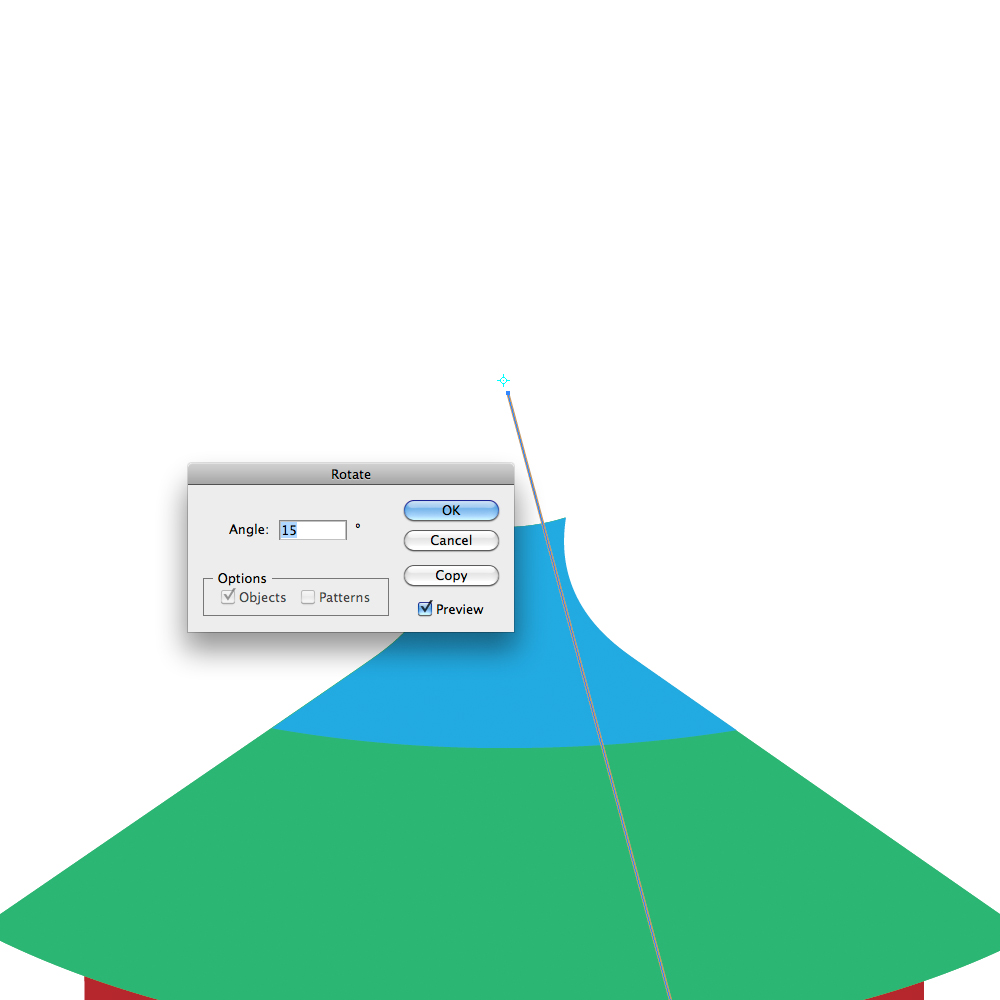
Grab the Rotate Tool ( R ) from the Tool Panel, hold the Alt key on the keyboard and click right above the vertical line.

0332 in How to Create a Circus Tent in Adobe Illustrator

The Rotation Option dialog will pop up. Set the value for the Angle to 15 degrees.

0341 in How to Create a Circus Tent in Adobe Illustrator

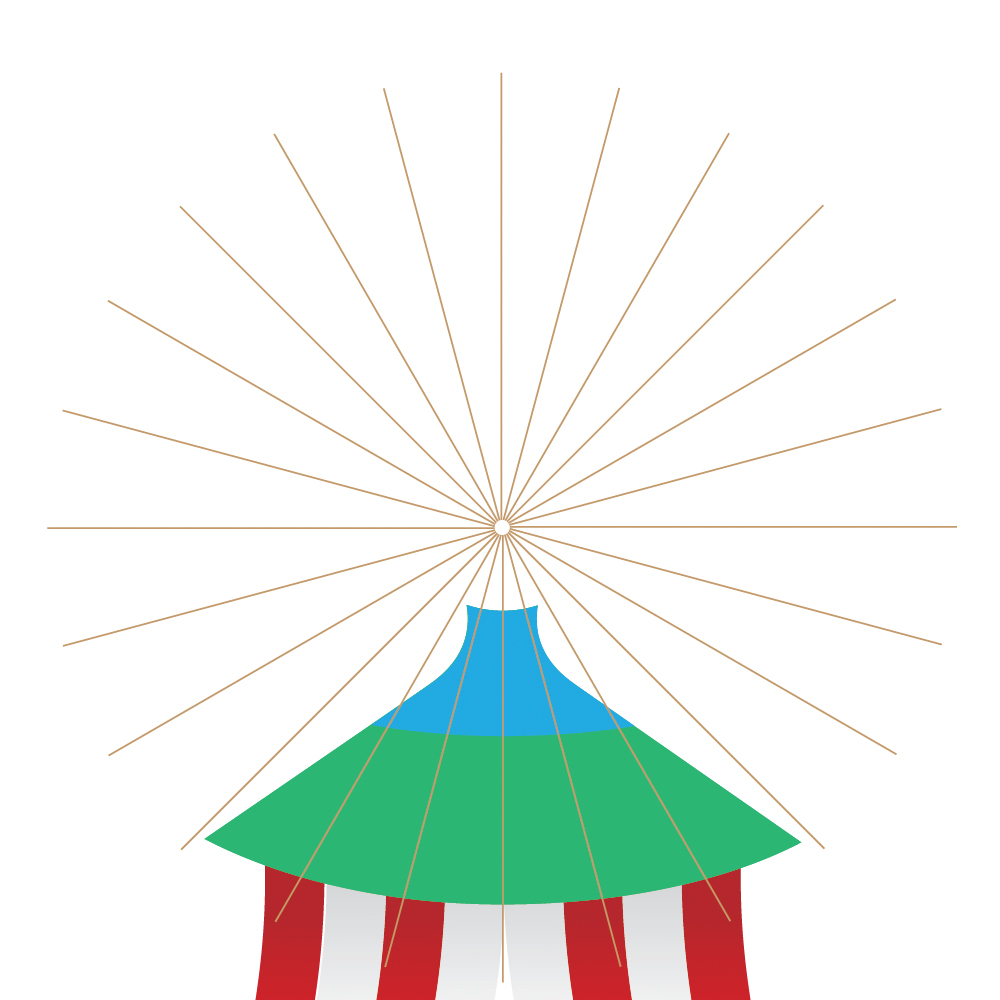
Hit the Copy button. It will create another line rotated for 15 degrees. To create more of those lines press the shortcut Ctrl / Cmd + D on the keyboard  22 times. It will create the whole round of lines.

0352 in How to Create a Circus Tent in Adobe Illustrator

Remove unnecessary lines. Select green shape and the rest of the lines and under the Pathfinder Panel hit Divide button.

036 in How to Create a Circus Tent in Adobe Illustrator

Ungroup the new shape and apply red and white gradients, just like we did before. Use the same gradients we’ve used for the lower part of the tent.

037 in How to Create a Circus Tent in Adobe Illustrator

038 in How to Create a Circus Tent in Adobe Illustrator

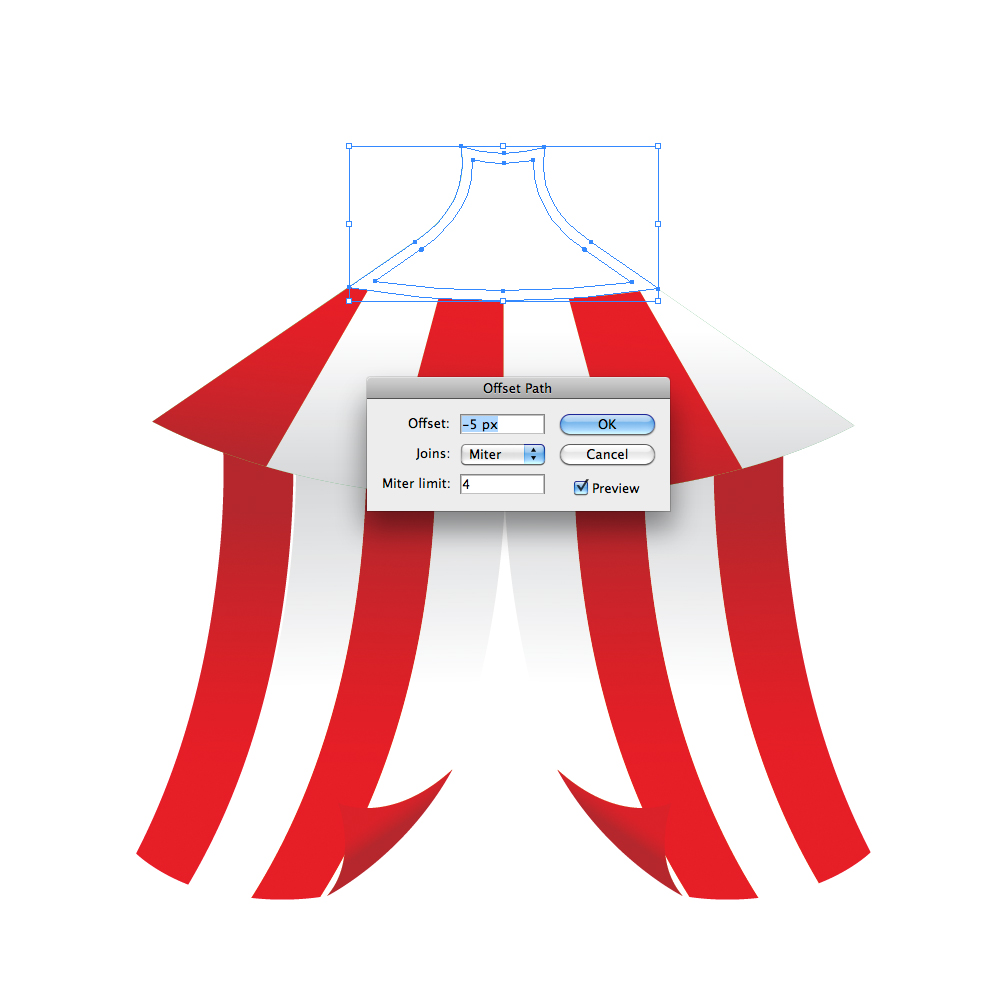
Set the Fill color of the blue shape to white (#FFFFF). Under the Object select Path > Offset Path. Set the value for Offset to -5. Set the Fill color of the smaller shape to #F1F2F2.

0391 in How to Create a Circus Tent in Adobe Illustrator

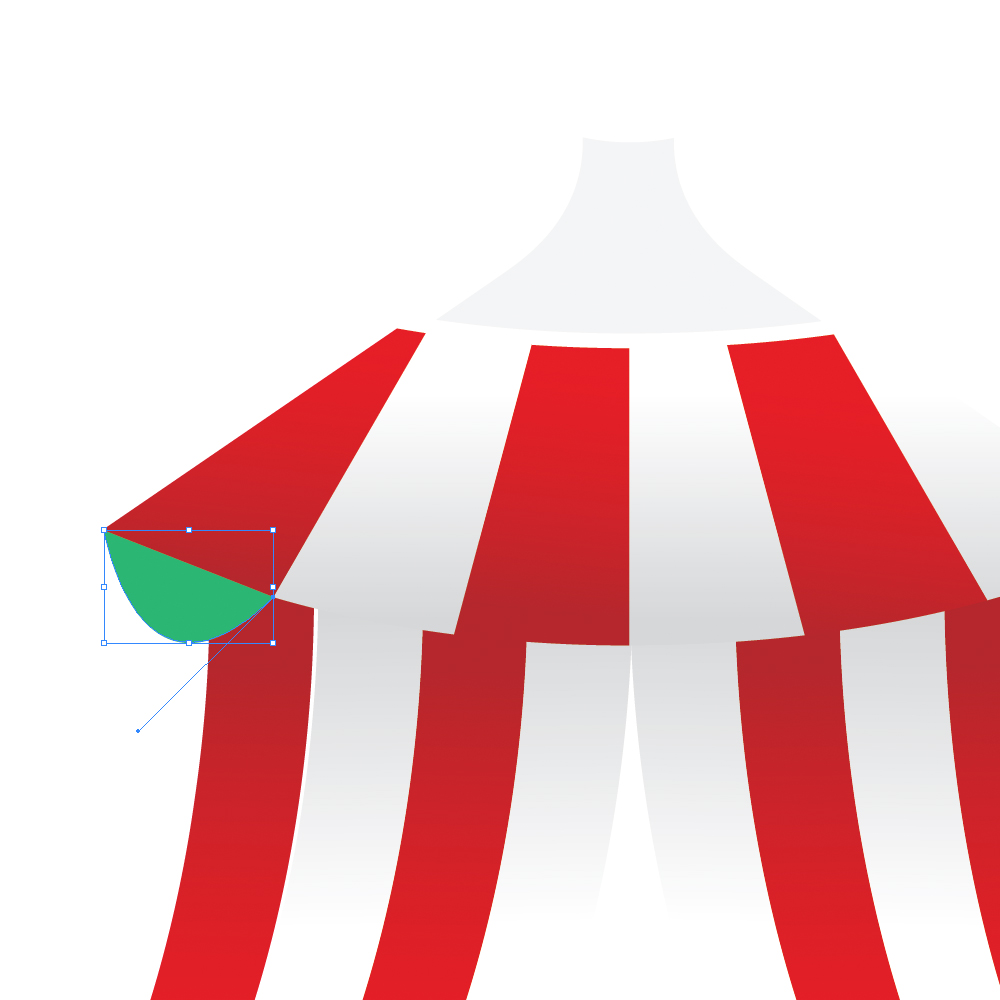
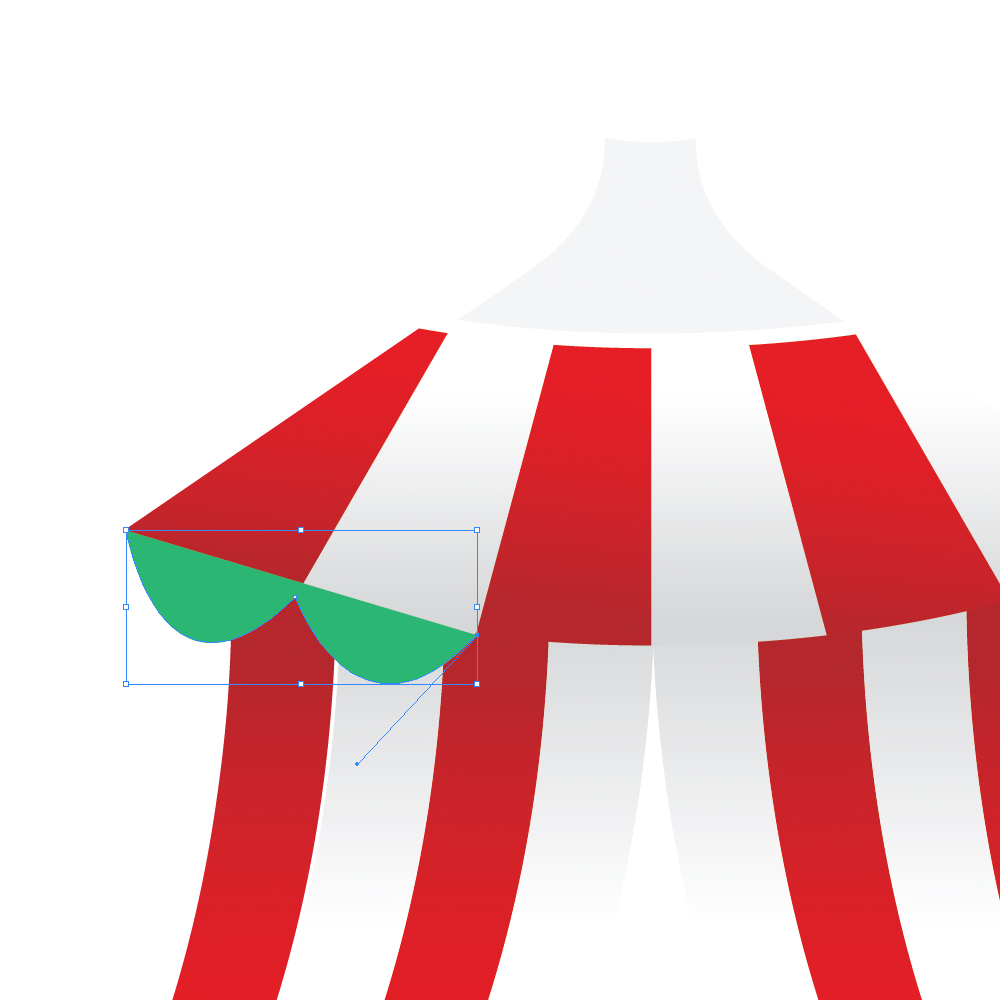
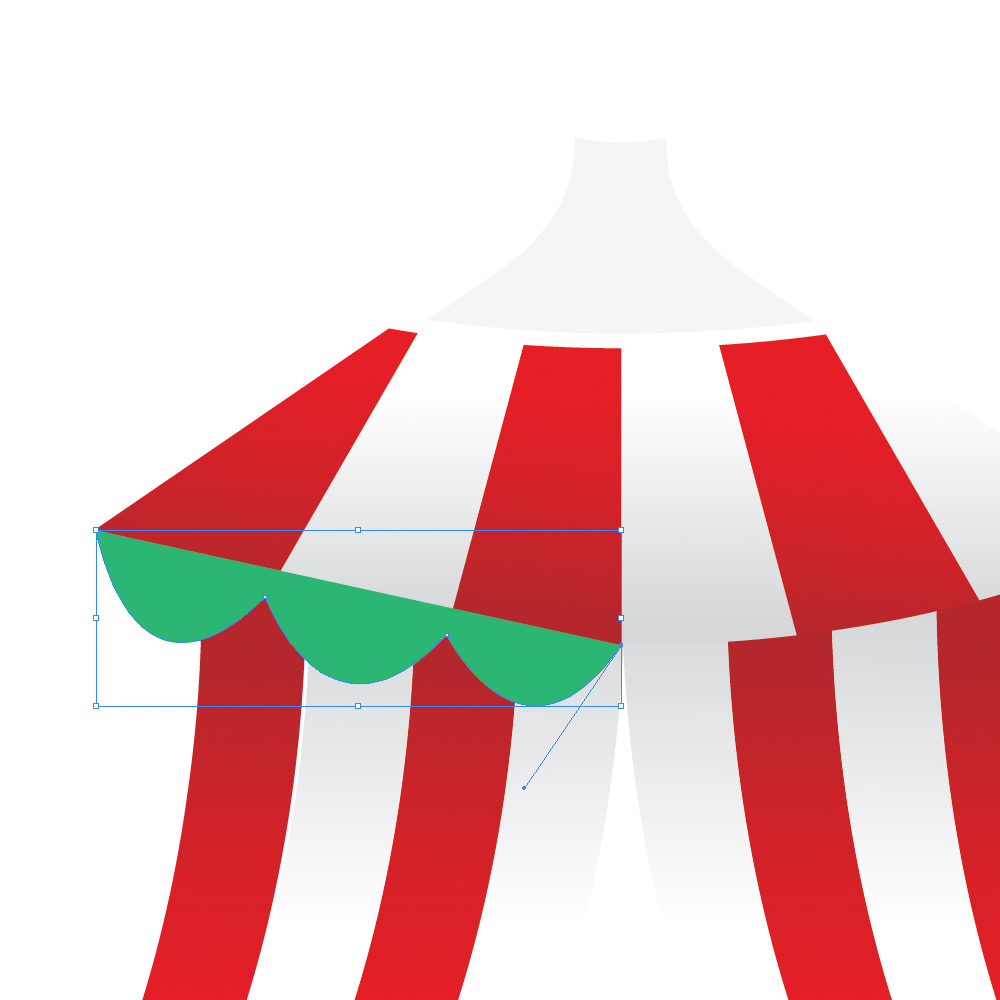
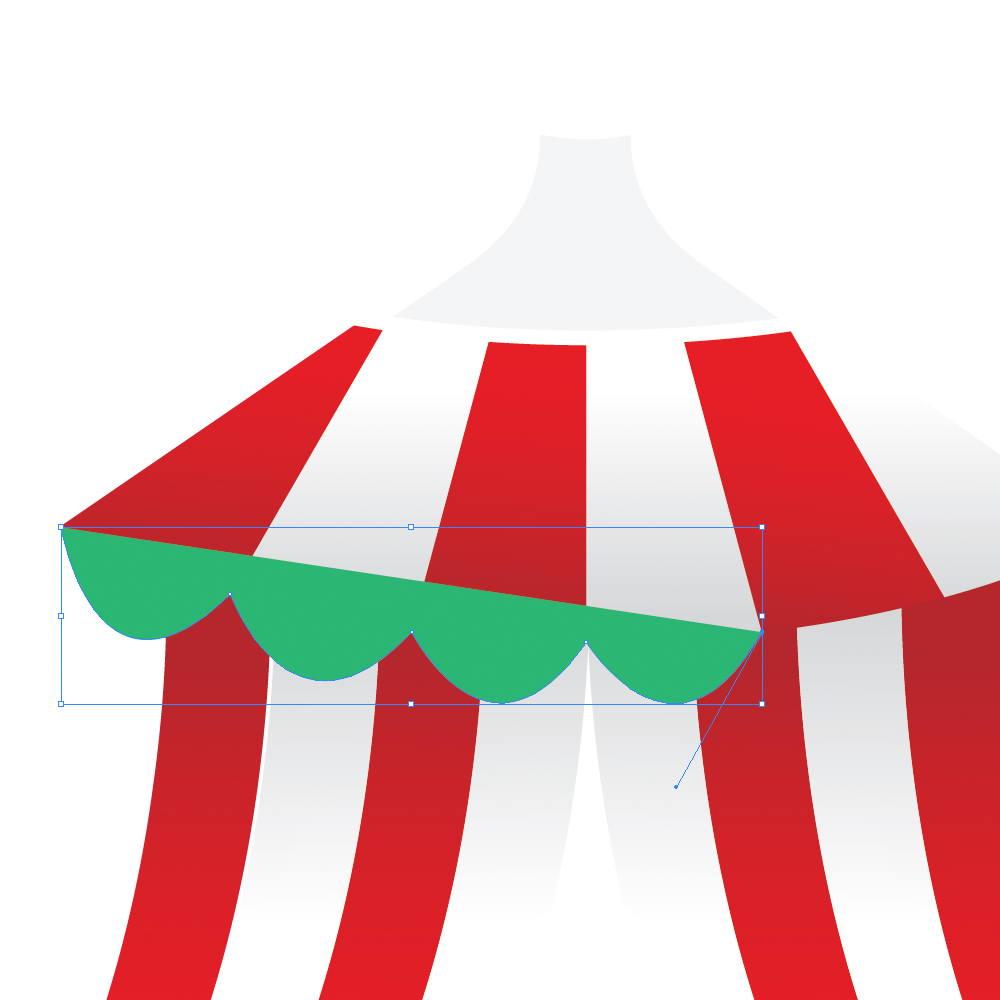
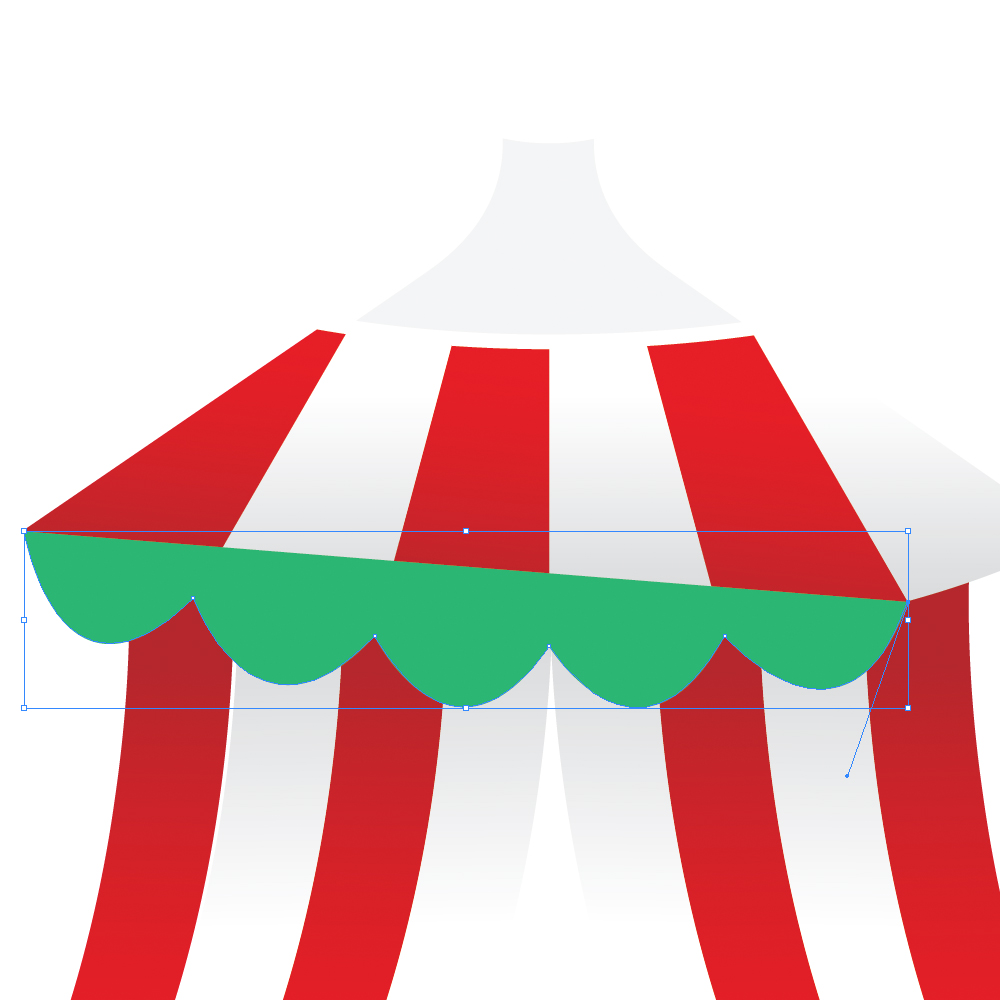
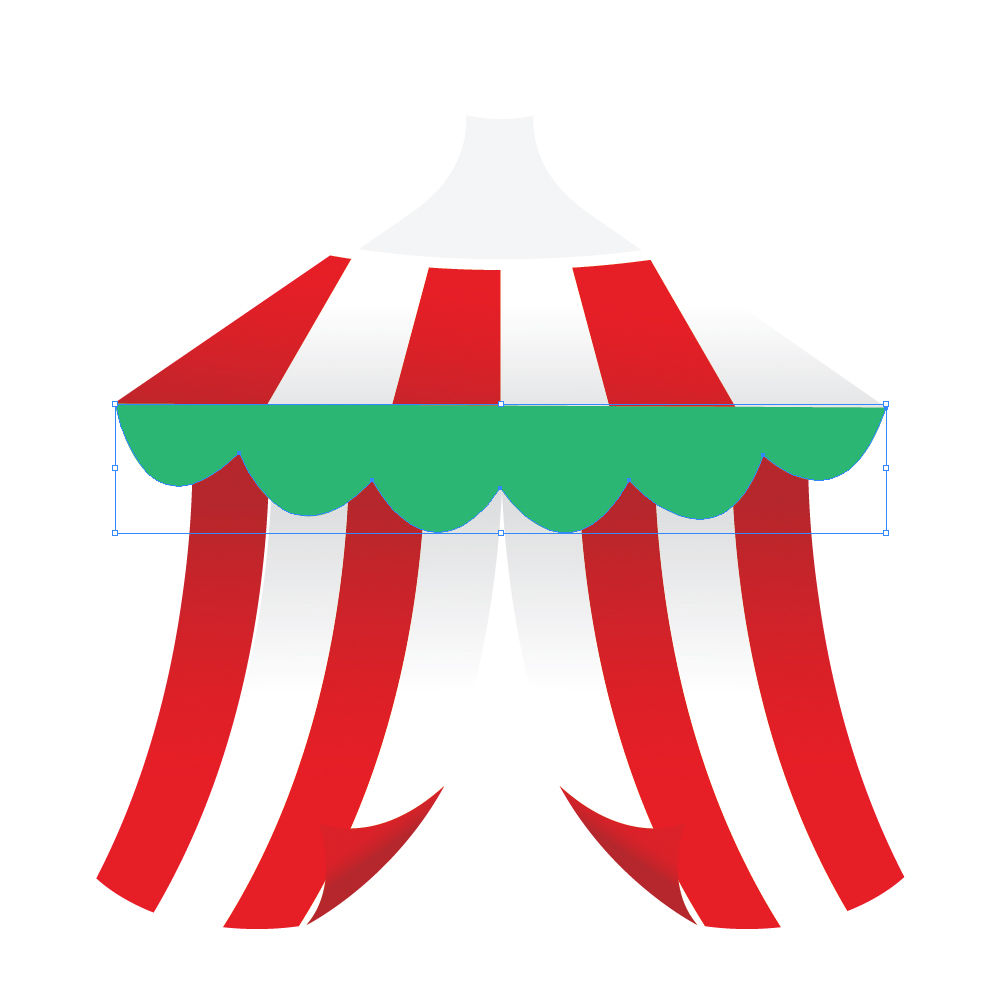
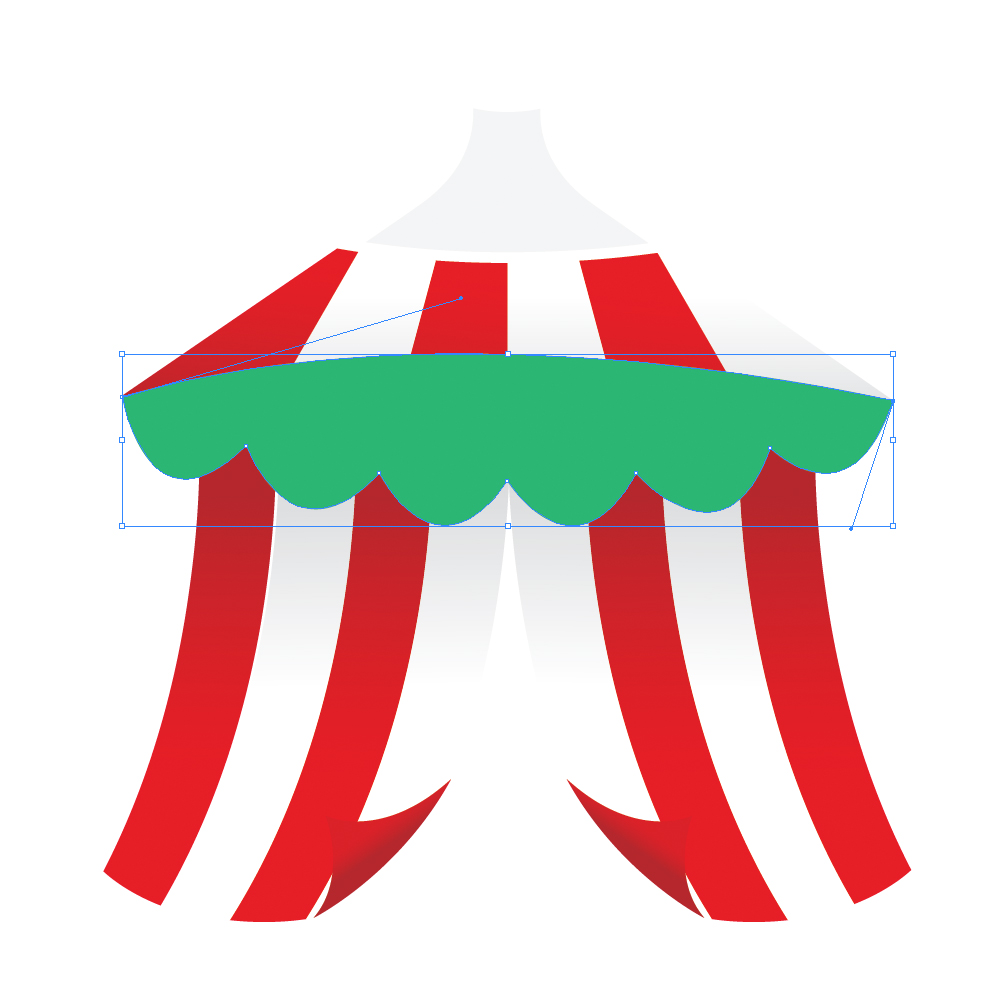
Grab the Pen Tool (P) from the Tool Panel and try to draw the shape as it shown on the pictures below.

040a in How to Create a Circus Tent in Adobe Illustrator

040b in How to Create a Circus Tent in Adobe Illustrator

040c in How to Create a Circus Tent in Adobe Illustrator

040d in How to Create a Circus Tent in Adobe Illustrator

040e in How to Create a Circus Tent in Adobe Illustrator

040f in How to Create a Circus Tent in Adobe Illustrator

040g in How to Create a Circus Tent in Adobe Illustrator

Select all the elements of the upper part of the tent (except the green shape) and send it to front ( Shift + Ctrl / Cmd +] ).

041 in How to Create a Circus Tent in Adobe Illustrator

Select only red and white stripes (as it shown on the picture below) and duplicate them ( Ctrl / Cmd + C, Ctrl / Cmd + F ). Under the Pathfinder Panel hit the Unite button.

042 in How to Create a Circus Tent in Adobe Illustrator

Select the shape we have just created and the green shape and under the Pathfinder Panel hit the Minus Front button.

043 in How to Create a Circus Tent in Adobe Illustrator

Ungroup ( Shift + Ctrl / Cmd + G ) the green shape and apply the same white and red gradients we have already used.

044 in How to Create a Circus Tent in Adobe Illustrator

045 in How to Create a Circus Tent in Adobe Illustrator

Grab the Pen Tool (P) from the Tool Panel and draw the path as it shown on the picture below.

046 in How to Create a Circus Tent in Adobe Illustrator

048 in How to Create a Circus Tent in Adobe Illustrator

Creating the Flag

Grab the Rounded Rectangle Tool from the Tool Panel and create a tiny rectangle. Apply linear gray gradient.

049 in How to Create a Circus Tent in Adobe Illustrator

We will create the shape of the flag with Pencil Tool (N), but first we have to set parameters for smooth line. With double click on the Pencil Tool icon in the Tool Panel we will bring up the Pencil Tool Options. Set the Fidelity to 2.5 and the Smoothness to 100%. Hit the OK button.

050 in How to Create a Circus Tent in Adobe Illustrator

Select the Pencil Tool (N) from the Tool Panel and create a curved line as it shown on the picture below. Don’t worry much about the shape. Just try to create a smooth waves.

051 in How to Create a Circus Tent in Adobe Illustrator

Duplicate the path ( Ctrl / Cmd + C, Ctrl / Cmd + F ), rotate it a bit and move around as it shown on the picture below. With the Direct Selection Tool (A) select endpoints on the right click hit Join.

052 in How to Create a Circus Tent in Adobe Illustrator

With the Pen Tool (P) close the path. Set Fill color to red.

053 in How to Create a Circus Tent in Adobe Illustrator

Duplicate the flag twice ( Ctrl / Cmd + C, Ctrl / Cmd + F ), scale up one of the copies and rotate it. Select both copies and under the Pathfinder Panel hit the Intersect button.

054 in How to Create a Circus Tent in Adobe Illustrator

Set the Fill color to white (#FFFFF), Group it ( Ctrl / Cmd + G ) and place it on the handle on the top of the circus tent.

055 in How to Create a Circus Tent in Adobe Illustrator

Grab the Pen Tool (P) from the Tool Panel and create the back side of the circus tent. The shape doesn’t have to be perfect. Apply the same red linear gradient we are using from the start of this tutorial.

056 in How to Create a Circus Tent in Adobe Illustrator

Send the red shape to the back ( Shift + Ctrl / Cmd + [ ).

057 in How to Create a Circus Tent in Adobe Illustrator

Creating details

Select the small parts of the roof (as it shown on the picture below) and duplicate them ( Ctrl / Cmd + C, Ctrl / Cmd + F ). Scale them up and move them to the right little bit.

058 in How to Create a Circus Tent in Adobe Illustrator

Ungroup ( Shift + Ctrl / Cmd +G ) the lower part of the tent. Make sure to have all stripes ungrouped. Now we will combine some shapes inside the Pathfinder Panel.

Select the stripe and duplicate it ( Ctrl / Cmd + C, Ctrl / Cmd + F ). Holding the Shift key on the keyboard select the copy of the stripe we have just made and one of the parts we created in the previous step. Under the Pathfinder Panel hit the Intersect button.

059 in How to Create a Circus Tent in Adobe Illustrator

Set the Fill color to #720F16 and make sure to place it underneath the upper part of the circus tent. Repeat this step for each stripe. For the shadow on white stripes set the Fill color to #A7A9AC.

060 in How to Create a Circus Tent in Adobe Illustrator

061 in How to Create a Circus Tent in Adobe Illustrator

The circus tent is done. Group ( Ctrl / Cmd + G ) all the elements we have created so far.

Let’s move on to the balloons.

Balloons

We will try to create create colorful balloons in just few steps.

Grab the Ellipse Tool (L) from the Tool Panel and create the ellipse. With Direct Selection Tool (A) we will distort the ellipse little bit. Select the lower anchor point and nudge it few pixels downwards. To do that use the arrow keys on the keyboard.

062 in How to Create a Circus Tent in Adobe Illustrator

Grab the Pen Tool (P) from the Tool Panel and create simple, irregular triangle.

063 in How to Create a Circus Tent in Adobe Illustrator

With the Ellipse Tool (L) create ellipse as it shown on the picture below. Make sure to mach endpoints.

064 in How to Create a Circus Tent in Adobe Illustrator

Under the Object select Path > Offset Path. Set the value for Offset to -3.

065 in How to Create a Circus Tent in Adobe Illustrator

Let’s put all elements together and to apply some nice gradients.

066 in How to Create a Circus Tent in Adobe Illustrator

To lower part of the balloon apply linear gradient with same colors as we used for the radial gradient. With the Ellipse Tool (L) create a small ellipse and set the Fill color to white (#FFFFFF). Lower the Opacity to 25%.

067 in How to Create a Circus Tent in Adobe Illustrator

Using the same technique create balloons in oder colors. Group them ( Ctrl / Cmd + G ).

068 in How to Create a Circus Tent in Adobe Illustrator

Creating the Background

Beside circus tent and the balloons we have to create a background with cute clouds and a hill with some flowers.

Grab the Rectangle Tool (M) from the Tool Panel and click somewhere on the Artboard. A Rectangle Option box will pop up. Set the values for width and height to 500 x 600 pixels. Apply nice blue, radial gradient.

069 in How to Create a Circus Tent in Adobe Illustrator

Grab the Ellipse Tool (L) from the Tool Panel and create an ellipse. Place it as it shown on the picture below.

070 in How to Create a Circus Tent in Adobe Illustrator

Duplicate ( Ctrl / Cmd + C, Ctrl / Cmd + F ) the rectangle from the previous picture. Select both, ellipse and rectangle and under the Pathfinder Panel hit the Intersect button.

071 in How to Create a Circus Tent in Adobe Illustrator

Let’s place our circus tent and balloons on the hill. We will have to create few more details in order to improve our illustration.

072 in How to Create a Circus Tent in Adobe Illustrator

We have to create shadow that tent cast on the grass. Grab the Ellipse Tool (L) again and create two ellipses.

Set the Fill color of the larger ellipse to #004B25.

073 in How to Create a Circus Tent in Adobe Illustrator

Set the Fill color of the smaller ellipse to #0C381E.

074 in How to Create a Circus Tent in Adobe Illustrator

We will create the mirror image of the balloons. Select the group of the balloons and under the Object select Transform > Reflect. Set the Axis to Vertical and hit the Copy button. Move the reflected balloons to the left.

075 in How to Create a Circus Tent in Adobe Illustrator

076 in How to Create a Circus Tent in Adobe Illustrator

Creating Clouds

Let’s create few cute clouds.

Grab the Ellipse Tool (L) from the Tool Panel and create many overlapping circles.

0771 in How to Create a Circus Tent in Adobe Illustrator

Select them all and under the Pathfinder Panel hit the Unite button. Set the Fill color to #E6F5F9. Duplicate the cloud ( Ctrl / Cmd + C, Ctrl / Cmd +F ). Scale down the cop of the cloud and set the Fill color to white (#FFFFFF).

078 in How to Create a Circus Tent in Adobe Illustrator

Using the same techniques create few more clouds.

0791 in How to Create a Circus Tent in Adobe Illustrator

Just few more flowers and…

080 in How to Create a Circus Tent in Adobe Illustrator

…Voila! We are done.

Feel free to create the circus tent in different colors.

Preview-image-2 in How to Create a Circus Tent in Adobe Illustrator

Preview-image-3 in How to Create a Circus Tent in Adobe Illustrator

Conclusion

In this quite long tutorial we had an opportunity to use different kind of techniques. We have used Pen Tool, Pathfinder with some of it’s features and Blend Tool. Their combination has resulted in cheerful illustration that can be used in multiply purpose. Feel free to use techniques discussed in this tutorial for creating different kind of illustrations. I hope you like the tutorial. Thank you for following along.

(rb)


  •   
  • Copyright © 1996-2010 BlogmyQuery - BMQ. All rights reserved.
    iDream theme by Templates Next | Powered by WordPress