CSS

Source order and display order should match

Years ago, when using CSS for layout was still rather new, one of the common arguments for using CSS instead of tables for layout was that it enables you to change the layout order without editing your markup.

A typical example is a page with a vertical sub-navigation to the left, a centered content area, and a sidebar to the right. If you use tables for layout you will need to change the HTML to move the columns around, say if you wanted the navigation on the right and the sidebar on the left. With CSS you can change the visual order of the columns without touching the HTML.

But, there is a but.

Read full post

Posted in , .


Technical Web Typography: Guidelines and Techniques

Advertisement in Technical Web Typography: Guidelines and Techniques
 in Technical Web Typography: Guidelines and Techniques  in Technical Web Typography: Guidelines and Techniques  in Technical Web Typography: Guidelines and Techniques

The Web is 95% typography, or so they say. I think this is a pretty accurate statement: we visit websites largely with the intention of reading. That’s what you’re doing now — reading. With this in mind, does it not stand to reason that your typography should be one of the most considered aspects of your designs?

Unfortunately, for every person who is obsessed with even the tiniest details of typography, a dozen or so people seem to be indifferent. It’s a shame; if you’re going to spend time writing something, don’t you want it to look great and be easy to read?

Creative and Technical Typography

I’m not sure these two categories are recognized in the industry but, in my mind, the two main types of typography are creative and technical.

Creative typography involves making design decisions such as which face to use, what mood the type should create, how it should be set, what tone it should have — for example, should it be airy, spacious and open (light) or condensed, bold and tight, with less white space (dark)? These decisions must be made on a per-project basis. You probably wouldn’t use the same font on a girl’s party invitation and an obituary. For me, this is creative typography: it is design-related and changes according to its application.

Technical typography is like type theory; certain rules and practices apply to party invitations just as well as they do to obituaries. These are little rules that always hold, are proven to work and are independent of design. The good news is that, because they are rules, even the most design-challenged people can make use of them and instantly raise the quality of their text from bog-standard to bang-tidy.

We’ll focus on technical type in this article. We’ll discuss the intricacies and nuances of a small set of rules while learning the code to create them.

We’ll learn about:

Fair warning: this is an in-depth article. It requires some basic CSS knowledge. If you’d rather learn a little at a time, use the links above to jump from section to section.

If any of the code examples seem out of context or confusing, then here is the final piece that we’re going to create (merely for your reference).

Setting Things Up

To begin, copy and paste this into an index.html file, and save it to your desktop:

<!DOCTYPE html>
<html lang="en">
<head>
  <meta charset="utf-8" />
  <title>Your Name</title>
  <link rel="stylesheet" type="text/css" href="css/style.css" />
</head>
<body>

  <h1>Your Name</h1>

</body>
</html>

Next, copy and paste this (slightly modified) CSS reset into your style.css sheet, and save that to your machine, too:

/*------------------------------------*\
  RESET
\*------------------------------------*/
body, div, dl, dt, dd, ul, ol, li,
h1, h2, h3, h4, h5, h6,
pre, form, fieldset, input, textarea,
p, blockquote, th, td {
  margin: 0;
  padding: 0;
}
table {
  border-collapse: collapse;
  border-spacing: 0;
}
fieldset, img {
  border: 0;
}
address, caption, cite, dfn, th, var {
  font-style: normal;
  font-weight: normal;
}
caption, th {
  text-align: left;
}
h1, h2, h3, h4, h5, h6 {
  font-size: 100%;
  font-weight: normal;
}
q:before, q:after {
  content: '';
}
abbr, acronym {
  border: 0;
}

/*------------------------------------*\
  MAIN
\*------------------------------------*/
html {
  background: #fff;
  color: #333;
}

Choosing A Font Face

First, let’s choose a face in which to set our project. There is, as you know, a solid base of Web-safe fonts to choose from. There are also amazing services like Fontdeck and Typekit that leverage @font-face to add non-standard fonts in a fairly robust way.

We’re not going to use any of those, though. To prove that technical type can make anything look better, let’s restrict ourselves to a typical font stack.

Let’s use a serif stack for this project, because technical type works wonders on serif faces:

html {
  font-family: Cambria, Georgia, "Times New Roman", Times, serif;
  background: #fff;
  color: #333;
}

Cambria is a beautiful font, specifically designed for on-screen reading and to be aesthetically pleasing when printed at small sizes. If you want to alter this or use a sans-serif stack, be my guest.

On Using Helvetica

If you’d like to use Helvetica in your stack, remember that Helvetica looks awful as body copy on a PC. To alleviate this, use the following trick to serve Helvetica to Macs and Arial to PCs (you can find more details about this trick in Chris Coyier’s recent article Sans-Serif):

html {
  font-family: sans-serif; /* Serve the machine’s default sans face. */
  background: #fff;
  color: #333;
}

Beware! This is a hack. It works by using a system’s default sans font as the font for the page. By default, a Mac will use Helvetica and a PC will use Arial. However, if a user has changed their system preferences, this will not be the case, so use with caution.

Choosing A Font Size

Oliver Reichenstein authored an inspiring article, way back in 2006, stating that the ideal size for type on the Web is 16 pixels: the user agents’ standard. This insightful article changed the way I work with type; it’s well worth a read. We’ll use 16 pixels as a base size, then. If you want to use another font size, feel free, but if you stick with 16 pixels, your CSS should look something like this:

html {
  font-family: Cambria, Georgia, "Times New Roman", Times, serif;
  background: #fff;
  color: #333;
}

If you want to use, say, 12 pixels, it will look like this:

html {
  font-family: Cambria, Georgia, "Times New Roman", Times, serif;
  font-size: 0.75em; /* 16 * 0.75 = 12 */
  background: #fff;
  color: #333;
}

You’ll be left with a basic layout (demo).

Choosing A Grid System

The grid is an amazing tool, and it’s not just for typographical ventures. It ensures order and harmony in your designs.

Some grid systems out there, in my opinion, go a little overboard and offer 30 or more columns, all awkwardly sized. For this tutorial, we’ll use Nathan Smith’s 16-column 960 Grid System (demo). 960.gs is amazing; its beauty lies in its simplicity. It is an ideal size for designs narrower than 1020 pixels, it has a good number of columns, and the numbers are easy to work with. You might also notice that the 960 Grid System only has 940 pixels of usable space. “960� comes from the 10 pixels of gutter space on either side.

Update your CSS to use a guide background image:

html {
  font-family: Cambria, Georgia, "Times New Roman", Times, serif;
  background: url(…/img/css/grid-01.png) center top repeat-y #fff;
  color: #333;
  width: 940px;
  padding: 0 10px;
  margin: 0 auto;
}

You should now have something like this:

02 in Technical Web Typography: Guidelines and Techniques

Choosing A Measure

We have our font size, so now we need to work out our ideal line length, or “measure.� Robert Bringhurst writes in The Elements of Typographic Style that, “anything from 45 to 75 characters is widely regarded as a satisfactory length of line….�

A measure that is too short causes the eye to jump awkwardly from the end of line x to the start of line x + 1, and a measure that’s too long can cause the reader’s eye to double back. You can circumvent this somewhat by following these rules of thumb:

  • for a longer measure, use slightly greater leading;
  • for a shorter measure, use slightly smaller leading.

So, a measure of 45 to 75 characters is the optimum for readability in columns of text. I can pretty much guarantee that after you learn this, every massively, overly long measure you see on the Web will annoy you spectacularly.

Here are 69 characters, a nice middle ground between the recommended 45 and 75:

Lorem ipsum dolor sit amet, consectetuer adipiscing elit accumsan

Paste that into your page, and count how many red columns it covers. This is how wide your measure will be:

03 in Technical Web Typography: Guidelines and Techniques

Here we have text spanning eight columns, which is 460 pixels of 960.gs. Update your CSS to read as follows:

/*------------------------------------*\
  MAIN
\*------------------------------------*/

html {
  font-family: Cambria, Georgia, "Times New Roman", Times, serif;
  background: url(…/img/css/grid-01.png) center top repeat-y #fff;
  color: #333;
}

body {
  width: 460px;
  margin: 0 auto;
}

04 in Technical Web Typography: Guidelines and Techniques

If you picked a font size other than 16 pixels, make sure your measurements reflect this!

Vertical Rhythm: Setting A Baseline

Leading (which rhymes with “wedding�) is a typographical term from way back when typographers manually set type in letterpress machines and the like. The term refers to the act of placing lead between lines of type in order to add vertical space. In CSS, we call this line-height.

Line height should be around 140%. This isn’t a great number to work with, and it’s only a general rule, so we’ll use 150% (or 1.5 em). This way, we simply need to multiply the font size by one and a half to determine our leading.

Some general rules for leading:

  • with continuous copy, use large leading;
  • with light text on dark background, use large leading;
  • with long line lengths, use large leading;
  • with large x-height, use large leading;
  • with short burst of information, use small leading.

If you used a 16-pixel font size, then your line height will be 24 pixels (16 pixels × 1.5 em = 24 pixels). If you used a 12-pixel font size, then your line height will be 18 pixels (12 pixels × 1.5 em = 18 pixels).

The Magic Number

For math-based tips on typography, check out this video on Web type by Tim Brown. The fun starts at 13:35.

The pixel value for your line height (24 pixels) will now be your magic number. This number means everything to your design. All line heights and margins will be this number or multiples thereof. I find it useful to always keep it in mind and stick to it.

Now that we know our general line height, we can define a baseline grid. The grid we currently have aligns only the elements in the y axis (up and down). A baseline grid aligns in the x axis, too. We need to update our background image now to be 24 pixels high and have a solid 1-pixel line at the bottom, like this.

Again, if you chose a font size of 12 pixels and your line height became 18 pixels, then your background image needs to be 18 pixels high with a solid horizontal line on the 18th row of pixels.

Your CSS should now look something like this:

html {
  …
}

body {
  width: 460px;
  margin: 0 auto;
  line-height: 1.5em;
}

Your page should now look something like this:

05 in Technical Web Typography: Guidelines and Techniques

As you can see, the text hovers slightly above the horizontal guideline. This doesn’t mean that anything is set incorrectly; it is merely the offset. This could hinder the process, so either tweak the padding on the body to move the page or alter the position of the background image to move it around a little. Some tinkering in Firebug tells me that the CSS needs to be as follows:

html {
  …
  background: url(…/img/css/grid.png) center -6px repeat-y #fff;
  …
}

That gives me the following — and everything lines up perfectly:

06 in Technical Web Typography: Guidelines and Techniques

Now, let’s get back to the magic number. Maybe you think the text is sitting too close to the top of the screen? Well, to remedy that, we’ll move the text down the page by a multiple of that magic number — let’s say 72 (3 × 24 = 72 pixels). Now adjust your CSS to read:

body {
  width: 460px;
  margin: 0 auto;
  line-height: 1.5em;
  padding-top: 72px;
}

Substitute your own magic number if you used a different font size.

We should get this:

07 in Technical Web Typography: Guidelines and Techniques

It took some doing, but our canvas is ready at last!

Setting A Scale

Okay, our reset has made our h1 and p the same size. We need to get some basic font styles in there. Add this block of code to the end of your CSS:

/*------------------------------------*\
  TYPE
\*------------------------------------*/
/*--- HEADINGS ---*/

h1, h2, h3, h4, h5, h6 {
  margin-bottom: 24px;
  font-weight: bold;
}

/*--- PARAGRAPHS ---*/

p {
  margin-bottom: 24px;
}

Recognize your magic number? Let’s refresh the page and take a look:

08 in Technical Web Typography: Guidelines and Techniques

Your magic number will now be the default margin-bottom value for all of your elements. This, combined with the line height, will keep everything on the baseline grid.

What we now need, though, are some different font sizes for the headings. We need a typographic scale. I suggest this:

  • h1 = 24 pixels,
  • h2 = 22 pixels,
  • h3 = 20 pixels,
  • h4 = 18 pixels,
  • h5 = 16 pixels,
  • h6 = 16 pixels.

Many people work in pixels, but I much prefer working in ems. An em is proportional to the current size of the font: 1 em in 72-point Georgia is 72 points, and 1 em in 8-point Garamond is 8 points.

So, if our base font size is 16 pixels (1 em), then 24 pixels would be 1.5 ems (24 ÷ 16 = 1.5). If we continue, we end up with:

  • h1 = 24 pixels → 24 ÷ 16 = 1.5 ems
  • h2 = 22 pixels → 22 ÷ 16 = 1.375 ems
  • h3 = 20 pixels → 20 ÷ 16 = 1.25 ems
  • h4 = 18 pixels → 18 ÷ 16 = 1.125 ems
  • h5 = 16 pixels → 16 ÷ 16 = 1 ems
  • h6 = 16 pixels → 16 ÷ 16 = 1 ems

Next, we need to make sure the line height of each is 24 pixels. This means that the h1 at a 24-point font size will have a line height of 1 em. Here’s the math:

(magic number) ÷ (font size) = (line height)

Using our scale, the full CSS for the headings (including the math) is:

/*--- HEADINGS ---*/
h1, h2, h3, h4, h5, h6 {
  margin-bottom: 24px;
  font-weight: bold;
}

h1 {
  font-size: 1.5em; /* 24px --> 24 ÷ 16 = 1.5 */
  line-height: 1em; /* 24px --> 24 ÷ 24 = 1 */
}

h2 {
  font-size: 1.375em; /* 22px --> 22 ÷ 16 = 1.375 */
  line-height: 1.0909em; /* 24px --> 24 ÷ 22 = 1.090909(09) */
}

h3 {
  font-size: 1.25em; /* 20px --> 20 ÷ 16 = 1.25 */
  line-height: 1.2em; /* 24px --> 24 ÷ 20 = 1.2 */
}

h4 {
  font-size: 1.125em; /* 18px --> 18 ÷ 16 = 1.125 */
  line-height: 1.333em; /* 24px --> 24 ÷ 18 = 1.3333333(3) */
}

h5, h6 {
  font-size: 1em; /* 16px --> 16 ÷ 16 = 1 */
  line-height: 1.5em; /* 24px --> 24 ÷ 16 = 1.5 */
}

There’s our typographic scale.

Now, to test it, let’s try the following markup:

<body>

  <h1>Your Name</h1>

  <h2>Your Name</h2>

  <h3>Your Name</h3>

  <h4>Your Name</h4>

  <h5>Your Name</h5>

  <h6>Your Name</h6>

  <p>Lorem ipsum dolor sit amet, consectetuer adipiscing elit accumsan</p>

</body>

You might notice that not all of the lines of text sit perfectly on a gridline, but that’s okay because they all honor the baseline! This is what I get:

09 in Technical Web Typography: Guidelines and Techniques

You might think that something has gone wrong. But if you look, the paragraph lies just fine once you get back to the normal font size. To be honest, I’m not entirely sure about what causes this effect; the numbers we used are all correct, and the vertical rhythm as a whole remains intact, but individual lines of larger text appear to be offset from the baseline. I think this could be due, in part, to the glyphs’ setting in their em box.

What Next?

Head back into your markup and remove everything except the h1. Now we’re ready to do something useful. Let’s make a little “About you”-page.

The h1 is the name. And the markup can simply be:

<!DOCTYPE html>
<html lang="en">
<head>
  <meta charset="utf-8" />
  <title>Harry Roberts</title>
  <link rel="stylesheet" type="text/css" href="css/style.css" />
</head>

<body>

  <h1>Harry Roberts</h1>

</body>
</html>

Now let’s add a little introductory paragraph about yourself. Mine reads:

<p>Hi there. My name is Harry Roberts.
I am a Web developer and type geek from the UK.
I love all things Web dev, and I am a huge advocate
of Web standards and proper ethics.</p>

Let’s experiment with altering the font size arbitrarily. Add this to your CSS:

*--- PARAGRAPHS ---*/
p {
  margin-bottom: 24px;
}

body > p:first-of-type {
  font-size: 1.125em;
    /* 18px → 18 ÷ 16 = 1.125 */

  line-height: 1.333em;
    /* 24px → 24 ÷ 18 = 1.3333(3) */
}

Here we’re giving the first paragraph — a direct descendant of the body element — a font size of 18 pixels and a line height of 24 pixels. See, there’s your magic number again!

You might again see slight oddities with the paragraph sitting on the baseline. To make sure the vertical rhythm is still intact, duplicate the paragraph once more. You should get this:

10 in Technical Web Typography: Guidelines and Techniques

Here you can see that the vertical rhythm is still intact and working correctly.

Now for the best bits.

Tips on Technical Typography

There’s a good chance that you won’t want the grid to always be on, so change this CSS:

/*------------------------------------*\
  MAIN
\*------------------------------------*/

html {
  font-family: Cambria, Georgia, "Times New Roman", Times, serif;
  background: url(…/img/css/grid.png) center -6px repeat-y #fff;
  color: #333;
}

body {
  width: 460px;
  margin: 0 auto;
  line-height: 1.5em;
  padding-top: 72px;
}

… to this:

/*------------------------------------*\
  MAIN
\*------------------------------------*/

html {
  font-family: Cambria, Georgia, "Times New Roman", Times, serif;
  color: #333;
}

body {
  width: 460px;
  margin: 0 auto;
  line-height: 1.5em;
  padding-top: 72px;
  background: #fff;
}

body:hover {
  background: url(…/img/css/grid.png) center -6px repeat-y #fff;
}

This will show the grid when you hover over the body, and hide it when you don’t.

Spacing And Setting Paragraphs

We’ve sorted out the magic number, and we know we should use it to space the elements, but there’s more than one way to denote the beginning of a new paragraph. One is the method we’re already using: inserting a blank space (one magic number) between the paragraphs. The second is indentation.

Typically, you would indent every paragraph except the first in a body of text; the first paragraph has no indent and the second, third, fourth and so on do have an indent (typically with a width of 1 em).

Enric Jardi writes in Twenty-Two Tips on Typography that, “… you must not use both indentation and a line break at the same time; that is redundant.�

Here’s some quick CSS for indenting only the second and subsequent paragraphs in a body of text:

p {
  margin-bottom: 24px;
}

p+p {
  text-indent: 1em;
  margin-top: -24px;
}

For an explanation of how and why this works, refer to my other article, “Mo’ Robust Paragraph Indenting.� You might also want to look at Jon Tan’s silo.

Alignment

When setting type on the Web, use a range-left, ragged-right style. This basically means left-justifying the type. If you use a sufficiently long measure, then your rags (the uneven edges on the right side of a left-aligned paragraph) will generally be clean; the raggedness of their appearance can, however, be exacerbated at short measures, where a large percentage of each line could end up as white space.

Justified typesetting can look great but lead to unsightly “rivers� in the text. To avoid this, rewrite the copy to remove them, or use something like Hyphenator.js, which is remarkably effective.

Proper Quotations Marks, Dashes And Ellipses

Quotation Marks

Many people are unaware that there are proper quotation marks and “ambidextrous� quotation marks. The single- and double-quotation keys on your keyboard are not, in fact, true quotation marks. They are catch-alls that can function as both left and right single and double quotation marks; they are, essentially, four glyphs in one key.

The reason behind this is simply space. A keyboard cannot feasibly fit proper left and right single and double quotation marks.

So, what is a proper quotation mark? A curly (or “bookâ€�) quotation mark is rounded and more angular than an ambidextrous (keyboard-style) quotation mark. Left single and left double quotation marks look like this: ‘ and “ (&lsquo; and &ldquo;, respectively). Right single and right double quotation marks look like this: ’ and ” (&rsquo; and &rdquo;, respectively).

Many people incorrectly refer to ambidextrous quotation marks as “primes,â€� but a prime is a different glyph. Single and double primes look like this: ′ and ″ (&prime; and &Prime;, respectively). They are used to denote feet and inches (e.g. 5′10″).

I said that one key incorporates four glyphs. In fact, two keys incorporate six glyphs.

Which Quotation Marks Should You Use?

The type of quotation marks to use (double or single) varies from country to country and style guide to style guide. Double quotation marks are typically used to quote a written or spoken source, and single quotation marks are used for quotes within quotes.

However, I much prefer Jost Hochuli’s advice in Detail in Typography: “… the appearance is improved by using the more obtrusive double quotation marks for the less frequent quotations within quotations.� Which basically means, for a nicer appearance, use single quotation marks, and then double quotation marks for quotes within quotes. (If I had a penny for every time I said quotes in this section.)

For example:

‘And then he said to me, “Do you like typography?” And naturally I said that I did.’

Use a right single quotation mark where you’d normally use an apostrophe in text: “I’m a massive typography nerd!� (I&rsquo;m a massive typography nerd!)

In short, stop using those horrible keyboard quotation marks, and start using lovely curly marks in your work.

Non-English Quotation Marks

The quotation marks we’ve covered are used in English, but quotes look different in other languages.

French and Spanish use guillemets, «like this» (&laquo;like this&raquo;). In Danish, they are used »like this« (&raquo;like this&laquo;). In German, using a combination of bottom and regular double quotation marks is common, „like this“ (&bdquo;like this&ldquo;).

For a great overview of other non-English quotation marks, see the Wikipedia entry on “Non-English Usage of Quotation Marks.�

Dashes

We know that keyboards can’t accommodate all quotation marks; and they can’t accommodate all types of dashes either. The hyphen key (-) is another catch-all. There are three main types of dash: the em dash, en dash and hyphen.

The em dash (&mdash;) denotes a break in thought—like this. It’s called the “emâ€� dash because, traditionally, it is one em wide. Em dashes are usually set without spaces on either side (as above).

The en dash (&ndash;) is traditionally half the width of an em dash. It is used to denote ranges, as in “please read pages 17–25â€� (17&ndash;25). It can also denote relational phrases, as in “father–sonâ€� or “New York–London.â€�

The hyphen simply ties together compound words, as in “front-end developer.�

The em dash, en dash and hyphen are different, and each has unique uses.

Ellipsis

An ellipsis is used to denote a thought trailing off. It is also used as a placeholder for omitted text in lengthy quotations.

The ellipsis has become the bane of my life. I often come across people who use a series of dots (periods) in place of a proper ellipsis, like so……

An ellipsis is not three dots. It is one glyph that looks like three dots. Its HTML entity is &hellip; (as in horizontal ellipsis).

So there were a few glyphs for you to use with quotes, primes, dashes and ellipses. Let’s recap:

Name/GlyphHTML entityExample
Quotes and primes
Left single quote ‘ and right single quote ’&lsquo; and &rsquo;‘Hey, this is a quote!’
Left double quote “ and right double quote ”&ldquo; and &rdquo;‘Hey, this is a quote “within another” quote!’
Single prime ′ and double prime ″&prime; and &Prime;The girl is 7′10″!
Dashes
Em dash —&mdash;A break in thought—like this
En dash –&ndash;Ages 2–5
Hyphen -- keyfront-end developer
Ellipsis
Ellipsis …&hellip;To be continued…

In addition to these common glyphs, there are numerous others: from the division symbol (÷ or &divide;) to the section symbol (§ or &sect;). If you’re interested in special characters and glyphs, then Wikipedia’s article on “Punctuationâ€� is a good place to start (just keep clicking from there).

Hanging Punctuation

Punctuation should be hung; quotation marks and bullet points should be clear of the edges of surrounding text. If that doesn’t make sense, don’t worry! Let’s add a new section to your page. Remove that duplicated paragraph and replace it with a list of facts about yourself. Mine looks like this:

<ul>
  <li>
    Web development
    <ul>
      <li>HTML(5)</li>
      <li>CSS(3)</li>
      <li>Accessibility</li>
      <li>Progressive enhancement</li>
    </ul>
  </li>
  <li>
    Web design
    <ul>
      <li>Typography</li>
      <li>Grids</li>
    </ul>
  </li>
</ul>

Add this to the end of your CSS sheet:

/*--- LISTS ---*/
ul, ol {
  margin-bottom: 24px;
    /* Remember, if your magic number is
    different to this, use your own. */
}

ul {
  list-style: square outside;
}

ul ul,
ol ol {
  margin: 0 0 0 60px;
}

My page now looks like this:

11 in Technical Web Typography: Guidelines and Techniques

We’ve given the lists our magic number as a margin, set the bullets to be hung outside of the text (i.e. the bullets will sit in the white of the gutter, not the pink of the column) and indented lists within lists by one grid column.

Experiment by nesting lists more and more deeply:

12 in Technical Web Typography: Guidelines and Techniques

Hang quotation marks as well as bullets. Let’s add some more text and a quote to our page:

<p>Vestibulum adipiscing lectus ut risus adipiscing
mattis sed ac lectus. Cras pharetra lorem eget diam
consectetur sit amet congue nunc consequat. Curabitur
consectetur ullamcorper varius. Nulla sit amet sem ac
velit auctor aliquet. Quisque nec arcu non nulla adipiscing
rhoncus ut nec lorem. Vestibulum non ipsum arcu. Quisque
dapibus orci vitae massa fringilla sit amet viverra nulla.</p>

<blockquote>

  <p>&ldquo;Lorem ipsum dolor sit amet,
  consectetuer adipiscing elit. In accumsan diam
  vitae velit. Aliquam vehicula, turpis sed egestas
  porttitor, est ligula egestas leo, at interdum
  leo ante ut risus.&rdquo;
  <b>&mdash;Joe Bloggs</b></p>

</blockquote>

The markup here is pretty straightforward: a blockquote surrounding a paragraph. You might also notice the use of a b element to mark up the name. The HTML spec states that “The b element [is used for] spans of text whose typical typographic presentation is boldened.� This is a loose definition, so its use for bolding the name of a person is acceptable.

Now, add this to the end of your CSS sheet:

/*--- QUOTES ---*/
blockquote {
  margin: 0 60px 0 45px;
  border-left: 5px solid #ccc;
  padding-left: 10px;
  text-indent: -0.4em;
}

blockquote b {
  display: block;
  text-indent: 0;
}

Here we indent the quote by 60 pixels from the left and right (i.e. 45-pixel margin + 5-pixel border + 10-pixel padding = 60 pixels), taking it in by one column of the grid. We then use a negative text-indent to make the opening quote hang outside of the body of text. The number I used works perfectly for Cambria, but you can experiment with the font of your choice. (Don’t forget to remove the text-indent on the b.) Now we know how to hang bullets and quotation marks.

13 in Technical Web Typography: Guidelines and Techniques

Maybe you’re wondering why I’m using double quotation marks here after recommending single quotation marks. The reason is purely aesthetic. Hanging double quotation marks in blockquote tags simply looks nicer.

Guillemets

Now that we’ve done that, let’s add a “Read moreâ€� link to get us from this little page to, say, our portfolio’s full “Aboutâ€� page. We want to imply direction or movement with this link because it’s going to take us elsewhere. We could, as many people do, use a guillemet (», &raquo;), but — as we covered earlier — French, German and other languages use this glyph as a quotation mark. Therefore, it shouldn’t be used stylistically. Add this markup to your page:

<p><a href="http://csswizardry.com/about/"
class="read-more">Read more</a></p>

Add this to the end of your CSS file:

/*--- LINKS ---*/
a {
  color: #09f;
  text-decoration: none;
}

a:hover {
  text-decoration: underline;
}

a:active,
a:focus {
  position: relative;
  top: 1px;
}

.read-more:after {
  content: "\00A0\000BB"; /* Insert a space then right angled-quote */
}

This simply places an encoded space and right-angled quotation mark after the “Read more� link by using CSS, which means you don’t have to add that quotation mark to your markup.

14 in Technical Web Typography: Guidelines and Techniques

You can use content:""; to keep the markup clean. This means that other things, such as stylistic right-angled quotation marks and other decorative items of type, can be added with CSS to keep the markup free of non-semantic elements.

Let’s say you wanted to add tildes to either side of a heading:

h1 {
  text-align: center;
}
h1:before {
  content: "\007E\00A0"; /* Insert an tilde, then a space. */
}
h1:after {
  content: "\00A0\007E"; /* Insert a space, then an tilde. */
}

Some Images

Elements such as tables and images are notoriously difficult to fit into baseline grids unless you save every one as a multiple of your magic number. However, we can float images left and right within the y axis of the grid and allow text to fit the baseline around it. Grab an image of yourself (or your cat or whatever) and crop it to a width that fits our 16-column 960.gs. I’m going to use a 160-pixel-wide image (i.e. three grid columns).

Place it in the markup just after your h1, thus:

…
<body>

  <h1>Harry Roberts</h1>

  <img src="img/me.jpg" alt="A photo of me." id="me" />

If you hit “Refreshâ€� now, it will likely break the baseline. Never fear — add this CSS:

/*------------------------------------*\
  IMAGES
\*------------------------------------*/

#me {
  float: right;
  margin: 0 0 0 20px;
  display: block;
  width: 148px;
  height: auto;
  padding: 5px;
  border: 1px solid #ccc;

  -moz-border-radius: 2px;
  -webkit-border-radius: 2px;
  -o-border-radius: 2px;
  border-radius: 2px;
}

Notice how the image doesn’t appear to sit on the baseline, but the rest of the text does? Beautiful, isn’t it?

So, there you have it. Using nothing more than plain ol’ browser text, one image, a lot of typography knowledge and some careful, caring attention, you’ve made a full page of typographic splendor — a page that uses a grid, a baseline, proper punctuation and glyphs, an ideal measure and leading and a typographic scale.

Now get in there! Add elements, subtract them, add colors, add your own creative type. Just remember the few simple rules and your magic number, and you’re away!

15 in Technical Web Typography: Guidelines and Techniques
The final piece, with the grid.

16 in Technical Web Typography: Guidelines and Techniques
The final piece, without the grid.

Final Words

In this admittedly long piece, we have discussed only technical typography. Everything in this article can be applied to almost any project. None of it was speculation; these are tried and tested methods and proven tips for beautiful Web type.

If you’d like to see more creative applications of Web type, then check out the work of the following creatives (each of whom has had much influence on my career so far):

  • Oliver Reichenstein of Information Architects
    A huge inspiration to me and a very knowledgeable guy who has a passion and talent for readable, sensible and beautiful type on the Web.
  • Jon Tan
    Jon’s website is gorgeous. He is a member of the International Society of Typographic Designers (ISTD), and his writings and “silo� (on his personal website) are a hive of typographical information.
  • Jos Buivenga
    Not strictly a Web-type guy, but Jos is the creator of some of the most beautiful (and free!) fonts in existence. His work got me hooked on typography.
  • Khoi Vinh
    His timelessly beautiful website spurred my love for grids. He also recently wrote a book on that very subject.

Keep in mind that you don’t have to be the world’s best designer to create beautiful type. You just have to care.

Further Reading

(al)


© Harry Roberts for Smashing Magazine, 2011. | Permalink | Post a comment | Smashing Shop | Smashing Network | About Us
Post tags: , , ,


Flexible height vertical centering with CSS, beyond IE7

One of the most common CSS questions is undoubtedly how to center an element vertically. There are several techniques for doing that, but many, including one that I posted more than seven years ago in Centering with CSS, rely on specifying a height for the centered content. That obviously makes the technique somewhat inflexible.

I recently needed to center something both horizontally and vertically and started thinking that there might be better ways of doing it if I could disregard IE7 and older. The technique I ended up with uses display:table to center the whole page and seems to work well, though there is one caveat.

Read full post

Posted in , .


jQuery Menus with Stunning Animations

Advertisement in jQuery Menus with Stunning Animations
 in jQuery Menus with Stunning Animations  in jQuery Menus with Stunning Animations  in jQuery Menus with Stunning Animations

jQuery is a great tool that helps our imagination turn ideas into reality. We can do almost everything we can think of with the help of this useful tool. Apart from being a lightweight cross-browser JavaScript library that simplifies HTML and Ajax interactions for rapid web development, it also gives sites that sleek look while also representing important data in a very attractive way.

You should always keep in mind that once a user lands on your site, the fist thing s/he does is to navigate and check out the content. If your site lacks in providing the user an attractive navigation, s/he will loose interest and will be clicking on that ‘Back’ button within seconds — even if the content on the site is excellent. Hence to stand apart you need to make your menu on your site different and appealing to users.

We’ve collected some tutorials to help you understand how to give your menus that stunning visual effect and animations. Please feel free to share any sites you’ve discovered that have been developed with jQuery. Enjoy!

Scrollable Thumbs Menu with jQuery
In this tutorial you can learn how to create a fixed menu with scrollable thumbs which you can nicely control with your mouse:

Fashion1 in jQuery Menus with Stunning Animations

Sweet Menu
Sweet Menu takes an ordinary list of links and makes it a sweet looking menu. It does this by utilizing jQuery and it’s plugin system:

Sweet in jQuery Menus with Stunning Animations

Creating a Fancy Menu Using CSS3 and jQuery
Here you can see how a fancy menu can be created with the help of the new CSS3 features along wth jQuey:

Lava-1 in jQuery Menus with Stunning Animations

Rocking and Rolling Rounded Menu with jQuery
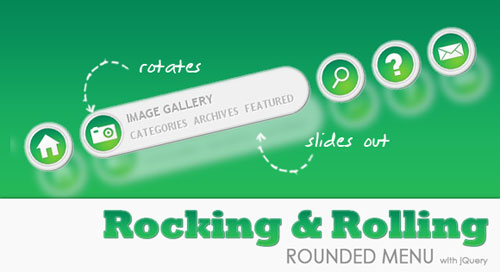
In this tutorial you can make use of the rotating and scaling jQuery patch from Zachary Johnson to create a menu with little icons that will rotate when hovering:

Rockroll1 in jQuery Menus with Stunning Animations

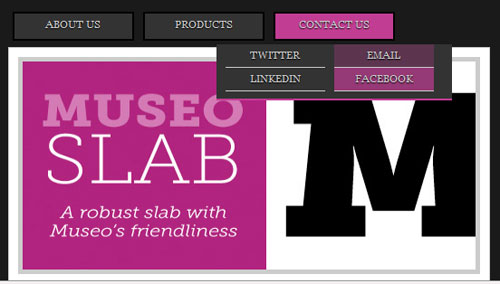
Slick Drop-Down Menu with Easing Effect Using jQuery & CSS
Drop-down menus are an excellent feature because they help clean up a busy layout. When structured correctly, drop-down menus can be a great navigation tool:

Erasing in jQuery Menus with Stunning Animations

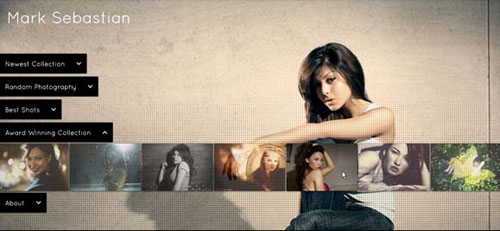
Thumbnails Navigation Gallery with jQuery
Here is a great tutorial on how to create an extraordinary gallery with scrollable thumbnails that slide out from a navigation:

Thumbnailsnavigation in jQuery Menus with Stunning Animations

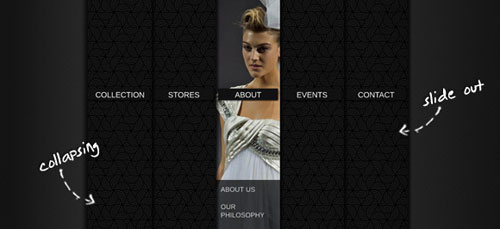
Collapsing Site Navigation with jQuery
A collapsing menu that contains vertical navigation bars and a slide out content area can be created like this:

Collapsingsitenavigation in jQuery Menus with Stunning Animations

jStackmenu
Here is a jQuery UI widget for Stack Menus. Click here to find out more:

Heart in jQuery Menus with Stunning Animations

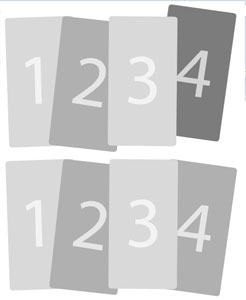
Create Your Own “kwicks� jQuery Effect
Check out this tutorial to find out how you can create your own kwicks jQuery effect:

Kwicks in jQuery Menus with Stunning Animations

Overlap that Menu!
In this tutorial, you can learn how to achieve overlapping effects to your menu:

Overlap1 in jQuery Menus with Stunning Animations

Overlay Effect Menu with jQuery
In this tutorial you can learn how to create a simple menu that will stand out once you hover over it by covering everything except the menu with a dark overlay:

Overlay1 in jQuery Menus with Stunning Animations

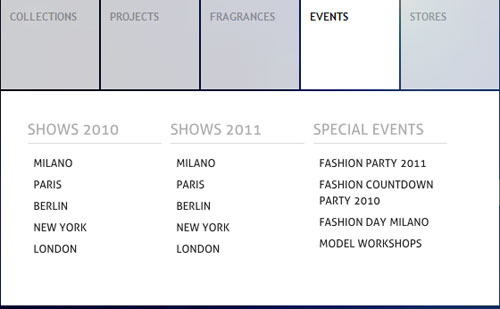
jQuery Multicolor Animation Drop-Down Navigation Menu
Check out this tutorial on how to create a multicolor drop-down navigation menu with jQuery:

Multicolor1 in jQuery Menus with Stunning Animations

jQuery Floating Menu
A simple navigation menu that “follows� page scrolling and expands on mouse over — made with CSS and jQuery:

Floating in jQuery Menus with Stunning Animations

Kwicks for jQuery & a Horizontal Animated Menu
Here is a walkthrough where you can see the final result of using Kwicks. A jQuery plugin that builds a horizontal menu with a nice effect like Mootools but much more customizable and versatile:

Horizontal in jQuery Menus with Stunning Animations

Fading Navigation Menu
Here is a simple, neat navigation menu using CSS sprites and a bit of jQuery code to give it a visually appealing fade effect:

Fade in jQuery Menus with Stunning Animations

UI Elements: Search Box with Filter and Large Drop Down Menu
A tutorial that will show you how to create a search box with a filter and a large drop-down menu:

Largedropdown in jQuery Menus with Stunning Animations

jQuery Convertion: Garagedoor Slider Navigation Effect
Learn how to turn your menu to jQuery and give it a Garagedoor slider navigation effect as well:

Garage in jQuery Menus with Stunning Animations

Create Bounce Out Vertical Menu with jQuery
A simple bounce out vertical menu is created here with the help of a little bit of CSS3 and jQuery Framework to create a vertical menu which on mouse hover gives a nice bounce out sliding effect:

Bouncer in jQuery Menus with Stunning Animations

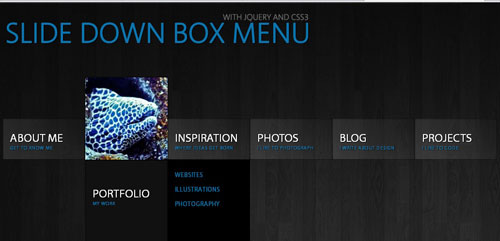
Slide Down Box Menu with jQuery and CSS3
Learn how to create a unique sliding box navigation. The idea here is to make a box with the menu item slide out, while a thumbnail pops up:

Slidedown in jQuery Menus with Stunning Animations

LavaLamp Plugin
This plugin has some attractive features like targeting and container options, automatic default location, vertical and horizontal morphing:

Lavalamp in jQuery Menus with Stunning Animations

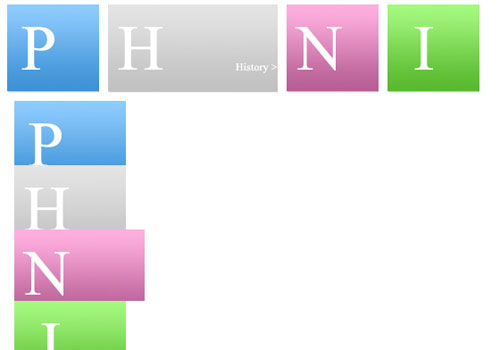
Little Boxes Menu with jQuery
A nice display of little boxes that animate randomly when the menu item is clicked. It then expands and reveals a content area for some description or links:

LittleBoxes1 in jQuery Menus with Stunning Animations

Horizontal Scrolling Menu Made with CSS and jQuery
Here is a tutorial that explains how to make a horizontal scrolling menu made with CSS and jQuery:

Vertical in jQuery Menus with Stunning Animations

Beautiful Background Image Navigation with jQuery
Learn how to create a beautiful navigation that has a background image slide effect. The main idea here is to have three list items that contain the same background image but with a different position:

BackgroundImageNavigation in jQuery Menus with Stunning Animations

Awesome Cufonized Fly-out Menu with jQuery and CSS3
One of our favourites! Here is a full page cufonized menu that has two nice features:

Cufonized in jQuery Menus with Stunning Animations

(ik)


CSS: Innovative Techniques and Practical Solutions

Advertisement in CSS: Innovative Techniques and Practical Solutions
 in CSS: Innovative Techniques and Practical Solutions  in CSS: Innovative Techniques and Practical Solutions  in CSS: Innovative Techniques and Practical Solutions

Although CSS isn’t that difficult, useful CSS techniques are not easy to find. Sometimes finding a cross-browser solution might take time, but you don’t have to reinvent the wheel every single time. Other designers may have had the same problem in the past and thus the main goal of this round-up is to share with you a goldmine of new techniques which you will hopefully find very useful and valuable. We also hope that these tutorials and articles will help you solve common design problems and find new ways of approaching tricky CSS issues.

The main goal of the article is to present powerful new CSS techniques, encourage experimentation in the design community and push CSS forward. Please notice that we feature both experimental demos and practical techniques in this article. Next week we will present even more useful new tools and resources for front-end developers. We sincerely appreciate the efforts of the design community — thank you, guys!

Interesting and Original Techniques

Wonder-Webkit: 3D Transforms
This is a remarkable example of what can be done using CSS3 3D transformations. The interesting stuff is the possibility of manipulate the transformation matrix of any element of the DOM, In this case we get the matrix given only the four end points of the element. Don’t forget to click on the items, too. Who thought a couple of years ago that something like that would be possible with only CSS?

Css-187 in CSS: Innovative Techniques and Practical Solutions

CSS Box Shadow & Text Shadow Experiments
The CSS box-shadow and text-shadow allow us to create some pretty cool design elements that don’t even look like shadows. The key is to think about how CSS shadows work and use them to get the desired effect. The article features three remarkable examples of using box-shadow property creatively to achieve effects that don’t have much to do with shadows.

Triangle in CSS: Innovative Techniques and Practical Solutions

CSS3 Depth of Field
Sawyer Hollenshead’s experiment is an attempt to create the “Depth of Field” effect with CSS. The blurry text is accomplished using text-shadow, with the text color set to transparent. Take a look at the demo and don’t forget to press ‘n’ to toggle animation.

New-css-techniques-119 in CSS: Innovative Techniques and Practical Solutions

Art Deco Selectable Text
This is a quick proof-of-concept of split typography, based on Pierre Fix-Masseau’s Art Deco style. The challenge was to have this kind of ‘split letters’ as part of a web page layout, while retaining the ability to select text.

Art-deco in CSS: Innovative Techniques and Practical Solutions

CSS3 :toggle-button without JavaScript
This demo presents a CSS3 toggle-button that works without JavaScript. If you ever need it: You stack two <a>s on top of each other and then disable pointer-events for the top <a> on :target.

Css-268 in CSS: Innovative Techniques and Practical Solutions

About War and Bananas
This student project explores new ways of styling and designing websites in an artistic way. The students from Merz Akademie in Germany used Picasso’s “Guernica” as the footage, seperated the picture into different layers and animated them using CSS.

Css-150 in CSS: Innovative Techniques and Practical Solutions

WebKit Clock
This demo is driven by HTML5 canvas, CSS3, JavaScript, Web Fonts, SVG and no image files. The CSS file is huge, yet the result is quite remarkable.

Css-146 in CSS: Innovative Techniques and Practical Solutions

Pure CSS Slideshow
This technique uses CSS transforms and positioning to create the pure CSS-based slideshow. Unfortunately, no documentation is available (yet).

New-css-techniques-102 in CSS: Innovative Techniques and Practical Solutions

CSS Dock
This is a quick CSS3 experiment trying to replicate the Dock of OS X, complete with labels, animations, reflections and indicators. It uses CSS transitions for the magnification effect and the :target pseudo-class and CSS animations for the bouncing effect.

New-css-techniques-108 in CSS: Innovative Techniques and Practical Solutions

Andrew Hoyer
An interesting experiment by Andrew Hoyer. The walking man is implemented using only CSS3 animations and simple HTML. The key idea behind all of this is the fact that a CSS transformation applied to an element also applies to all of its children. Works in Webkit-browsers only.

New-css-techniques-197 in CSS: Innovative Techniques and Practical Solutions

Type study: An all CSS button
Dan Cederholm explains how through the use of box-shadow, text-shadow, border-radius, and CSS gradients, we can create a highly polished three-dimensional, responsive button that doesn’t require images.

New-css-techniques-103 in CSS: Innovative Techniques and Practical Solutions

3D Text
This technique uses multiple text-shadows to create a 3D appearance of the text on any HTML element. No extra mark-up is used. Works in the latest builds of Safari, Chrome, Firefox, and Opera.

3d-text in CSS: Innovative Techniques and Practical Solutions

Spin those Icons with CSS3
Tom Kenny features a neat effect which spins the social icons with the help of a CSS transforms and transition when you hover over them. A very nice enhancement.

Css-111 in CSS: Innovative Techniques and Practical Solutions

The Shapes of CSS
The article presents various geometrical forms, all created using CSS and a single HTML element. The following forms are presented: square, rectangle, circle, oval, triangle, parallelogram, trapezoid, star, pentagon, hexagon, octagon, heart and infinity — all using CSS only.

Css-272 in CSS: Innovative Techniques and Practical Solutions

CSS background image hacks
Emulating background image crop, background image opacity, background transforms, and improved background positioning. The article explains a few hacks relying on CSS pseudo-elements to emulate features unavailable or not yet widely supported by modern browsers.

Background-image-hacks in CSS: Innovative Techniques and Practical Solutions

Making Better Select Elements with CSS3 and jQuery
This tutorial explains how to take an ordinary select element, and replace it with a better looking version, while keeping all the functionality intact. It uses CSS3 multiple background and a transparent PNG image as a sprite. Currently, multiple backgrounds are supported by Firefox, Safari, Chrome and Opera. For Internet Explorer and older versions of the first browsers, a fallback is defined, which is basically just a regular version of the background. When parsing the CSS document, browsers that do not understand multiple background will just ignore the rule and use the plain one.

Css-190 in CSS: Innovative Techniques and Practical Solutions

CSS-Only 3D Slideshow
This tutorial shows how to create a 3D slideshow using only HTML and CSS. No JavaScript required. You’ll be able to mimic a click event with CSS using the :focus pseudo-class and the HTML5 element <figcaption>, but the idea is the same. As the author admits, this method isn’t necessarily “betterâ€� than using JavaScript, but simply a neat alternative that takes advantages of the newest HTML5 elements.

New-css-techniques-157 in CSS: Innovative Techniques and Practical Solutions

Have Fun with Borders
This tutorial shows three simple technique to add a light shadow, “pressed” and “beveled” states to text blocks and images. By Soh Tanaka.

New-css-techniques-223 in CSS: Innovative Techniques and Practical Solutions

Animated CSS3 Owl
“What about having an owl that moved his eyes every so often and when hovered over would raise his wings while a few light rays would spin in the background. A little excessive? Probably. Necessary? Not at all. However, that’s exactly what I was looking to do with CSS3 transforms, transitions, and animations.” An interesting experiment, best viewed in Safari or Chrome.

Owl in CSS: Innovative Techniques and Practical Solutions

CSS Social Sign-in Buttons
This blog post describes a fairly simple technique for creating nice responsive CSS-buttons using a CSS sprite, border-radius, shadows and CSS gradients.

Css-258 in CSS: Innovative Techniques and Practical Solutions

Rotating color cube box with CSS3 animation, transforms and gradients
A yet another remarkable experiment that presents a rotating color cube using CSS3 animations and transforms. Be aware that the browser may slow down a bit when loading the demo.

Css-260 in CSS: Innovative Techniques and Practical Solutions

CSS3 Demo: 3D Interactive Galaxy
A CSS3 demo where you can interact with a procedurally generated 3D galaxy. In order to create the effect, the designer used 3D CSS properties available in Safari 5 and on the iPhone and iPad.

Galaxy in CSS: Innovative Techniques and Practical Solutions

Getting Hardboiled with CSS3 2D Transforms
Andy Clarke explains how to use CSS3 two-dimensional transforms to add realism to a row of hardboiled private detectives’ business cards. The working demo is available as well.

Css-261 in CSS: Innovative Techniques and Practical Solutions

How to create Microsoft Office Minibar with jQuery and CSS3
Janko Jovanovic explains how to create a Microsoft Office Minibar that exposes context-related functionality. In case of MS Word, context is a text selection. Since Minibar always pops up near the mouse pointer it enables users to quickly perform actions related to a selection.

New-css-techniques-171 in CSS: Innovative Techniques and Practical Solutions

Angled Content Mask with CSS
This article explains how to create angled CSS content “masks”. The idea is pretty simple and uses CSS transform property (rotation, to be more precise).

Bicycle in CSS: Innovative Techniques and Practical Solutions

Rotating Feature Boxes
All the animation here are CSS3 transitions. JavaScript only watches for the clicks and applies and removes classes as needed. So when you click on a block, that block’s class’ is adjusted. The new classes have different size and position values. Because the block has transition CSS applied, those new sizes and postion values are animated as well.

Feature-boxes in CSS: Innovative Techniques and Practical Solutions

Pure CSS3 box-shadow page curl effect
Okay, the CSS3 code here is quirky and might seem a bit bloated first, but it’s a nice example of using various CSS3 features together to create an effect that would usually require images.

Curl in CSS: Innovative Techniques and Practical Solutions

Pure CSS Folded-Corner Effect
Learn how to create a simple CSS folded-corner effect without images or extra markup. It works well in all modern browsers and is best suited to designs with simple colour backgrounds; supported by Firefox 3.5+, Chrome 4+, Safari 4+, Opera 10+, IE 8+.

Fold in CSS: Innovative Techniques and Practical Solutions

Useful Practical Techniques

Smooth Fading Image Captions with Pure CSS3
Learn how to use CSS3 transitions to create nice, animated, semitransparent image captions. Full example and code download included.

Smooth in CSS: Innovative Techniques and Practical Solutions

Fade Image Into Another
Learn how to create an image rollover by giving the element a background image. There are three ways to fade in the opacity. Click here to find out more:

Web-services-030 in CSS: Innovative Techniques and Practical Solutions

New @Font-Face Syntax: Simpler, Easier
With IE9 and FF4 nearing release, Ethan Dunham from Font Squirrel has revisited the problem of a cross-browser CSS @font-face syntax and found a new and simpler solution. In this article, Richard Fink explains the new syntax and its variations and suggests the most reasonable syntax to use. Also, check FontSpring’s The New Bulletproof @font-face Syntax. Please notice that this technique no longer works in Internet Explorer 9.

New-css-techniques-174 in CSS: Innovative Techniques and Practical Solutions

The New Clearfix Method
The clearfix hack, or “easy-clearing” hack, is a useful method of clearing floats. The original clearfix hack works great, but the browsers that it targets are either obsolete or well on their way. The new clearfix method applies clearing rules to standards-compliant browsers using the :after pseudo-class. For IE6 and IE7, the new clearfix method triggers hasLayout with some proprietary CSS. Thus, the New Clearfix method effectively clears floats in all currently used browsers without using any hacks.

New-css-techniques-168 in CSS: Innovative Techniques and Practical Solutions

Quick Tip: Mimic a Click Event with CSS
Jeffrey Way shares with us a quick tip with a video that will illustrate a nifty technique by using plain and simple CSS to mimic click events.

Breadcrumb Navigation with CSS Triangles
This article describes a fairly simple technique for creating triangles with pure CSS. You just make a block level element with zero width and height, a colored border on one side, and transparent borders on the two adjacent sides. Useful for little arrow sticking out from speech bubbles, navigation pointers, and more.

Css-200 in CSS: Innovative Techniques and Practical Solutions

Responsive Images: Experimenting with Context-Aware Image Sizing
Since Ethan Marcotte coined the term, responsive Web design has gained a lot of attention in the Web design community, mainly due to its remarkable potential for flexible layouts that respond to the browser’s viewport for the best user experience. The main problem with such designs, however, is figuring out how to serve small images to mobile devices and tablets and large ones to desktop displays. The goal of this technique is to deliver optimized, contextual image sizes for responsive layouts that utilize dramatically different image sizes at different resolutions.

New-css-techniques-121 in CSS: Innovative Techniques and Practical Solutions

CSS powered ribbons the clean way
Harry Roberts presents a simple technique that uses an image and CSS to create clean ribbons. This technique creates a white <h2> with a pink background, pulls the <h2> out of the content area with a negative margin and then places the image absolutely left-bottom of the <h2> in a :before pseudo-element.

New-css-techniques-123 in CSS: Innovative Techniques and Practical Solutions

Create a centred horizontal navigation
Centring block level elements is easy, just define a width and set margin: 0 auto;, but what if you don’t know that fixed width? You could use text-align: center;, but that won't work on 100%-width block-level elements either. However, there is a way to have a centred horizontal navigation without knowing an explicit width, and without adding CSS.

Keep Margins Out of Link Lists
When building a menu or other list of links, it's generally a good practice to use display: block; or display: inline-block; so that you can increase the size of the link target. The simple truth: bigger link targets are easier for people to click and lead to better user experience. Make sure list items don't have padding, but links do and don't use margins, so there are no un-clickable gaps.

New-css-techniques-198 in CSS: Innovative Techniques and Practical Solutions

Pure CSS3 Post Tags
This is a rather simple pure CSS trick you can use to style your blog post tags, usually placed at the bottom of the posts. See also Image-Free Tag Shape.

Tag-name in CSS: Innovative Techniques and Practical Solutions

Styling children based on their number, with CSS3
Lea Verou presents an interesting technique for styling children based on their number. It is based on the relationship between :nth-child and :nth-last-child. With the technique, the number of total rules is still O(N), but the number of selectors in every rule becomes just 2, making this trick practical for far larger numbers of children.

New-css-techniques-115 in CSS: Innovative Techniques and Practical Solutions

Wrapping Long URLs and Text Content with CSS
To wrap long URLs, strings of text, and other content, it's enough to apply a carefully crafted chunk of CSS code to any block-level element (e.g., perfect for <pre> tags). Very useful for cases when code snippets need to be presented in a blog post with a fixed content width.

New-css-techniques-165 in CSS: Innovative Techniques and Practical Solutions

Pure CSS(3) accordion
An interesting accordion technique that uses nothing but semantic HTML, CSS and some progressive CSS3. There are also two versions, a horizontal one and a vertical one.

Css-114 in CSS: Innovative Techniques and Practical Solutions

Target iPhone and iPad with CSS3 Media Queries
A detailed explanation of how to se CSS3 media queries to apply CSS style to the portrait and landscape modes in mobile devices such as iPad or iPhone.

Rein In Fluid Width By Limiting HTML Width
If you are making a fluid width site but wish to limit the maximum width it can expand, you can do so easily by literally applying a max-width to the html element. Quick and useful tip.

New-css-techniques-193 in CSS: Innovative Techniques and Practical Solutions

Inline Boxes with Bottom Alignment
Imagine that you want to keep a "Submit" button at the bottom of a line box, aligned with form controls positioned below their label (see below). If the containing block is not wide enough for the "Submit" button to flow next to the other controls, that button must be displayed at the beginning of the next line box with minimal space above it. The article explains a solution for this problem.

Css-168 in CSS: Innovative Techniques and Practical Solutions

Transparent CSS Sprites
The idea of the technique is to create a transparent sprite allowing the background-color to show through. If you are familiar with CSS Sprites, you should be able to grasp this twist relatively easily. Simply, an image with a transparent “knocked-out� transparent center is placed over a background colour. Changing the background colour changes the appearance of the element.

Jump links and viewport positioning
"Using within-page links presses the jumped-to content right at the very top of the viewport. This can be a problem when using a fixed header. With a bit of hackery, there are some CSS methods to insert space between the top of the viewport and the target element within a page."

Css-170 in CSS: Innovative Techniques and Practical Solutions

Mimic Equal Columns with CSS3 Gradients
"What happens when your main content area needs two specific background colors: one for the primary content, and another for the sidebar? If you’ve ever tried applying the background to each container itself, you’ll no doubt have realized that your layout quickly becomes fragmented as soon as the primary content section exceeds the height of the sidebar. Generally, the solution is to set a background image on the parent element, and set it to repeat vertically. However, if we get clever with CSS3 gradients, we can achieve the same effect with zero images." A nice piece by Jeffrey Way.

Double Click in CSS
There has been some interesting talk about how we essentially lose the :hover pseudo class in CSS as well as mouseenter, mouseleave, and mousemove in JavaScript. Now, here is the idea: can we somehow pull off a double click with pure CSS? Yes, we can, if the input covers link, buries on focus, which triggers hover on link keeping it on top. Work on WebKit (including Mobile) and Firefox. So we've basically created a "light" alternative to hover for the sequence tap → change state / activate link → tap again to visit link.

New-css-techniques-207 in CSS: Innovative Techniques and Practical Solutions

Center Multiple DIVs with CSS
At some point, you may have a situation where you want to center multiple elements (maybe «div» elements, or other block elements) on a single line in a fixed-width area. Centering a single element in a fixed area is easy. Just add margin: auto and a fixed width to the element you want to center, and the margins will force the element to center. You can achieve something similar by taking advantage of CSS’s flexibity with “recastingâ€� elements.

Center in CSS: Innovative Techniques and Practical Solutions

Clearing Floats with Overflow
One of the common problems we face when coding with float-based layouts is that the wrapper container doesn't expand to the height of the child floating elements. The typical solution to fix this is by adding an element with clear float after the floating elements or adding a clearfix to the wrapper. But you can also use the overflow property to fix this problem. It's not a new trick, but still very useful.

Overflow in CSS: Innovative Techniques and Practical Solutions

Different Transitions for Hover On / Hover Off
The idea of this technique is to solve an interesting problem: what about using different transition for hover on and off? In the example, when you hover over, the :hover transition overrides the transition set in the regular state, and that property animates. When you hover off, the transition from the regular state takes over and that property animates. Useful.

Stretch a Box to its Parent's Bounds
A powerful feature that enables absolute positioning of stretching a box. The most popular use is having a box positioned in either top or bottom and right or left coordinates.

Equal Height Column Layouts with Borders and Negative Margins in CSS
This article demonstrates different construct techniques and brushes up on a few concepts you might have missed.

Layout in CSS: Innovative Techniques and Practical Solutions

Using CSS Text-Shadow to Create Cool Text Effects
The CSS3 text-shadow property has been around for some time now and is commonly used to recreate Photoshop's Drop Shadow type shading to add subtle shadows which help add depth, dimension and to lift an element from the page. A demo is available if you'd like to see what it looks like before you give it a try yourself.

New-css-techniques-186 in CSS: Innovative Techniques and Practical Solutions

Fluid Width Equal Height Columns
Equal height columns have been a need of web designers forever. If all the columns share the same background, equal height is irrelevant because you can set that background on a parent element.

New-css-techniques-204 in CSS: Innovative Techniques and Practical Solutions

CSS Box-Shadow:Inset
It's always nice to be able to add a vignetting effect to photos sans-Photoshop, but the way browsers interpret box-shadow:inset is to throw the shadow behind the image, rendering it invisible. While this seems pretty useless, it does make sense when you consider other kinds of content.

Inset in CSS: Innovative Techniques and Practical Solutions

Flexible Navigation
An interesting technique for a navigation that uses only CSS transforms and transitions and no JavaScript.

Deaxon in CSS: Innovative Techniques and Practical Solutions

Circle Zoom
A very nice hover effect: the Twitter icon has a circle as a background and the circle increases its radius when the users hovers the mouse over it.

Circle in CSS: Innovative Techniques and Practical Solutions

Last Click

CSS3 Memory
A game of memory in which you will have to find three matching cards (as a tribute to the CSS transitions).

New-css-techniques-199 in CSS: Innovative Techniques and Practical Solutions

CSS 3D Scrolling @ BeerCamp at SXSW 2011
Now, that's innovative: while you are scrolling down the page, the site appears to have a 3D scrolling effect. And it has a nice Inception reference. Can you discover it?

New-css-techniques-175 in CSS: Innovative Techniques and Practical Solutions

50 New Useful CSS Techniques, Tutorials and Tools
The previous round-up of CSS techniques on Smashing Magazine. In this post we present recently released CSS techniques, tutorials and tools for you to use and enhance your workflow, thus improving your skills.

Css-237 in CSS: Innovative Techniques and Practical Solutions


© Vitaly Friedman for Smashing Magazine, 2011. | Permalink | Post a comment | Smashing Shop | Smashing Network | About Us
Post tags:


  •   
  • Copyright © 1996-2010 BlogmyQuery - BMQ. All rights reserved.
    iDream theme by Templates Next | Powered by WordPress