This tutorial was inspired by a 3D rendered version of the Google Android logo that I came across. So, I decided to try out achieving relativity the same result with Photoshop – CS 2 to be precised. And the final image was outstanding to say the least. The interplay of light and shadows are key for a near-realistic result for a traditionally 2D program as Photoshop.
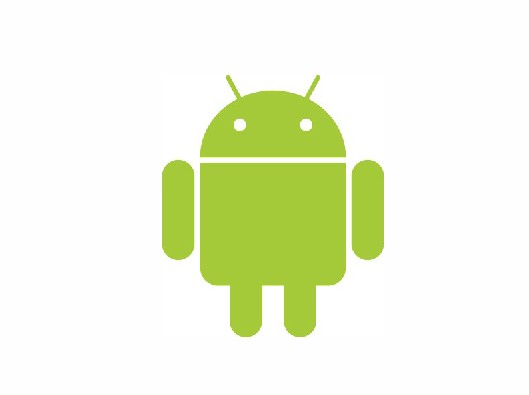
The Google Android logo:
Step 1
In the first step, we’ll create a new document with the size of 800 px by 600 px and a resolution of about 140 dpi. Then we select the Ellipse Tool (U) and draw a circle.

Step 2
Right-click within the circle and select Fill Path and choose the fill colour as #a4ca39.

Step 3
You may enable Grids for guidance if you choose by pressing Ctrl+’. Select the Rectangular Marquee Tool (M) and make a selection at about half of the circle and hit the Delete to remove the selected area. Press Ctrl+D to to clear the selection. Now create a new layer and select the Pen Tool (P) and create an arc below whats left of the circle. Adjust the Anchor Points with your mouse or direction key on the keyboard until you’ve obtained a smooth curve.

Step 4
Fill the arc with #a4ca39.

Step 5
With the Rectangular Marquee Tool, clear the pen outline and merge the arc with the circle by pressing Ctrl+E.
![]()
Name this layer ‘head.’

Step 6
Double-click on the head layer for a Layer style. Select an Inner Glow Layer style and set its parameters below:

Step 7
Follow up with a Bevel and Emboss Layer style and set the parameters below:

Step 8
Well now add a light shadow with the Inner Shadow Layer style:

The result below:

Step 9
In a new layer, select the Ellipse Tool and draw an Ellipse within the head. Fill with a the colour #e5f2b6.

Step 10
Press Ctrl+T to enter the Free Transform Mode and then choose the Warp Tool to spread out the ellipse a little more within the head. Press Enter when done.

Step 11
Add a Bevel and Emboss Layer style:

You get the result below:

Step 12
Go to Filter>Blur>Gaussian Blur and set the Blur Radius to 4.8 pixels.

Now the droid’s head is looking more rounded with the light and dark areas.

Step 13
For a more shiny look, in a new layer, use the Pen Tool (P) draw something of an arc with the head as shown below:

Step 14
From other options within the Pen Tool from the Tools bar, select the Add Anchor Points Tool and of course add more anchor points adjusting and aligning them for smoother curves.

Step 15
Fill the curve with #.

Step 16
Head on to Filter>Blur>Gaussian Blur and set the Radius to about 9.5 pixels.

Step 17
Draw another curve over the previous one and fill with white.

Step 18
Apply a Gaussian blur at a Radius of 2.7 pixels.

There we have it! A shiny and plasticy top.

Step 19
For a the little antennas of the droid, create new layers ‘antenna1′and ‘antenna2′ respectively. Select the Rounded Rectangle Tool and set its Radius to 30 px. Then draw a thin rectangle and have it rotated diagonally with the the Free Transform Tool. Fill with colour: #a4ca39.

Step 20
Double-click the ‘antenna1′ layer to add an Inner Shadow Layer style to antenna. Just the Shading properties is adjusted here.

The result:

Step 21
Also add an Inner Shadow Layer style to the ‘antenna2′ layer with the adjustments below:

The result below:

Step 22
Go to the’ head’ layer and select the Burn Tool ‘O’ with its Highlights reduced to 25%in the Burn Tool Options bar. Create dark lines that would appear as reflections from the antennas.

Step 23
Once again, select the Ellipse Tool and draw two oblique circles for the eyes.

Step 25
Fill these circles with black.

Step 26
To make the eyes hollow, add a Bevel amd Emboss Layer style settings below:

The result:

Step 27
Enable the Grids once more and with the Rounded Rectangle Tool, draw a square for the body of the android.

Step 28
Press Ctrl+T for Free Transform Mode and right-click the selection to select the Warp Tool. Drag and bend the upper and lower lines for a cylinder like shape and the warp handles to adjust these curves as you see it fit. Hit Enter when you’re done.

Step 29
Fill with the colour #a4ca39.

Step 30
Add a Bevel and Emboss Layer style to the ‘body’ layer with the parameters below:

Step 31
For the Gradient Overlay style, set the colours of the stops for Gradient as shown below:

Step 32
Still with the Gradient Overlay, set its Angle to zero degrees and increase the Scale to 107%.

Step 33
Finally, add an Inner Shadow Layer style setting the parameters below:

Below, is the final result:

Step 34
With the Ellipse Tool, draw a flat circle behind the ‘head’ and ‘body’ layers and fill with black.

Step 35
Select the Rounded Rectangle Tool and draw an arm for the android and fill with #a4ca39.

Step 36
Add to the ‘arm 1′ layer, a Bevel and Emboss Layer style:

Step 37
Follow up with an Inner Shadow Layer style:

Step 38
Select the Gradient Overlay style and set the Gradient colours as depicted below:

And we have below a nice rounded arm.

Step 39
Draw a second arm in a new layer which should be placed behind the ‘body’ layer. Also add as before, a Bevel and Emboss layer style.

Step 40
Make adjustments to the colours of the Gradient:

The result:

Step 41
To add more gloss to the arms in respect to lighting which is a primary element for an improved 3D look for our model. Sketch out a thin curve with the Pen Tool and fill with a white colour.

Step 42
Apply a Gaussian Blur with a Radius of about 2.0 pixels.

Step 43
Run over Step41 in a similar fashion for the second arm.

Step 44
For the legs of our model, use the Rounded Rectangle Tool set at32 px to create a short leg and then fill with #a4ca39.

Step 45
Apply an Inner Shadow style to the leg:

The result:

Step 46
Create another leg – obviously.

Step 47
Add for sure an Inner Shadow layer style:

Now both legs are complete.

Step 48
We need to create a shadow casted on the body of the droid by the first arm by using the Ellipse Tool as shown below:

Have the shape blurred with a Gaussian Blur at a Radius of 7.5 pixels.

The result:

Step 49
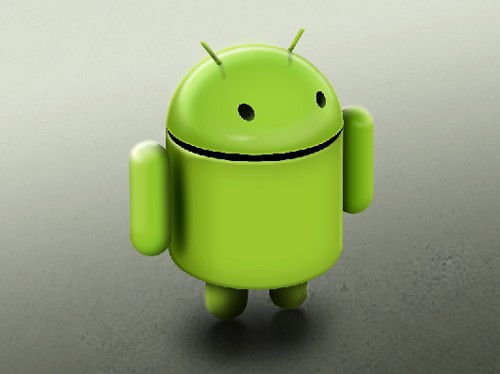
Over the head of the droid, paint a thin short strip of white and blur lightly.

Its alive!!! Probably not. Well, this is our 3D Android!
With an added background, the realism of the android is enhanced.