Author Archive

How to Design and Launch a Successful Online Course with WordPress

Creating an online course is more difficult than it seems. The real challenge is standing out in a sea of quality online courses. Every day, countless courses pop up, so yours needs to shine if it has any chance of success.

Feeling the heat yet? Now think about the tech hurdles. Picking the right tools can be a maze. And then there’s engaging your audience. It’s tough to keep learners glued to the screen.

Here’s the good news: WordPress is your secret weapon. With its easy-to-use features and powerful plugins, launching a standout online course is within reach. 

In this article, we’ll teach you how to design and launch an online course using the WordPress platform. 

Ready to get started? 

Keep reading to learn more.

Understand your audience and course objectives 

Before you can get started in creating a successful online course, there are a few questions you’ll need to ask. 

Who’s your audience? What’s your goal? 

Thankfully, you’re designing this online course with WordPress, so this process just got a lot easier. Think of WordPress as more than just a platform. It’s your ally on every step of this journey.

(Image Source)

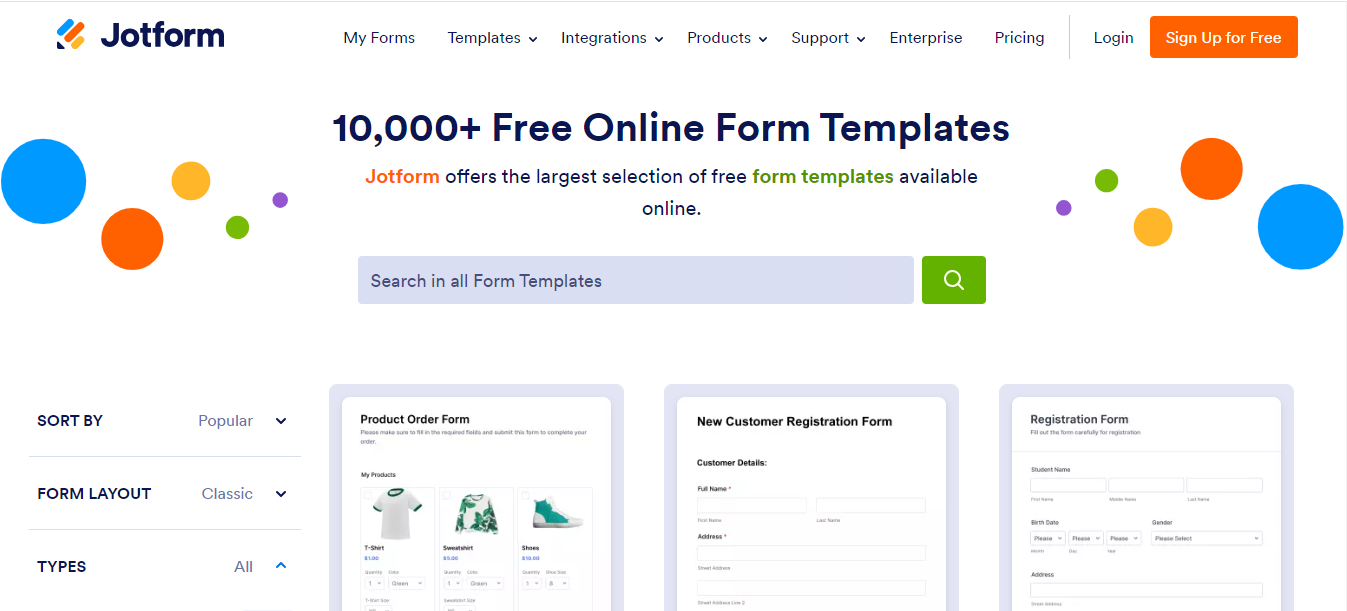
For instance, you can use plugins like Jotform, WPForms, or Quiz and Survey Master to survey your audience and find out essential information like:

  • Average budget for online learning
  • What they want to learn
  • Gender breakdowns
  • Their occupations
  • Their age range
  • Where they live
  • Marital status

This feedback shapes your course. By knowing who you’re marketing to, you’ll have a much easier time choosing plugins and crafting course content. 

This is also when you need to set goals for your course — WordPress shines here, too. 

With plugins like LearnDash or LifterLMS, you can map out the entire course with these goals in mind. These tools let you design a clear path from start to finish. They offer quizzes, lesson plans, and progress tracking.

In short, WordPress equips you with the tools to understand your audience and craft courses that deliver results. It’s not just about content — it’s about creating a learning journey that resonates.

Choose the right WordPress tools and plugins

It’s vital to identify and install the right WordPress tools and plugins for your course to succeed. 

First up, you’ll need a Learning Management System (LMS) plugin. This software creates, manages, and delivers educational courses and training programs online. 

When integrated with WordPress, an LMS plugin transforms a standard website into a fully functional e-learning platform.

Popular LMS plugins for WordPress include LearnDash, LifterLMS, and Sensei, each offering a range of features tailored to different educational needs, from simple courses to complex training programs.

The dashboard for Learndash.

(Image Source)

Next up, payment gateways. They make buying courses easy. WooCommerce or Easy Digital Downloads work well here — they’re also secure and straightforward.

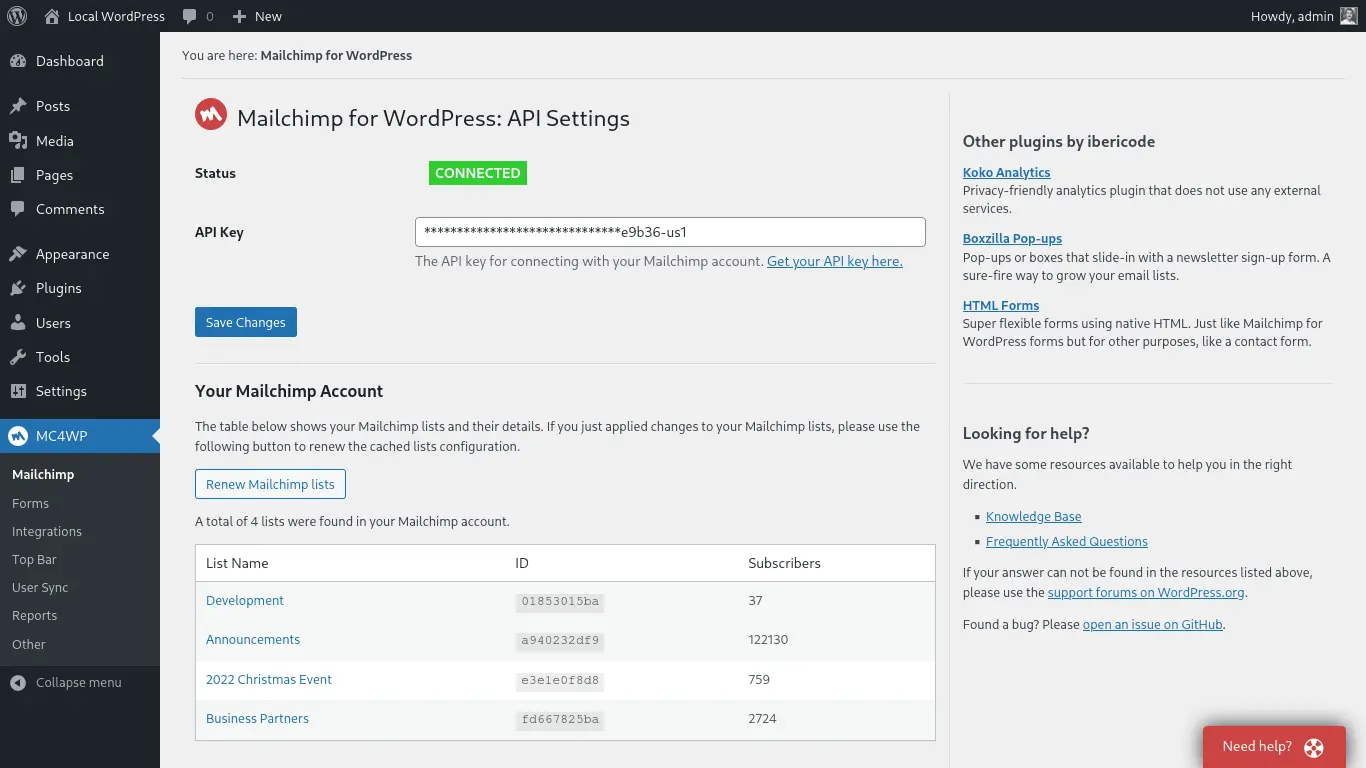
To build your email list, OptinMonster or MailChimp for WordPress can help. With personalized email marketing sequences, you can keep your students engaged and coming back for more.

If adding unlimited courses with advanced features, look into a membership plugin like MemberPress. It sets up exclusive areas that offer advanced content to subscribers or members who pay for access.

In addition to choosing the right plugins, consider enhancing your course with interactive live sessions. A robust video conferencing software can seamlessly integrate into your WordPress site, enabling real-time collaboration and dynamic learning experiences. 

This tool is particularly useful for courses that benefit from live discussions, Q&A sessions, and group projects.

You can also enhance engagement with tools like Jotform and Quiz and Survey Master. They can help you craft engaging quizzes and feedback forms. Jotform and WPForms can also help you create intuitive contact forms, registration pages, and more. 

For content protection and membership management, MemberPress allows you to restrict access to courses, manage subscriptions, and even create community forums. 

Combining these tools with your WordPress site can lead to more engaging, interactive, and professionally managed online courses.

Design engaging educational content 

Now it’s time to craft content for your online course. You’ll need to make it pop to succeed in a crowded marketplace. 

Start with a solid lesson plan. Break down complex ideas into bite-sized, digestible pieces to keep your learners hooked.

You can also use WordPress to bring your lessons to life. Add videos, infographics, and interactive quizzes. Just make sure you mix it up. Variety keeps learners engaged and eager for more.

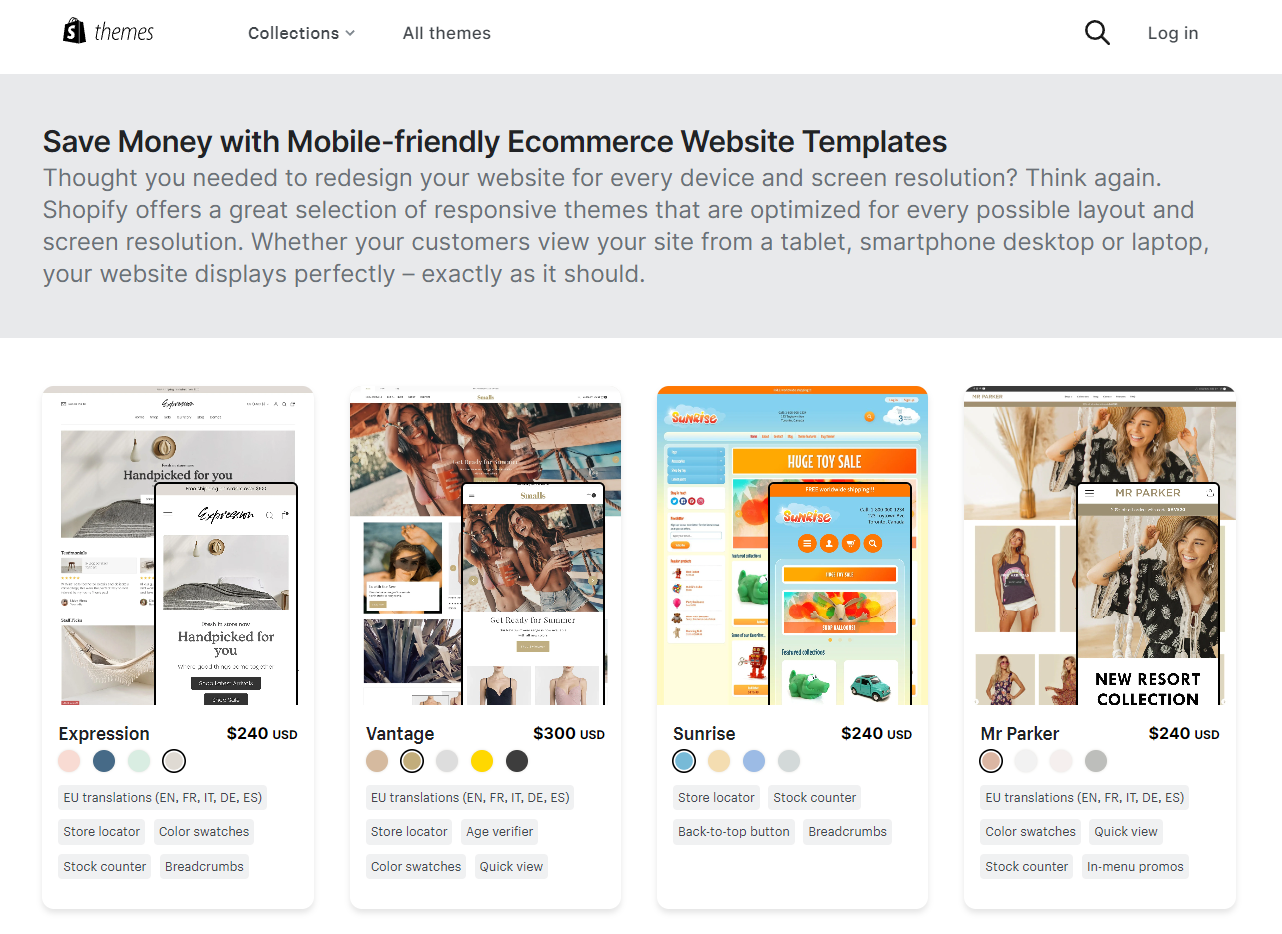
Remember, your content is more than text on a screen. It needs to be an experience. Use a premium WordPress theme to make your course visually appealing. 

Make navigation easy, too. Your students need to find what they need with no fuss.

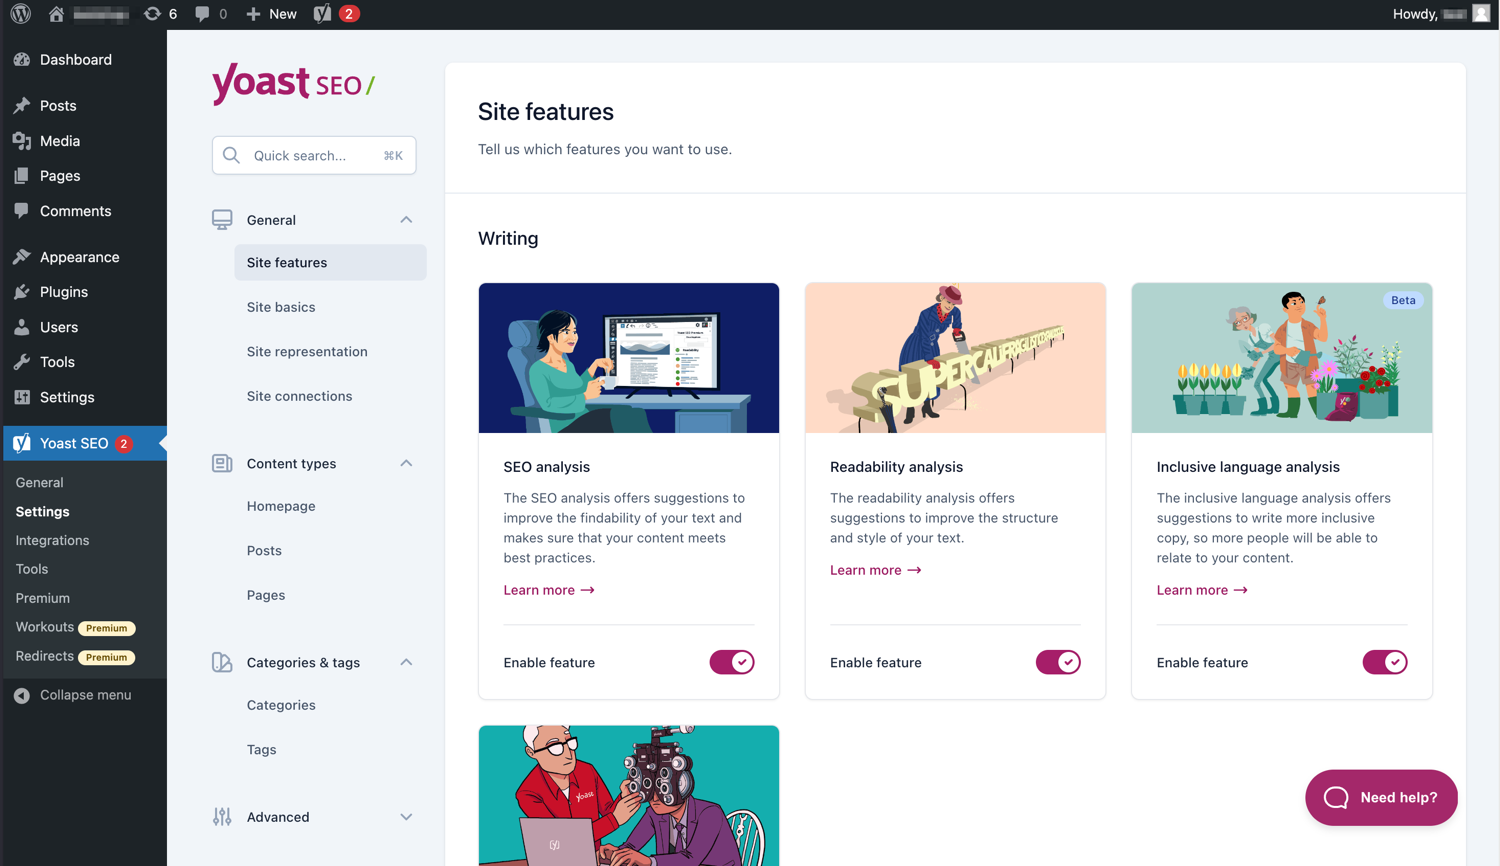
And don’t overlook SEO. Optimize your content for search engines to make it easy for learners to find your course through a simple Google search. WordPress plugins like Yoast SEO are essential here.

??An image of Yoast SEO.

(Image Source)

Build your course structure on WordPress

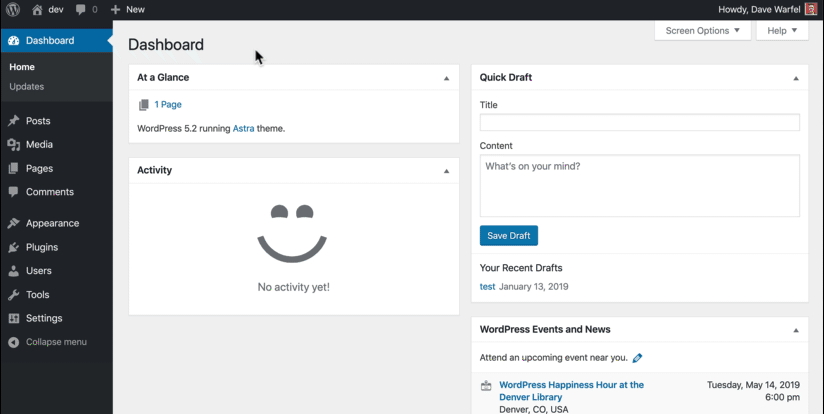
When starting your online course on WordPress, the first step is to map out the course’s structure. As we mentioned before, use an LMS plugin like LearnDash. It’s an intuitive course builder that can simplify your lesson plans. 

This is essential for hosting unlimited courses with ease.

When crafting your content through the LMS, create modules that guide learners through each lesson. Make it engaging. Add quizzes and assignments to test their knowledge.

Don’t forget about the user experience — a premium theme on WordPress makes your course appealing and easy to navigate. And with the right hosting plan, your online course platforms run smoothly, no matter the traffic. 

Test and optimize your course

Ready to launch your WordPress course? First, you’ll need to test it by creating sample courses. Gather a sample group from your target audience demographic for feedback. 

If you spot any snags, then it’s time to optimize. Make sure your lesson content is clear and engaging. Your hosting plan needs to support smooth, fast access. This keeps learners happy and engaged.

Use WordPress to adjust your course based on feedback. Are the quizzes in your lesson plan hitting the mark? Is your course structure intuitive? Make the necessary tweaks before launching.

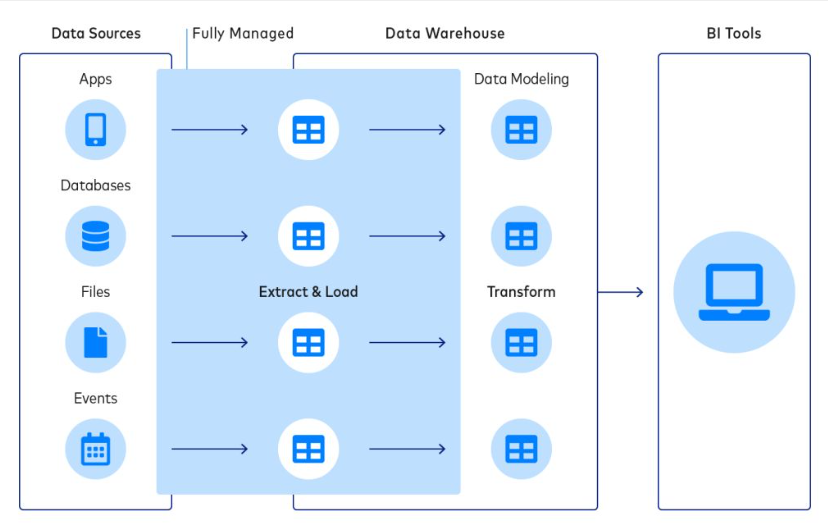
You can also leverage WordPress analytics tools to monitor progress. These can help you spot where learners get stuck. 

This is the step where you test, refine, and adapt. Your WordPress site isn’t just hosting your course—it’s an evolving online learning platform. By continuously improving, you guarantee your course remains relevant and practical. Outsource software development if you need help with your website optimization process. 

Market your course to the right audience

Once your course is ready, it’s time to spread the word. WordPress is the perfect platform for this. Make use of the plugins we discussed earlier for the best results.

Start with SEO. Make sure your course pops up in search engines. Use a plugin like Yoast SEO to nail those keywords.

Next, tap into your email list. Send promotional teasers to your course. Excite your audience. Plugins like MailChimp for WordPress can automate this process, making your life easier.

Mailchimp for WordPress

(Image Source)

Don’t forget social media. Share your course on all platforms. Use WordPress plugins like Social Media Share Buttons & Social Sharing Icons to link your site with social accounts. This boosts visibility.

Consider offering a sneak peek with sample courses or free lessons. This gives potential students a taste of what’s to come.

In short, market smart. Use WordPress tools to reach a wide audience. Make your online course the talk of the town. With the right strategy, your enrollment numbers can soar.

Launch your course and foster a learning community

Use WordPress to schedule launch posts and build anticipation. Tease your audience with snippets of course content.

As you prepare to launch your course, consider your business’s legal structure. Establishing an LLC can provide a safeguard, as it shields your personal assets, like your home and savings, from potential liabilities associated with your online course.

On launch day, hit that publish button. Announce it everywhere. Email your list. Post on social media. And use the WordPress plugins from the last section to amplify your reach.

Be sure to also engage with your audience. Answer questions and address any concerns. Your first students are critical as their feedback shapes your course’s future.

Measure success and scale up

Track your course’s impact. Use WordPress analytics to see who’s enrolling and completing it. If you notice trends, then act on them.

Is your content hitting the mark? Check your student feedback and make updates accordingly. Doing this regularly can keep your course fresh and relevant.

When you’re ready to grow, add more courses. Explore new topics identified through trends and feedback. Return to the first step of this guide and use WordPress to manage them all with ease.

Success in online education isn’t static. It’s about adapting and expanding. With WordPress, you have the tools to scale up and keep your learners engaged. Keep pushing. Your course’s potential is limitless.

Wrap up

You’ve now got the blueprint for online course creation success with WordPress as your foundation. The platform can help you craft engaging lessons and push the course out to the right audience.

Remember, the first step is deciding to take action. Don’t wait on it. Dive in and build your course. WordPress makes it manageable — and even fun.

So … got a course idea simmering? Bring it to life. Turn knowledge into impact. Your audience awaits.

Ready for more insights? Head to noupe.com. It’s your go-to for digital tips and tricks. Let’s make learning unstoppable. See you there!

Featured Image by Thought Catalog on Unsplash

The post How to Design and Launch a Successful Online Course with WordPress appeared first on noupe.


Mastering Responsive Web Design: Techniques and Best Practices for Cross-Device Compatibility

Need to create a website, landing page, or blog that can deliver a pristine customer experience across a range of devices? 

Look no further than responsive web design, a strategy that focuses on creating a fluid layout to create congruent interfaces for desktop and mobile users.

In this article, we’ll take a closer look at what responsive design really means, three ways to create it, and two examples of optimal websites with flexible designs. We’ve also included a bonus checklist for you to help you refine your layout before going live.

Ready to learn more?

Let’s get started.

What is responsive website design? 

Coined by Ethan Marcotte, otherwise known as “The Godfather of RWD”, responsive web or website design means creating a website that looks clean, intuitive, and functions well, regardless of the device type it’s viewed on.

According to Ethan, having a “device-agnostic layout” is key. This can be accomplished using flexible images, media queries, and fluid gridsthe three pillars of a responsive design.

In his original article on the subject, Ethan referenced the following quote which perfectly depicts the power of responsive web design (RWD).

“The control which designers know in the print medium, and often desire in the web medium, is simply a function of the limitation of the printed page. We should embrace the fact that the web doesn’t have the same constraints and design for this flexibility. But first, we must accept the ebb and flow of things.” — John Allsopp, A Dao of Web Design

2 examples of optimal websites with cross-device compatibility 

In today’s digital era, a website’s cross-device compatibility has become paramount for delivering a seamless and engaging user experience. 

Ensuring that blog posts, landing pages, and other content have comprehensive navigation and are visually appealing across a variety of devices is crucial for capturing and retaining user attention.

Two notable examples of well-optimized websites include the Hers blog and Clean Origin’s diamond stud-earring collection page. 

Let’s explore how these exemplify the significance of cross-device compatibility.

The Hers blog 

For Hers, a well-optimized blog means that users can easily access insightful information about topics like the effects of Adderall on mental health and other wellness resources from any device. 

Whether on a computer, tablet, or mobile phone, Hers’ content retains a responsive layout without sacrificing design quality. Here’s the desktop version: 

Desktop version of a website for hers.

(Image Source)

And here’s the mobile version:

Mobile version of a website for hers.

(Image Source)

This cross-device compatibility empowers users to educate themselves and make informed decisions regardless of their location or preferred viewing device. What’s more, the smooth user experience provided by the responsive design can help enhance user satisfaction and foster trust in the brand’s expertise and credibility.

Clean Origin’s diamond stud-earring collection page

Clean Origin’s well-optimized landing page for its diamond stud-earring collection offers stunning visuals that are equally captivating on both desktop and mobile screens.

Here’s a peek at how it looks on a desktop:

Desktop version of a website for Clean Origin.

(Image Source)

And this is how it looks on a mobile device:

Clean Origin mobile version of a website.

(Image Source)

This cross-device compatibility ensures that users can enjoy browsing through the exquisite earring designs and easily select their favorite from any location or device. The seamless transition from one device to another facilitates a seamless shopping experience, maximizing customer engagement and increasing the likelihood of conversions.

But the advantages of cross-device compatibility extend beyond user satisfaction. 

Cross-device compatibility can also positively impact search engine rankings, as major search engines prioritize mobile-friendly websites, considering them more relevant and user-oriented.

Websites that cater to various devices can receive higher visibility and reach broader audiences, ultimately leading to increased organic traffic and inspiring business growth.

3 ways to create cross-device compatibility 

Now that you’re clear on the basics, let’s take a look at three ultra-simple ways you can master responsive web design when working on your next design project.

1. Use a grid system

If you’re a coding enthusiast who loves having control over every stage of development, responsive grid systems, like Flexbox Grid, Zimit Framework, or Bootstrap, might just be your thing. 

Grid system example.

(Image Source)

Grid systems provide all of the necessary building blocks you’ll need to create responsive web design, including containers, columns, rows, and classes for organizing and nesting elements. 

With media queries and popular breakpoints, these systems smoothly adapt to different screen sizes.

When it comes to responsive grid systems, there’s a wide variety to choose from. Some are simple and straightforward, while others are more comprehensive and feature-rich. Jot down your top priorities before shopping for grid system software.

2. Use a responsive website builder

If you’re looking for an easy and flexible way to create a responsive website, website builders have got you covered! 

Whether you’re a tech guru or a beginner, these user-friendly platforms provide features you can use to build your website without needing to touch a single line of code. Features may include browser-based drag-and-drop editors, advanced customization options, and hundreds of stylish blocks.

Grid system example.

(Image Source)

Some responsive website builders focus on responsive behavior, while others prioritize mobile-friendliness, offering tools to optimize your site for different devices.

Hiring React JS developers with expertise in building responsive web applications can also be a great option to ensure your website meets your specific requirements.

If you’re interested in using a responsive website builder, check out options like SpringBuilder, Designmodo Startup, and Visual Composer.

3. Use a CMS

Another simple way to create cross-device compatibility is by using a Content Management System (CMS) like WordPress or Shopify. Hint: If you need an easy way to create a responsive blog or ecommerce store, this option may be your best bet! 

These user-friendly platforms are designed to cater to both tech-savvy individuals and those new to web development

Although CMS platforms may not initially provide responsive behavior, the good news is that many theme developers have recognized the importance of mobile optimization. With this in mind, they’ve created a plethora of responsive templates that seamlessly adapt to different screen sizes, guaranteeing a smooth browsing experience on mobile and desktop devices.

Example of Shopify templates.

(Image Source)

Whichever method you choose, don’t go live until testing your website on a variety of devices. Head to the checklist in the next section for additional support.

Cross-device compatibility checklist

Here’s the bonus checklist we promised you. ??

Before going live, make sure your new web page can pass the following cross-device compatibility checklist: 

Does my website, landing page, or blog:

  • uncheckedFeel and look intuitive on larger screens and smaller screens?
  • uncheckedHave plenty of white space to decrease overwhelm and promote readability? 
  • uncheckedLook beautiful and professional on mobile and desktop browsers?
  • uncheckedFunction correctly across desktop and mobile versions? 
  • uncheckedHave responsive images and correct image sizes?

Wrap up 

And there you have it. 

Today we discussed what responsive web design is, some simple techniques to help you master it, and two examples of optimal websites with cross-device compatibility. 

If you’re ready to get started on your next project, don’t forget to bookmark this article and share it with your web development team. 

And if you’re looking for even more insightful advice you can apply to your business, check out our online magazine for additional guides and resources.

Here’s to your success!

Featured image by Domenico Loia on Unsplash

The post Mastering Responsive Web Design: Techniques and Best Practices for Cross-Device Compatibility appeared first on noupe.


Relationships 101: Tips for Maximizing Social Media Channels to Increase Brand Awareness

Maximizing social media channels has become a buzzing topic across all industries. From B2B SaaS to DTC retail to local mom-and-pop shops, everyone wants a slice of the social media market pie.

And we can see why.

In 2021, over 4.26 billion people used social media around the globe — a number projected to increase to nearly six billion by 2027.

In other words, there’s a limitless supply of marketing and relationship-building opportunities on social media.

If you’ve decided the time to make the most of your channels is now, then you’ve come to the right spot. In today’s article, we’re sharing some of our best tips for maximizing social media channels to increase brand awareness. 

Grab a notepad and a pen, and let’s get started.

1. Use a multichannel approach 

Nearly 91% of retail brands use two or more social media platforms to connect with their target audience. 

But here’s the deal — if you’re going to spread your eggs across multiple baskets, make sure you choose the right ones for your business. 

In other words, stick to only building a presence on channels that your audience uses most. 

For instance, if you sell one-of-a-kind virtual fashion pieces, you’ll likely focus on channels that target the younger demographic, such as Snapchat, TikTok, and Instagram. If your company sells space in a colocation data center, you’ll likely focus on channels that thrive in the B2B sector, like LinkedIn, Twitter, and Facebook. 

Whatever the case may be, be sure to find out:

  • What channels your audience uses and why
  • How often they frequent said channels — bonus points if you can dig up specific days and times
  • What kind of content they devour on social media 
  • What messaging and style preferences they have

Once you’ve chosen your dedicated social media platforms, strategize ways to integrate them with other marketing activities, such as blogging, email marketing, and guest posting.

For instance:

  • Add a call to action (CTA) at the end of blog posts inviting readers to follow you on social media 
  • Set up an email sequence that highlights user-generated content and customer stories you’ve collected from your social channels 
  • Invite email recipients to follow you on social media in your email signature line 
  • Use thought leadership insights you’ve shared on social media as screenshots and examples in your guest posts

2. Befriend data 

Whether you’re getting ready to sell your company or you’re just interested in improving your lead scoring process, leveraging data can help you set yourself up for success. 

So, how do you do that exactly? 

Create a data pipeline

While it may sound fancy, a data pipeline is just a compilation of information from a variety of sources that you analyze for marketing purposes. 

(Image Source)

With a data pipeline, your business has a centralized data source allowing you to get a more robust view of your audience and make data-driven decisions. 

In other words, you have insights at your fingertips you can leverage to boost your social media presence. 

For instance, your data might show you that your audience values encouraging content. Or, your data might reveal that your audience is curious about NFTs and virtual goods. 

Whatever the case may be, you can use centralized data to learn more about your audience’s:

  • Pain points and needs
  • Social media purchasing habits
  • Content preferences 
  • Social media activity 

You can then turn those insights into action by improving your social media strategy as you discover more about your audience.

Psst, feeling overwhelmed by the thought of gathering your own data? Consider opting for a Customer Data Platform (CDP) that can do the heavy lifting for you. 

3. Plan thematic caption sequences and batch your content

Our third tip is probably our favorite. 

Why? 

Because it includes the formula every brand needs to deliver valuable and engaging content on social media — consistently.

Yes, we’re nodding to the hardcore truth that consistency is vital to: 

  • Discovering what kind of content performs best on social media 
  • Developing an understanding of your audience’s questions, needs, and concerns
  • Positioning yourself as an industry expert
  • Building trust and loyalty with your audience 
  • Understanding how to course correct when your strategy goes awry 

So, what’s the secret formula brands need to win on social media? 

First, plan thematic caption sequences. Then, batch your content. 

If you’ve never heard of planning thematic caption sequences, it just means choosing a series of caption themes (based on your goals and target audience) and rotating them out. 

For instance, the caption themes you rotate might include:

  • About me
  • Behind-the-scenes
  • Offer pitch 
  • Encouragement
  • Value-driven
  • Humor 

Or, you might choose:

  • Brand story 
  • Sustainability tips 
  • Company wins
  • News 
  • Specific offer 
  • Industry insights 

Let’s take the second example list and explore this a bit further. If you decide to post on social media Monday through Wednesday, then your caption theme list for the month would look like this: 

  • Monday: Brand story
  • Tuesday: Sustainability tips 
  • Wednesday: Company wins
  • Monday: News 
  • Tuesday: Specific offer 
  • Wednesday: Industry insights 
  • Monday: Brand story 
  • Tuesday: Sustainability tips
  • Wednesday: Company wins
  • Monday: News
  • Tuesday: Specific offer
  • Wednesday: Industry insights

See? Pretty easy.

Next, choose visual product themes to rotate along with your caption themes. 

Taking the second example, your visual product themes might include:

  • Candid photo of staff, management, or work location
  • Professional custom photograph of plants, trees, oceans, or general nature scenes
  • Custom text and announcement image  
  • Visual clipping or infographic from reputable news source 
  • User-generated image showcasing company product
  • Visual clipping or infographic from reputable industry source or peer-reviewed journal

Once you’ve laid all of that out, use a social media management tool to create your captions, upload your images, include your hashtags, and schedule your posts in batches. Aim to schedule your content at least 30 days out. 

(Image Source)

If you’re using an in-house marketing team or going the DIY route, lighten the load by getting access to caption templates and professional images through a membership with Social Curator.

4. Build in time for daily community engagement 

With internet users spending on average 147 minutes per day on social media, building in time to communicate with them is vital.

If you’re worried you can’t invest too much time on community engagement, remember it’s more about quality and consistency than quantity. In other words, it’s about the quality of the time you put in and the discipline to show up every day — even if it’s just for 30 minutes a day. 

If all else fails? Hire a virtual assistant and train them on how to engage with your audience on behalf of your brand.

Here are a few quick tips to help you stay active and engaged with your audience on social:

  • Respond to comments and questions as soon as possible — bonus points for sharing tips and resources, too
  • Leave comments and questions on your audience’s posts — bonus points for leaving words of encouragement and sharing personal experiences 
  • Initiate questions, quizzes, polls, and sliders in Stories
  • Show up for live video Q&As
  • Post and respond to thought leadership content on LinkedIn

5. Give users a reason to pay attention to your brand on social media

Sometimes your audience needs a little extra incentive to pay attention to you on social media. 

So, give them a reason to by putting some more oomph into your posts. 

Here’s how:

  • Share tremendous value: Give your audience advice, tools, tips, and tricks on the topics that matter most to them
  • Utilize giveaways: Reel your audience in with irresistible prizes they can enter to win
  • Give out freebies: Share free downloadables, guides, and ebooks 
  • Use storytelling techniques: Paint a picture and hook readers with real, meaningful stories — bonus points for drawing on emotion or weaving in humorous content

Wrap up 

Maximizing social media channels is a key topic of discussion across industries worldwide. 

With increasingly more users joining social media platforms, it’s no surprise brands are motivated to grab their slice of the market share. 

And with a limitless supply of social media marketing and relationship-building opportunities, social media will continue to play an integral role in connecting brands with customers. 

If you’re ready to make the most of your channels, we hope the best practices we shared will help you increase brand awareness and build lasting customer relationships. 

For quick reference, here’s another look at the tips we shared:

  • 1. Use a multichannel approach
  • 2. Befriend data
  • 3. Plan thematic caption sequences and batch your content 
  • 4. Build in time for daily community engagement 
  • 5. Give users a reason to pay attention to your brand on social media 

And that’s it for today! Now go forth and nurture your social media audience, friends.

The post Relationships 101: Tips for Maximizing Social Media Channels to Increase Brand Awareness appeared first on noupe.


  •   
  • Copyright © 1996-2010 BlogmyQuery - BMQ. All rights reserved.
    iDream theme by Templates Next | Powered by WordPress