Archive for July, 2011

The Secrets Behind Great Call To Action Buttons

Advertisement in The Secrets Behind Great Call To Action Buttons
 in The Secrets Behind Great Call To Action Buttons  in The Secrets Behind Great Call To Action Buttons  in The Secrets Behind Great Call To Action Buttons

Within web design ‘calls to action‘ can be defined as any element of the page that prompt an action of the user. However, clearly some actions are more desirable than others. For example, any site owner would prefer users to click on a ‘buy now’ link than a ‘twitter’ link.

For the most important calls to action a designer will often employ a call to action button. Buttons traditionally entice users to click them, and so generally result in much higher click through rates than standard links. Like this example from the showcase below:
Calltoaction13 in The Secrets Behind Great Call To Action Buttons

How To Get Your Call To Action Button Right!

It’s important to realize that not all call to action buttons are the same. As your call to action button could drastically impact your user’s/customer’s behavior it’s essential to get it right!

Below I’ve laid out a hypothetic example of a call to action and how to improve it. Here are some pointers to improve your click through rate:

  • Experiment with various button shapes. Sometimes breaking the norm can garner more attention.
  • Try to contrast your buttons color against it’s backdrop.
  • Try to use bold, clear text, and great typography for your button’s copy.
  • Feel free to use humor, informative taglines or credible references within the copy.
  • Try to make the button more clickable. Think of it like a real button (who can resist pushing a button!).
  • Introduce subtle design touches (highlights, drop shadows, borders, indents, textures, patterns etc…). These can really help your button stand out.

To illustrate these tips I’ve laid out an example below:

Calltoactionexample1 in The Secrets Behind Great Call To Action Buttons

Calltoactionexample2 in The Secrets Behind Great Call To Action Buttons

Remember to keep it subtle!

Obviously the example above is fairly extreme just to demonstrate how some of the techniques I’ve mentioned can make a button have more impact. The idea is not necessarily to implement all of them, but to create an attractive, effective call to action button that makes your users take notice. You don’t want to over do things and end up with a tacky, overwhelming call to action that will dissuade your users. Instead, tweak your buttons styles until you’re happy with the result.

It’s not all about looks…

Whilst you don’t want to overwhelm your users, it’s equally important not to get hung up on how beautiful your calls to action are. Some of the ugliest calls to action have the best click through rates. If you’re trying to run a business then really you should value sales/conversions over aesthetics. A great solution is A/B testing. Perhaps design a few variations on your button and see which perform better, and which get the best feedback from your users.

Inspiring Call To Action Buttons

Here are 40 inspiring examples of effective and well designed call to action buttons. Hopefully these will inspire your own designs!

Ronin App
Ronin use a large, bright call to action button that really pops against the relatively subdued background color. The 1px highlight at the top of the button and subtle outer glow make the button appear more 3D and ‘clickable’, thus encouraging action on the part of the user. The tagline ‘No credit card required’ provides a subtle extra incentive to click the button.

Calltoaction1 in The Secrets Behind Great Call To Action Buttons

Ehab Aref
This is a great example of how contrast can lead to an effective call to action button. In this case the simplicity of the button is what helps it stand out. The background is bright and integrates a woven pattern design. Therefore the lighter, simpler call to action button contrasts this and draws the eye. Notice also how the button text is darker than the surrounding headline text, which helps attract clicks.

Calltoaction2 in The Secrets Behind Great Call To Action Buttons

Light CMS
One of the more effective call to action buttons in this article. There is a whole lot going on with this button! First of all, look at the backdrop – there is a kind of indented area in which the button sits, which instantly adds depth and creates intrigue in the viewer. Then the button itself stands out, using a teal color in the midst of a large block of orange background. Subtle inner glows, drop shadows etc… are applied to really make the button pop. Finally, the button is divided into two halfs ‘sign up’ and ‘for free’. This creates the illusion of two call to action buttons, despite there only being one. This seems to create double the attention from a users perspective, surely resulting in more click throughs.

Calltoaction3 in The Secrets Behind Great Call To Action Buttons

Shane Guymon
Shane Guymon uses two prominent call to action buttons on his homepage. These buttons work really well, as they both stand out from, and fit in with the overall design. The red and blue buttons fit with the main colors of his logo/slogan, yet really stand out against the plain white background of the main content area. There is a clear visual hierarchy at work, as the red button is given more visual precedence. This is achieved through it’s slightly larger size, more apparent gloss style, and preferential positioning (as we read left to right we encounter this button first).

Calltoaction4 in The Secrets Behind Great Call To Action Buttons

Simon Albrecht
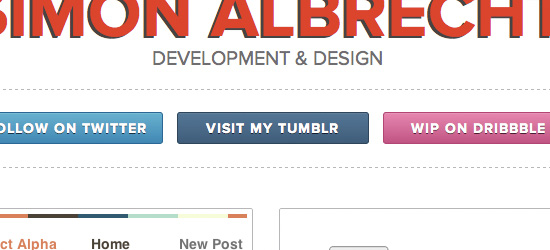
The call to action buttons at Simon Albrecht’s page are really well designed. Interestingly each button mimics the color-scheme of the social networking site that it links to. This helps establish instant brand recognition, and should boost click throughs. One point to note is that whilst these buttons may be effective, they are in fact navigating away from his main portfolio site. If this is the aim fine, otherwise they may be hindering more than helping.

Calltoaction5 in The Secrets Behind Great Call To Action Buttons

Web App Heaven
Really interesting call to action button, as it promotes a newsletter, rather than a product sale. The square button shape makes the button appear almost more like a banner ad than a call to action button. However, the intricate icons and masterful typography are very enticing. Overall this is a very nicely designed button, but perhaps the site owner should consider a more traditional button shape.

Calltoaction6 in The Secrets Behind Great Call To Action Buttons

Resume Baking
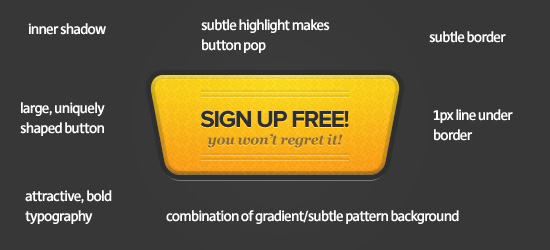
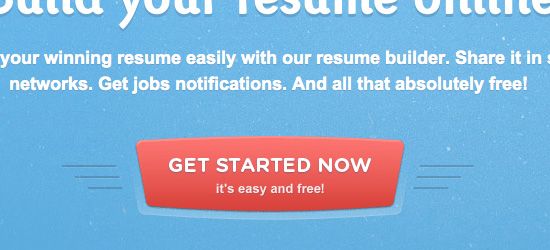
Easily one of my favorite buttons from this collection. In a world dominated by traditional rectangular or rounded rectangular buttons, this retro shaped button is incredibly eye catching. The shape and side lines make this button almost resemble a car logo. The bold red color helps the button pop, whilst the indented background design, drop shadow and gradient fill all help give the button depth and purpose.

Calltoaction7 in The Secrets Behind Great Call To Action Buttons

Studio Press
The two main call to action buttons at Studio Press are effective for a number of reasons. Their 1px stroke effect and drop shadows help make them stand out from the background. The typography is also consistent with the main navigation at the site, implying that the buttons should be clicked. The copy is simple and straight to the point. ‘View Our Themes’ could not be clearer, so the users know exactly what to expect.

Calltoaction8 in The Secrets Behind Great Call To Action Buttons

Snoack Studios
Snoack Studios is a great example of how call to action buttons don’t need to do anything too revolutionary. Sometimes simple is best. The traditional button shape, bold blue design and contrasting text work well. A little extra impact is provided by the button’s inner glow and subtle arrow.

Calltoaction9 in The Secrets Behind Great Call To Action Buttons

Concept Engine
Concept Engine has a great call to action button. Not only does it contrast well against the main page background but it feels very clickable due to a heavy bevel/drop shadow effect. Finally, the unusual arrow shape makes the button feel somewhat like a sign post directing the site’s users further into the website.

Calltoaction10 in The Secrets Behind Great Call To Action Buttons

Code my Concept
Code my Concept use a pretty unique call to action button, which integrates into the pricing box directly above it. This indented design feature creates a direct link between the prices/services offered and the option to place an order. The low opacity stroke effect really helps to define the button, and the arrow icon should help boost click through rates.

Calltoaction11 in The Secrets Behind Great Call To Action Buttons

Now Up
Now Up uses quite a cartoony style call to action button, which really fits with the surrounding aesthetic. The subtle metallic gloss on the text and gloss on the button make the button stand out against the plain, vector style page background.

Calltoaction12 in The Secrets Behind Great Call To Action Buttons

Vision 18
Vision 18 is one of the most creative examples in this post. The designer has photo manipulated the sofa image that acts as a welcome graphic, making one of the cushions red. This red cushion then acts as a bold call to action button, that creatively integrates with the surrounding graphics. It’s both artistic and functional.

Calltoaction13 in The Secrets Behind Great Call To Action Buttons

Square Space
Square Space use a really large call to action button that grabs plenty of attention. The bright green button design really pops against the dark gray backdrop and the text is clear and direct. The additional text ‘no credit card required’ is indicative of a growing trend I’m seeing, where important extra details are displayed as part of the call to action button, in a tagline format.

Calltoaction14 in The Secrets Behind Great Call To Action Buttons

Reynolds Digital
This is another example of a simple but effective call to action button. Nothing fancy going on, but the call to action works. The user is not distracted by unnecessary bells and whistles, but instead views the button as having an obvious purpose (in this case as represented by the copy ‘submit design brief’).

Calltoaction15 in The Secrets Behind Great Call To Action Buttons

Site Plan
Couldn’t analyze the copy in this example (my language skills are that bad!). However, the design for this button is solid. Fairly simple, yet the rounded edges, bright gradient and Museo typeface all combine to create a modern, elegant call to action.

Calltoaction16 in The Secrets Behind Great Call To Action Buttons

Alan Power
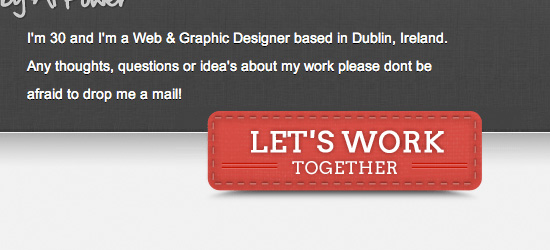
One of my favorite call to action button designs. The details are really inspiring, such as the subtle stitching and indented lines. The creative drop shadow style helps at depth and draws the users eye towards the button. The text is given a subtle outer glow to make it pop against the button backdrop.

Calltoaction17 in The Secrets Behind Great Call To Action Buttons

Bomb Plates
This simple call to action button works well by following the wider site color-scheme. It’s position on the page works well as your eye is drawn down the left of page towards the button. The subtle noise effect for the button background adds a nice design touch.

Calltoaction18 in The Secrets Behind Great Call To Action Buttons

Custom Bags HQ
A lovely pair of call to action buttons, using nice complimentary colors. The inner glow and button highlights give them an appealing glossy appearance, whilst the outer border effect gives a really professional touch. A great example of how the details can make or break an effective call to action button!

Calltoaction19 in The Secrets Behind Great Call To Action Buttons

DFied
Another great example of a call to action button being integrated into content areas. This button straddles the main welcome area and area underneath, and appears to be indented due to a semi-transpareant border effect. The indented text adds depth and the bright orange color-palette really helps the button pop.

Calltoaction20 in The Secrets Behind Great Call To Action Buttons

Pierre Saikali
These call to action buttons are simple but effective. Perhaps one of their main draws is the huge amount of white space around them. They comprise most of the content in a vast header area, and therefore the eye is naturally drawn towards them.

Calltoaction21 in The Secrets Behind Great Call To Action Buttons

Iphone Icon
The ‘order now’ button on this page is practically the only colorful element on the page, which is otherwise gray/white. Therefore it really stands out. Additionally the call to action button uses bold typography, a fairly heavy drop shadow, and a highlight effect to grab attention.

Calltoaction22 in The Secrets Behind Great Call To Action Buttons

Mojo Themes
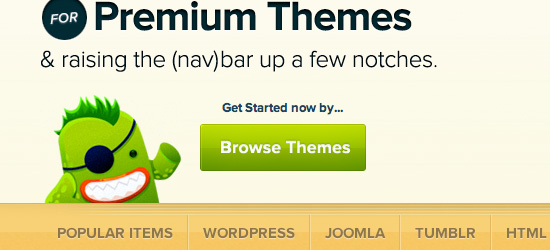
Mojo Themes have a great call to action button. Apart from the obvious great design of the button itself, it’s the surrounding elements that really make this button work. The site’s mascot is gesturing towards the button, whilst the tagline ‘get started now by…’ leads the users eye down to the button.

Calltoaction23 in The Secrets Behind Great Call To Action Buttons

Platinoom
The call to action button here is effective for a number of reasons. The button is large and prominent, with subtle design touches such as an inner shadow, 1px border etc… The shopping cart icon instantly creates a visual link for the purpose of the button (buying the theme).

Calltoaction24 in The Secrets Behind Great Call To Action Buttons

Pixel2Html
This call to action button has a great retro design that fits with the overall design of the site. The subtle patterned background, chunky border and large drop shadow all make it jump off the page and the copy ‘submit your order’ couldn’t be clearer.

Calltoaction25 in The Secrets Behind Great Call To Action Buttons

Make It Bead
Make It Bead use a nice clean, bold set of call to action buttons. The designer has used a classic technique of visual precedence to encourage people to click on the brighter red button, whilst offering a secondary option (the yellow button). The indented style for each button just makes you want to push them as they look almost real!

Calltoaction26 in The Secrets Behind Great Call To Action Buttons

Quote Roller
Quote Roller’s call to action button would be fairly plain, but the heavily rounded shape and indented button add a lot to quite a simple design. The arrow icon is a great visual element to suggest additional content – we wonder ‘what is that arrow leading to?’.

Calltoaction27 in The Secrets Behind Great Call To Action Buttons

Slamdot
The bright neon green color of this call to action button really pops against the blue backdrop. Importantly the tagline underneath the primary text helps explain where the user is clicking.

Calltoaction28 in The Secrets Behind Great Call To Action Buttons

Reflex Studios
The only other elements on the homepage using the pink of call to action button are the bullet points leading down to it. Therefore a clear visual flow is established scanning down the bullet points (which highlight services provided) to the call to action (‘view our work’). As the brightest element on the page, this is where users are most likely to click.

Calltoaction29 in The Secrets Behind Great Call To Action Buttons

Geekletics
Geekletics use one of my favorite call to action buttons in this collection. The button is really prominent and large, so instantly grabs people’s attention. The real selling points for this button are the details. The subtle border, inner glow and gradient work beautifully together. Combine this with excellent typography (notice the subtle color difference on the word ‘Go’), and the simplistic but effective icon. The Zazzle logo adds a lot of credibility to the shop which the button links to.

Calltoaction30 in The Secrets Behind Great Call To Action Buttons

Wire Hive
Wire Hive mount their call to action button on top of a curved graphical area. This positions the button totally central, so is really eye catching. The indented graphic on the button helps make it stand out, and the sharp drop shadow adds depth and perspective.

Calltoaction31 in The Secrets Behind Great Call To Action Buttons

Desk Time
DeskTime uses a fairly standard call to action button, but it’s very effective. Another example of how simplicity can work wonders! The green on blue combination helps the button stand out, and the subtle drop shadow and gloss effect add impact.

Calltoaction32 in The Secrets Behind Great Call To Action Buttons

Baby Li.st
One of the simpler call to action buttons in this compilation, yet one of the more artistic. This is a great example of how typography can make a button much more interesting. The word ‘BabyList’ uses the site’s logo text, rather than the font used elsewhere on the button. This subtle variation is really eye-catching and helps maintain the company’s brand.

Calltoaction33 in The Secrets Behind Great Call To Action Buttons

WP Zoom
A super bright call to action button which starkly contrasts the dark blue background. The main button text is accompanied by a cheeky subtext ‘You will definitely find one you’ll like!’. This helps establish a personal/emotional connection with the viewer, who is most likely used to plain/boring copy buttons they encounter.

Calltoaction34 in The Secrets Behind Great Call To Action Buttons

Podio
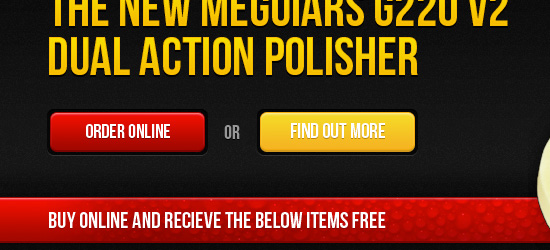
Podio’s call to action buttons are understated, but work well with the page design. By staying small and sleek they support the quietly professional brand of the website. There is a visual hierarchy established by the colors of each button, whereby the ‘get started for free’ button is given more precedence than the ‘find out more’ button. Clearly the brighter button is encouraging users to sign up, as the primary call to action on the page.

Calltoaction35 in The Secrets Behind Great Call To Action Buttons

FanExtra
FanExtra uses a large call to action button that has adopted some of the graphical elements of a banner to help draw plenty of attention. The button includes a professional icon design, as well as copy that clearly states what is offered by signing up. The ‘sign up today!’ text is styled bright yellow in order to stand out the most.

Calltoaction36 in The Secrets Behind Great Call To Action Buttons

Assistly
Assistly uses a simple, elegant call to action button to encourage users to sign up for their service. The green button compliments the purple background well, yet the button stands out partly through use of a drop shadow effect.

Calltoaction37 in The Secrets Behind Great Call To Action Buttons

Hello Bar
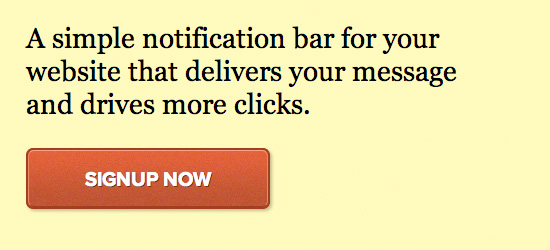
Hello Bar has a great call to action button. The button is one of the most colorful elements on the page, and uses a bold outline/inner glow effect to stand out. The ‘signup now’ text uses a very bold font, which helps it have the impact of a headline or title area. This is a great example of subtle design aspects making a button more ‘clickable’. The very subtle texture used on the button design makes it feel more real/palpable and jumps out more to users.

Calltoaction38 in The Secrets Behind Great Call To Action Buttons

Open Public App
Open Public use maroon for highlights against a largely blue/gray web design. The bold maroon ‘DOWNLOAD’ button is really bold, and the white text provides a great contrast. The subtle drop shadow adds depth to this button.

Calltoaction39 in The Secrets Behind Great Call To Action Buttons

Janko at Warp Speed
Another great example of a layout with two call to action buttons and a clear visual hierarchy. The bolder ‘read my blog’ button is clearly given more precedence than ‘view my work’. Both buttons are enticing though. Whilst they fit with the subdued color-scheme of the website the arrows help draw attention, and the large amount of padding given to the buttons helps them stand out against a plain backdrop.

Calltoaction40 in The Secrets Behind Great Call To Action Buttons

(rb)


The Heritage Of Berlin Street Art And Graffiti Scene

Advertisement in The Heritage Of Berlin Street Art And Graffiti Scene
 in The Heritage Of Berlin Street Art And Graffiti Scene  in The Heritage Of Berlin Street Art And Graffiti Scene  in The Heritage Of Berlin Street Art And Graffiti Scene

Art critic Emilie Trice has called Berlin “the graffiti Mecca of the urban art world.� While few people would argue with her, the Berlin street scene is not as radical as her statement suggests. Street art in Berlin is a big industry. It’s not exactly legal, but the city’s title of UNESCO’s City of Design has kept local authorities from doing much to change what observers call the most “bombed� city in Europe. From the authorities’ point of view, the graffiti attracts tourists, and the tourists bring money to a city deep in debt.

This article looks at the development of the Berlin street art scene, from its beginnings as a minor West Berlin movement in the late ’70s to its current status: the heritage of a now unified city.

The Development Of The Berlin Graffiti Scene

After the few East Germans who crossed the Berlin Wall in the ’80s blinked and pinched themselves, what do you think was the first thing they saw?

They saw big bubbly letters, spelling out words in German, English and French. They saw political slogans, either carved indelibly into the concrete or sprayed temporarily onto surfaces, commenting not only on the situation in Germany, but on the whole political world: “God Ble$$,� “Concrete Makes You Happy,� “Death to Tyrants.� As far as they could see, covering every inch of wall, was layer upon layer of zest, life and color.

Wall-final2 in The Heritage Of Berlin Street Art And Graffiti Scene

If they’d crossed in the ’60s, however, they’d have been tempted to jump straight back. Abandoned buildings, derelict streets, piles of rubble — the immediate areas around the wall were reminiscent of World War II, and it would take another 10 years for the first communities to settle there.

Even then, those early settlers weren’t “real� Berliners, but outsiders: draft resisters, anarchist punks and Turkish migrants. They either opened businesses or formed squats and, with no resistance from the West German government, began turning walls into monuments to their own thoughts and beliefs.

By the end of the ’70s, a new wave of graffiti artists, arriving with innovations such as stencils and spray cans, were contributing genuine works of art. Our East German friends would have been staring not just at the defacement of Communist property, but at what graffiti artists had by then claimed as their Mecca.

After The Wall

After the collapse of the Berlin Wall, the graffiti artists marched straight into East Germany. Mitte, Friedrichshain, Prenzlauer Berg — all of the areas that the military had occupied became a new playground for the Western artists and became a new world for the Eastern artists who joined them. Few doubted that the East Germans’ work was weightier. It wasn’t that they were better artists, but that they could express — with authority — the one concept close to the hearts of all people now living in the city: what it meant to be free.

Friedrichshain in The Heritage Of Berlin Street Art And Graffiti Scene
A street in the East Berlin area of Friedrichshain a year after the fall of the Berlin Wall.

One East Berliner to make an impact during this period was “Tower.� With his name printed in a variety of colors and fonts on what looked like car stickers, people must have initially mistaken his work for advertising. But the more they saw it — on lamp posts, on post boxes, on trash cans, on fences — the more they understood what he was trying to communicate: Tower, as in the communist TV tower; Tower, as in the skyscrapers that dominated the skyline of almost every major city — built not for the people who lived there, but for the egos of the people who ran them. Tower’s aim was to reclaim the word as a symbol of strength and, in doing so, proclaim that the majority, not the minority, should be shaping the public space.

Tower9 in The Heritage Of Berlin Street Art And Graffiti Scene

A Case Study: Linda’s Ex

In the summer of 2003, posters of a boy bemoaning the loss of his ex-girlfriend, Linda, began to appear on walls and fences in the Friedrichshain district. Sometimes he looked like a boy ready to kill himself; sometimes he looked like a man ready to kill. Whichever way the artist drew him, his sad eyes always asked passersby the same question: “Where’s Linda?�

Eyes1 in The Heritage Of Berlin Street Art And Graffiti Scene

At first, people either ignored the posters or were mildly curious. But as both the pictures and messages increased in intensity, they had no choice but to take notice. On one poster, Linda’s ex told his estranged lover that he would be waiting to speak to her at a certain bar every Saturday and Tuesday night. People were starting to believe that his suffering was real. And if his suffering was real, then they did not doubt that he needed help.

Lindabar in The Heritage Of Berlin Street Art And Graffiti Scene

“He loves you, Linda� one person wrote in a newspaper ad.

Angel in The Heritage Of Berlin Street Art And Graffiti Scene

A caller to a radio show wasn’t so kind. “He’s a cad,� the person said to Linda. “Don’t go back.�

Dec1 in The Heritage Of Berlin Street Art And Graffiti Scene

Everyone seemed to have a point of view, and the more they expressed it, the more posters appeared.

Lindapic-e1308773587848 in The Heritage Of Berlin Street Art And Graffiti Scene

Takemihand in The Heritage Of Berlin Street Art And Graffiti Scene

Finally, a year later, Linda’s Ex, the alias of artist Roland Brueckner, faced the public. There was no Linda, he confessed. The whole campaign had been a hoax.

The New Artists

Linda’s Ex was successful because he communicated with and responded to his audience almost every day. If he had stopped, even for a month, the public’s interest would have dissipated.

The critiques below examine the artwork of three Berlin street artists working today — maybe at this very moment. Like Linda’s Ex, XOOOX, Alias and Mein Lieber Prost make certain that their work remains in the public eye, constantly.

XOOOOX

Berlin has the typical street art spots… but I like more the classical writing scene, with the huge street bombings and the masses of tags.

To most people, the letters xoooox represent hugs and kisses. To XOOOOX, they represent symmetry and strength, for no matter how much he rearranges them, they remain a powerful signature that could belong to no one but him.

This tells XOOOOX’s public as much about him as they need to know: what you see is what you get. For instance, many people would like to believe that his black and white stencils are an ironic, anti-capitalist statement. But as the artist claims himself, they are a straight homage to the fashion world.

His fascination with fashion began when he discovered a pile of his parent’s old fashion magazines in the cellar. He would cut out parts of the pictures, mix them up and stick them on the walls of his room.

Collage still fascinates him, but he says that on the street, stencils are far more practical. At home, he creates a stencil from one of his fashion magazines — including everything from Harper’s to Vogue — and then, armed with his spray paint and stencil, he replicates the image on the streets.

Sample of XOOOOX’s Work

Piss in The Heritage Of Berlin Street Art And Graffiti Scene

Xooox-3 in The Heritage Of Berlin Street Art And Graffiti Scene

Xooox-2 in The Heritage Of Berlin Street Art And Graffiti Scene

Analysis of XOOOOX’s work

People enjoy XOOOOX’s approach because of his objective treatment of his subjects, presenting each model as neither happy nor sad, neither warm nor cold. He even draws one model urinating on the ground; while some might interpret the piece as a sign of arrogance, XOOOOX’s signature, flowing from her head like a thought bubble, persuades sensitive observers to judge her on a more humane level. She is, he suggests, just like everyone else.

What sets her apart is her beauty. The artist highlights this by always spraying her image on the grayest and ugliest of concrete walls, amidst the most innocuous of graffiti scrawls. Like the pretty girl sitting alone in a bar, passersby rarely walk past without giving her a second glance.

Overall, XOOOOX’s images show an artist with a genuine appreciation of conventional beauty. In a scene that likes to subvert conventions, this must make XOOOOX the most unconventional artist working on Berlin’s streets today.

Alias

My motives are often introverted and emotional, but… they brand… themselves on the memory of people passing. They are supposed to inspire people to interpret the motives on their own.

Judging from the number of his pieces, Alias must rarely sleep. His artwork certainly suggests someone at odds with society: black and white pictures of hooded skater types staring at the ground, and young kids unknowingly sitting on live bombs. One senses that something is very wrong with Alias’ world.

Alias left school early and moved to Hamburg, a city with its own impressive array of street artists. Developing his skill there to an advanced level, he moved on to Berlin, where people soon recognized his work as among the best in the city.

Sample of Alias’s work

Alias2 in The Heritage Of Berlin Street Art And Graffiti Scene

Alias1 in The Heritage Of Berlin Street Art And Graffiti Scene

Alias-2 in The Heritage Of Berlin Street Art And Graffiti Scene

Analysis of Alias’s Work

Alias’ dark and somber images make him the city’s most serious artist. He stencils each of his pictures with great care, and always places them in a spot that best communicates his message. His picture of a man asking people to keep his identity a secret is stuck not on the wall of a busy thoroughfare, but at the bottom edge of a staircase. It gives the impression that, beyond the playfulness, he genuinely wants to keep his identity a secret.

Alias’ signature then is essential to understanding his work. The picture of a hooded teenager with a blank face communicates a need to give outsiders a voice. The irony is that the one person humane enough to give them that voice, a street artist, has to remain anonymous. That, Alias suggests, is his reward for daring to question society.

Mein Lieber Prost

All that’s come out is a result of my happiness, my courage, my fantasies or my disappointments. All great artists are great not for their technique, but their passion.

Most people will walk by graffiti without even noticing it. It hides in the corners of doorways and blends in with its surroundings. Prost’s characters, however, point and laugh directly at passersby. The characters are often a simple black outline. On occasion, Prost takes the time to fill the characters in with red, white and black. Whatever the method, he places his artwork in just about any free spot he can find: side streets, high streets, advertisements, doorways, signs. Nowhere in the city is safe.

And yet the public knows little about the artist himself. For legal reasons, he safeguards his identity. At a more artistic level, the anonymity enables him to present the smiley faces, and not himself, as the essence of his work.

Sample of Mein Lieber Prost’s Work

Prost-1 in The Heritage Of Berlin Street Art And Graffiti Scene

Prost-3 in The Heritage Of Berlin Street Art And Graffiti Scene

Prost-2 in The Heritage Of Berlin Street Art And Graffiti Scene

Analysis of Mein Lieber Prost’s Work

It’s easy to miss the point of Prost’s smiley faces. On the surface, they look like the simple one-minute doodles of a high-school student. And the artist probably drew them in half that time. But that simplicity is what makes Prost’s faces so interesting, for two reasons.

First, it allows Prost to put his images in places that few other artists would dare to go. Alias, for example, needs time to place and spray his images and, therefore, works in more secluded spots to decrease the chances of getting caught. Prost has only to draw a quick outline, and then he’s finished. In fact, he has now drawn so many that he no longer needs to leave his signature: his work, rather than his name, has become his identity.

Secondly, the artist positions his characters to look like they are taking in their surroundings, laughing aloud at something happening right at that moment. It is natural, then, on seeing Prost’s characters pointing at them, for people to wonder what the joke is, asking themselves: is it me? Each character forces passersby to question their surroundings and (hopefully, if they don’t want to leave paranoid) to find a satisfactory answer.

Moving Into The Mainstream

Visitors to Berlin tend to ask the same question: is the street art legal? It is a difficult question for Berliners to answer. In central parts of the city at least, there is variously so much and so little criticism directed at it that no one quite knows. Head of the anti-graffiti team, Chief Detective Marko Moritz, insists, however, that the city views graffiti as a crime.

In an interview with The Local newspaper, he states that his team’s main goal is to catch the tagging crews whose work has its roots not in art, but in gang culture. In what he calls bombings, crews will spray whole trains and sometimes buildings with their signatures and colors. But Moritz is concerned not only with the defacement of public property; some crews, he claims, are starting to carry firearms.

Unlike19 in The Heritage Of Berlin Street Art And Graffiti Scene

Their behavior, while disturbing, is a byproduct of the authorities’ attempt to turn the street art scene into an industry. When UNESCO named Berlin as a City of Design, few people doubted that the thriving street art scene was partly responsible. Local businesses and even local authorities hired artists to paint murals on the fronts of their buildings. Most famously, on a wall in Kreuzberg, the artist Blu painted two men trying to rip each other’s masks off — symbolizing, he claims, Berlin’s struggles during its first few years of reunification.

Today, such work has made the street art a tourist attraction. Kunsthaus Tacheles, once an artists’ squat and still a focal point of the scene, holds disco nights downstairs and sells urban art books upstairs — its bar is as expensive as anywhere in the city. Artists such as XOOOOX, Mein Lieber Prost and Alias have started to exhibit and sell in galleries. They still work on the street, but they are no longer impoverished artists — if they ever were. They can afford to travel and work in countries across the world.

Murals in The Heritage Of Berlin Street Art And Graffiti Scene

While these artists believe that street art needs to appeal to a wider audience, the local, more traditional artists, such as the tagging crews, disagree. They argue that street art derives its power from being on the margins of society; only from the outside can they address problems within it. That difference of opinion is opening a space in the scene that can be filled only by the mainstream. In the next few years, street art has the potential to become a social movement as inclusive as anything from the ’50s and ’60s.

(al)


© Simon Thomas for Smashing Magazine, 2011.


Obscure and Valuable Keyboard Shortcuts

Advertisement in Obscure and Valuable Keyboard Shortcuts
 in Obscure and Valuable Keyboard Shortcuts  in Obscure and Valuable Keyboard Shortcuts  in Obscure and Valuable Keyboard Shortcuts

If there is one thing that many of us in the design and development fields love, it is shortcuts. Those lovely little timesavers and workflow improvers that quickly get us where we need to go in fewer motions. Effectively keeping us in stride, as we navigate our computers and various apps using the shortcuts that we have picked up along the way. But even the most alert of those among us will have numerous hotkeys go under our radar, as there are just so many out there.

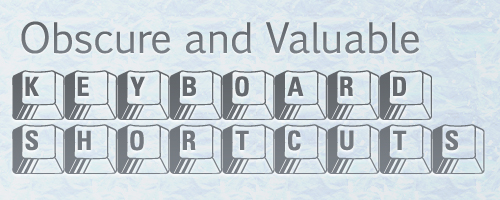
Keyboardshortcutsheader in Obscure and Valuable Keyboard Shortcuts

So in this quest to find some useful and obscure hotkeys we turned, as we do from time to time, to the faithful followers and friends of the Smashing team. With days of amazing answers to sift and sort through, we have compiled a truly exciting list of keyboard shortcuts that may not be that widely known. So we hope that our readers find this post as helpful as we imagine that they will.

Mac

  • ALT + CMD + SPACE to search in finder
  • CMD + ALT + Left/Right to switch between tabs
  • CMD + L to access the input field
  • CMD + ` on a mac to tab through application windows
  • CMD + OPT + ESC to Force Quit apps
  • CMD + Tab to cycle through open apps on Mac
  • CMD + H to hide the window
  • CMD + ALT + H to hide other windows
  • Shift + CMD + I when in safari opens a mail with the link of the current page in it
  • CMD + T followed by CMD + K to perform a search in a new tab
  • ALT + CMD + Eject put the mac to sleep
  • CMD + Shift + A to autofill forms in Safari
  • OPT/CMD + arrow keys – also hold Shift to select. Makes it easy to delete multiple words/lines quickly
  • CMD + OPT + Shift and V to paste without coping the formatting of what you pasted
  • CTRL + OPT + CMD + 8. Inverts Mac screen colors
  • CMD + Shift + 4. Saves a snapshot of a selected area to the desktop (You can then press spacebar to cycle between a crosshair or window selection)
  • CMD + CTRL + Shift + 4 = snap a screen a picture of a marquee area of the screen and copy it to clipboard
  • CMD + SPACE to open spotlight
  • CTRL + OPT + CMD + Eject Quits all applications and shuts the computer down
  • CMD + E to eject selected volume on the Mac
  • CTRL + Shift + CMD + 3 for clipboard – screenshot, compared to print-screen on PCs
  • CMD + , on a Mac to access current app preferences
  • CMD + OPT click and drag creates an alias of the file where you drag it
  • CMD + Delete to move to trash
  • CMD + Shift + Delete to empty the trash from Finder
  • CTRL + OPT + CMD + . = increase contrast CTRL + OPT + CMD + , = decrease contrast
  • CMD + OPT + D to hide/unhide the dock

Windows

  • CTRL + INS to copy, Shift + INS to paste, Shift + Delete to cut. Such an underappreciated series of hotkeys.
  • CTRL + 0 to return web page to 100% (default) zoom level
  • CTRL + Shift + Eject to turn off monitor
  • CTRL + Shift + ESC on windows to get to task manager directly
  • Win7: WIN + M to minimize all opened windows
  • WIN + Left/Right to put windows side by side. Nice live coding method.
  • CTRL + K + D this hotkey indents html and c# code nicely
  • WIN + D (return to desktop)
  • ALT + BACK to backspace by the word rather than by the character
  • win: Shift + Delete delete files without saving to trash bin

Linux

  • CTRL + ALT + T to open Terminal on Ubuntu. I can’t live without it now

Photoshop / Illustrator

  • CMD + Shift + C in Photoshop to copy the merged selection (save’s you the step of merging your file then undoing!)
  • In Photoshop – CMD + ALT + 0 to resize the window to 100% is essential for web designers!
  • Shift + ALT + CMD + S (win: CTRL + Shift + ALT + S)… Save for web in Photoshop
  • CTRL + Shift + C flatten and copy with transparency, Photoshop
  • Illustrator CTRL + 7 to crop image
  • Photoshop: CTRL + Shift + ALT + E merges all visible layers to a new layer on top of the others without deleting them

Firefox / Chrome

  • CTRL + Shift + E for Edit CSS (Firefox/Webmasters Toolbar)
  • CMD + Shift + C Inspect Element // Firefox—Firebug // Chrome—Developer Tools
  • CTRL + Shift + T to open closed tabs FF Chrome, and CTRL + Shift + N to open closed windows FF
  • Firefox CTRL + L to enable retyping of a web address
  • ESC hides the mousepointer (in browser). Great for Screenshots

Honorable Mention: Mouse Gestures

“I almost stopped using hot keys when started using mouse gestures, both in ff and chrome”

  • Press Shift and scroll your mousewheel. Scrolls horizontally on the page
  • Click on links using mousewheel in FF & Chrome and links open automatically in new tab

(rb)


Behind The Scenes Of Nike Better World

Advertisement in Behind The Scenes Of Nike Better World
 in Behind The Scenes Of Nike Better World  in Behind The Scenes Of Nike Better World  in Behind The Scenes Of Nike Better World

Perhaps one of the most talked about websites in the last 12 months has been Nike Better World. It’s been featured in countless Web design galleries, and it still stands as an example of what a great idea and some clever design and development techniques can produce.

In this article, we’ll talk to the team behind Nike Better World to find out how the website was made. We’ll look at exactly how it was put together, and then use similar techniques to create our own parallax scrolling website. Finally, we’ll look at other websites that employ this technique to hopefully inspire you to build on these ideas and create your own variation.

Nike Better World

Nike-Better-World in Behind The Scenes Of Nike Better World

Nike Better World is a glimpse into how Nike’s brand and products are helping to promote sports and its benefits around the world. It is a website that has to be viewed in a browser (preferably a latest-generation browser, although it degrades well) rather than as a static image, because it uses JavaScript extensively to create a parallax scrolling effect.

A good deal of HTML5 is used to power this immersive brand experience and, whatever your views on Nike and its products, this website has clearly been a labor of love for the agency behind it. Although parallax scrolling effects are nothing new, few websites have been able to sew together so many different design elements so seamlessly. There is much to learn here.

An “Interactive Storytelling Experience�

In our opinion, technologies are independent of concept. Our primary focus was on creating a great interactive storytelling experience.

– Widen+Kennedy

Nike turned to long-time collaborator Widen+Kennedy (W+K), one of the largest independent advertising agencies in the world, to put together a team of four people who would create Nike Better World: Seth Weisfeld was the interactive creative director, Ryan Bolls produced, while Ian Coyle and Duane King worked on the design and interaction.

Wiedenkennedy in Behind The Scenes Of Nike Better World

I started by asking the team whether the initial concept for the website pointed to the technologies they would use. As the quote above reveals, they in fact always start by focusing on the concept. This is a great point. Too many of us read about a wonderful new technique and then craft an idea around it. W+K walk in the opposite direction: they create the idea first, and sculpt the available technologies around it.

So, with the concept decided on, did they consciously do the first build as an “HTML5 website,� or did this decision come later?

There were some considerations that led us to HTML5. We knew we wanted to have a mobile- and tablet-friendly version. And we liked the idea of being able to design and build the creative only once to reach all the screens we needed to be on. HTML5 offered a great balance of creativity and technology for us to communicate the Nike Better World brand message in a fresh and compelling way.

– W+K

HTML5 is still not fully supported in all browsers (read “in IE�) without JavaScript polyfills, so just how cross-browser compatible did the website have to be?

The primary technical objectives were for the site to be lightweight, optimized for both Web and devices, as well as to be scalable for future ideas and platforms.

– W+K

To achieve these goals, the website leans on JavaScript for much of the interactivity and scrolling effects. Later, we’ll look at how to create our own parallax scrolling effect with CSS and jQuery. But first, we should start with the template and HTML.

The Starting Boilerplate

It’s worth pointing out the obvious first: Nike Better World is original work and should not be copied. However, we can look at how the website was put together and learn from those techniques. We can also look at other websites that employ parallax scrolling and then create our own page, with our own code and method, and build on these effects.

I asked W+K if it starts with a template.

We started without a framework, with only reset styles. In certain cases, particularly with experimental interfaces, it ensures that complete control of implementation lies in your hands.

– W+K

If you look through some of the code on Nike Better World, you’ll see some fairly advanced JavaScript in a class-like structure. However, for our purposes, let’s keep things fairly simple and rely on HTML5 Boilerplate as our starting point.

Download HTML5 Boilerplate. The “strippedâ€� version will do. You may want to delete some files if you know you won’t be using them (crossdomain.xml, the test folder, etc.).

As you’ll see from the source code (see the final code below), our page is made up of four sections, all of which follow a similar pattern. Let’s look at one individual section:

<section class="story" id="first" data-speed="8" data-type="background">
 <div data-type="sprite" data-offsetY="950" data-Xposition="25%" data-speed="2"></div>
 <article>
  <h2>Background Only</h2>
  <div>
   <p>Pellentesque habitant morbi tristique senectus et netus et malesuada fames ac turpis egestas. Vestibulum tortor quam, feugiat vitae, ultricies eget, tempor sit amet, ante. Donec eu libero sit amet quam egestas semper. Aenean ultricies mi vitae est. Mauris placerat eleifend leo.</p>
  </div>
 </article>
</section>

I’m not sure this is the best, most semantic use of those HTML5 tags, but it’s what we need to make this effect work. Normally, a section has a heading, so, arguably, the section should be a div and the article should be a section. However, as W+K points out, the HTML5 spec is still young and open to interpretation:

HTML5 is still an emerging standard, particularly in implementation. A lot of thought was given to semantics. Some decisions follow the HTML5 spec literally, while others deviate. As with any new technology, the first to use it in real-world projects are the ones who really shape it for the future.

– W+K

This is a refreshing interpretation. Projects like Nike Better World are an opportunity to “reality check� an emerging standard and, for the conscientious among us, to provide feedback on the spec.

In short, is the theory of the spec practical? W-K elaborates:

We use the article tag for pieces of content that can (and should) be individually (or as a group) syndicated. Each “story� is an article. We chose divs to wrap main content. We took the most liberty with the section tag, as we feel its best definition in the spec is as chapters of content, be it globally.

– W+K

As an aside (no pun intended!), HTML5 Doctor has begun a series of mark-up debates called Simplequizes, which are always interesting and illustrate that there is rarely one mark-up solution for any problem. Make sure to check them out.

In style.css, we can add a background to our section with the following code:

section { background: url(../images/slide1a.jpg) 50% 0 no-repeat fixed; }

We should also give our sections a height and width, so that the background images are visible:

.story { height: 1000px; padding: 0; margin: 0; width: 100%; max-width: 1920px; position: relative; margin: 0 auto; }

I’ve set the height of all our sections to 1000 pixels, but you can change this to suit your content. You can also change it on a per-section basis.

We have also made sure that the maximum width of the section is the maximum width of the background (1920 pixels), and we have specified a relative position so that we can absolutely position its children.

Here’s the page before adding JavaScript. It’s worth digging into the source code to see how we’ve duplicated the sections in the HTML and CSS.

Backgroundonly in Behind The Scenes Of Nike Better World

Even with this code alone, we already have a pleasing effect as we scroll down the page. We’re on our way.

The HTML5 Data Attribute

Before looking at parallax scrolling, we need to understand the new data attribute, which is used extensively throughout the HTML above.

Back in the good old days, we would shove any data that we wanted to be associated with an element into the rel attribute. If, for example, we needed to make the language of a story’s content accessible to JavaScript, you might have seen mark-up like this:

<article class='story' id="introduction" rel="en-us"></article>

Sometimes complex DOM manipulation requires more information than a rel can contain, and in the past I’ve stuffed information into the class attribute so that I could access it. Not any more!

The team at W+K had the same issue, and it used the data attribute throughout Nike Better World:

The data attribute is one of the most important attributes of HTML5. It allowed us to separate mark-up, CSS and JavaScript into a much cleaner workflow. Websites such as this, with high levels of interaction, are almost application-like behind the scenes, and the data attribute allows for a cleaner application framework.

– W+K

Sportisanaddress in Behind The Scenes Of Nike Better World

So, what is the data attribute? You can read about it in the official spec, which defines it as follows:

Custom data attributes are intended to store custom data private to the page or application, for which there are no more appropriate attributes or elements.

– W+K

In other words, any attribute prefixed with data- will be treated as storage for private data; it does not affect the mark-up, and the user cannot see it. Our previous example can now be rewritten as:

<article class='story' id="introduction" data-language="en-us"></article>

The other good news is that you can use more than one data attribute per element, which is exactly what we’re doing in our parallax example. You may have spotted the following:

<div data-type="sprite" data-offsetY="100" data-Xposition="50%" data-speed="2"></div>

Here, we are storing four pieces of information: the x and y data offsets and the data speed, and we are also marking this element as a data type. By testing for the existence of data-type in the JavaScript, we can now manipulate these elements as we wish.

Parallax Scrolling

On our page, three things create the parallax scrolling illusion:

  • The background scrolls at the slowest rate,
  • Any sprites scroll slightly faster than the background,
  • Any section content scrolls at the same speed as the window.

With three objects all scrolling at different speeds, we have created a beautiful parallax effect.

AnExplanation in Behind The Scenes Of Nike Better World

It goes without saying that we don’t need to worry about the third because the browser will take care of that for us! So, let’s start with the background scroll and some initial jQuery.

$(document).ready(function(){
 // Cache the Window object
 $window = $(window);
// Cache the Y offset and the speed
$('[data-type]').each(function() {
  $(this).data('offsetY', parseInt($(this).attr('data-offsetY')));
  $(this).data('speed', $(this).attr('data-speed'));
});
// For each element that has a data-type attribute
 $('section[data-type="background"]').each(function(){
  // Store some variables based on where we are
  $(this).data('speed', parseInt($(this).attr('data-speed')));
   var $self = $(this),
   offsetCoords = $self.offset(),
   topOffset = offsetCoords.top;
   $(window).scroll(function(){
    // The magic will happen in here!
   }); // window scroll
 });	// each data-type
}); // document ready

First, we have our trusty jQuery document ready function, to ensure that the DOM is ready for processing. Next, we cache the browser window object, which we will refer to quite often, and call it $window. (I like to prefix jQuery objects with $ so that I can easily see what is an object and what is a variable.)

We also use the jQuery .data method to attach the Y offset (explained later) and the scrolling speed of the background to each element. Again, this is a form of caching that will speed things up and make the code more readable.

We then iterate through each section that has a data attribute of data-type="background" with the following:

$('section[data-type="background"]').each(function(){}

Already we can see how useful data attributes are for storing multiple pieces of data about an object that we wish to use in JavaScript.

Inside the .each function, we can start to build up a picture of what needs to be done. For each element, we need to grab some variables:

// Store some variables based on where we are
var $self = $(this),
    offsetCoords = $self.offset(),
    topOffset = offsetCoords.top;

We cache the element as $self (again, using the $ notation because it’s a jQuery object). Next, we store the offset() of the element in offsetCoords and then grab the top offset using the .top property of offset().

Finally, we set up the window scroll event, which fires whenever the user moves the scroll bar or hits an arrow key (or moves the trackpad or swipes their finger, etc.).

We need to do two more things: check that the element is in view and, if it is, scroll it. We test whether it’s in view using the following code:

// If this section is in view
if ( ($.Window.scrollTop() + $.Window.height()) > ($offsetCoords.top) &&
( ($offsetCoords.top + $self.height()) > $.Window.scrollTop() ) ) {
}

The first condition checks whether the very top of the element has scrolled into view at the very bottom of the browser window.

The second condition checks whether the very bottom of the element has scrolled past the very top of the browser window.

You could use this method to check whether any element is in view. It’s sometimes useful (and quicker) to process elements only when the user can see them, rather than when they’re off screen.

So, we now know that some part of the section element with a data-type attribute is in view. We can now scroll the background. The trick here is to scroll the background slower or faster than the browser window is scrolling. This is what creates the parallax effect.

Here’s the code:

// Scroll the background at var speed
// the yPos is a negative value because we're scrolling it UP!
var yPos = -($window.scrollTop() / $self.data('speed'));

// If this element has a Y offset then add it on
if ($self.data('offsetY')) {
  yPos += $self.data('offsetY');
}

// Put together our final background position
var coords = '50% '+ yPos + 'px';

// Move the background
$self.css({ backgroundPosition: coords });

The y position is calculated by dividing the distance that the user has scrolled from the top of the window by the speed. The higher the speed, the slower the scroll.

Next, we check whether there is a y offset to apply to the background. Because the amount that the background scrolls is a function of how far the window has scrolled, the further down the page we are, the more the background has moved. This can lead to a situation in which the background starts to disappear up the page, leaving a white (or whatever color your background is) gap at the bottom of each section.

The way to combat this is to give those backgrounds an offset that pushes them down the page an extra few hundred pixels. The only way to find out this magic offset number is by experimenting in the browser. I wish it was more scientific than this, but this offset really does depend on the height of the browser window, the distance scrolled, the height of your sections and the height of your background images. You could perhaps write some JavaScript to calculate this, but to me this seems like overkill. Two minutes experimenting in Firebug yields the same result.

The next line defines a variable coords to store the coordinates of the background. The x position is always the same: 50%. This was the value we set in the CSS, and we won’t change it because we don’t want the element to scroll sideways. Of course, you’re welcome to change it if you want the background to scroll sideways as the user scrolls up, perhaps to reveal something.

(Making the speed a negative number for slower scrolling might make more sense, but then you’d have to divide by -$speed. Two negatives seems a little too abstract for this simple demonstration.)

Finally, we use the .css method to apply this new background position. Et voila: parallax scrolling!

Here’s the code in full:

// Cache the Window object
$window = $(window);

// Cache the Y offset and the speed of each sprite
$('[data-type]').each(function() {
  $(this).data('offsetY', parseInt($(this).attr('data-offsetY')));
  $(this).data('speed', $(this).attr('data-speed'));
});

// For each element that has a data-type attribute
$('section[data-type="background"]').each(function(){

// Store some variables based on where we are
var $self = $(this),
    offsetCoords = $self.offset(),
    topOffset = offsetCoords.top;

$(window).scroll(function(){

// If this section is in view
if ( ($window.scrollTop() + $window.height()) > (topOffset) &&
( (topOffset + $self.height()) > $window.scrollTop() ) ) {

  // Scroll the background at var speed
  // the yPos is a negative value because we're scrolling it UP!
  var yPos = -($window.scrollTop() / $self.data('speed'));

  // If this element has a Y offset then add it on
  if ($self.data('offsetY')) {
    yPos += $self.data('offsetY');
  }

  // Put together our final background position
  var coords = '50% '+ yPos + 'px';

  // Move the background
  $self.css({ backgroundPosition: coords });

  }; // in view

}); // window scroll

});	// each data-type

Of course, what we’ve done so far is quite a bit simpler than what’s on Nike Better World. W+K admits that the parallax scrolling threw it some challenges:

The parallax scrolling presented a few small challenges in cross-browser compatibility. It took a little experimenting to ensure the best scrolling experience. In the end, it was less about the actual parallax effect and more about synchronized masking of layers during transitions.

– W+K

W+K also reveals how it maintained a fast loading and paint speed by choosing its tools wisely:

The key to maintaining faster speeds is to use native CSS where possible, because DOM manipulation slows down rendering, particularly on older browsers and processors.

– W+K

For example, the “Moreâ€� button below spins on hover, an effect achieved with CSS3. In browsers that don’t support CSS3 transforms, the purpose of the graphic is still obvious.

CSSuse in Behind The Scenes Of Nike Better World

Adding More Elements

Of course, one of the other common features of parallax scrolling is that multiple items on the page scroll. So far, we have two elements that move independently of each other: the first is the page itself, which scrolls when the user moves the scroll bar, and the second is the background, which now scrolls at at slower rate thanks to the jQuery above and the background-position CSS attribute.

For many pages, this would be enough. It would be a lovely effect for the background of, say, a blog. However, Nike and others push it further by adding elements that move at a different speed than that of the page and background. To make things easy — well, easier — I’m going to call these new elements sprites.

Here’s the HTML:

<div id="smashinglogo" data-type="sprite" data-offsetY="1200" data-Xposition="25%" data-speed="2"></div>

Put this just before the closing </article> tag, so that it appears behind the contents of <article>. First, we give the div an id so that we can refer to it specifically in the CSS. Then we use our HTML5 data attribute to store a few values:

  • The status of a sprite,
  • A y (vertical) offset of 1200 pixels,
  • An x (horizontal) position as a percentage,
  • A scrolling speed.

We give the x position of the sprite a percentage value because it is relative to the size of the viewport. If we gave it an absolute value, which you’re welcome to try, there’s a chance it could slide out of view on either the left or right side.

Now about that y offset…

Inception

This is the bit that’s going to mess with your noodle and is perhaps the hardest part of the process to grasp.

Thanks to the logic in the JavaScript, the sprite won’t move until the parent section is in view. When it does move, it will move at (in this case) half the speed. You need the vertical position, then, to account for this slower movement; elements need to be placed higher up if they will be scrolling more slowly and, therefore, moving less on the y axis.

We don’t know how far the user has to scroll before the section appears at the bottom of the page. We could use JavaScript to read the viewport size and then do some calculations based on how far down the page the section is positioned. But that is already sounding too complicated. There is an easier way.

What we do know is how far the user has scrolled before the current section is flush with the top of the viewport: they have scrolled the y offset of that particular section. (Put another way, they have scrolled the height of all of the elements above the current one.)

So, if there are four sections, each 1000 pixels high, and the third section is at the top of the viewport, then the user must have scrolled 2000 pixels, because this is the total height of the preceding sections.

If we want our sprite to appear 200 pixels from the top of its parent section, you’d figure that the total vertical offset we give it should be 2200 pixels. But it’s not, because this sprite has speed, and this speed (in our example) is a function of how far the page has been scrolled.

Let’s assume that the speed is set as 2, which is half the speed at which the page is scrolling. When the section is fully in view, then the window has scrolled 2000 pixels. But we divide this by the speed (2) to get 1000 pixels. If we want the sprite to appear 200 pixels from the top, then we need to add 200 to 1000, giving us 200 pixels. Therefore, the offset is 1200. In the JavaScript, this number is inverted to -1200 because we are pushing the background-position down off the bottom of the page.

Here’s a sketch to show this in action.

Parallax-sketch in Behind The Scenes Of Nike Better World

This is one of those concepts that is easier to understand when you view the page and source code and scroll around with the console open in Firebug or Developer Tools.

The JavaScript looks like this:

// Check for other sprites in this section
$('[data-type="sprite"]', $self).each(function() {

  // Cache the sprite
  $sprite = $(this);

  // Use the same calculation to work out how far to scroll the sprite
  var yPos = -($.Window.scrollTop() / $sprite.data('speed'));
  var coords = $sprite.data('Xposition') + ' ' + (yPos + $sprite.data('offsetY')) + 'px';
  $sprite.css({ backgroundPosition: coords });
}); // sprites

HTML5 Video

One criticism levelled at Nike Better World is that it didn’t use HTML5 video. HTML5 is still not fully supported across browsers (I’m looking at you, Internet Explorer), but for the purposes of this article, we’ll embrace HTML5 video, thanks to the lovely folks at Vimeo and Yum Yum London.

But we can’t set a video as a background element, so we have a new challenge: how to position and scroll this new sprite?

Well, there are three ways:

  1. We could change its margin-top property within its parent section;
  2. We could make it a position: absolute element and change its top property when its parent section comes into view;
  3. We could define it as position: fixed and set its top property relative to the viewport.

Because we already have code for the third, let’s grab the low-hanging fruit and adapt it to our purposes.

Here’s the HTML we’ll use, which I’ve placed after the closing </article> tag:

<video controls width="480" width="320" data-type="video" data-offsetY="2500" data-speed="1.5">
  <source src="video/parallelparking.theora.ogv" type="video/ogg" />
  <source src="video/parallelparking.mp4" type="video/mp4" />
  <source src="video/parallelparking.webm" type="video/webm" />
</video>

First, we’ve opened our HTML5 video element and defined its width and height. We then set a new data-type state, video, and defined our y offset and the speed at which the element scrolls. It’s worth nothing that some experimentation is needed here to make sure the video is positioned correctly. Because it’s a position: fixed element, it will scroll on top of all other elements on the page. You can’t cater to every viewport at every screen resolution, but you can play around to get the best compromise for all browser sizes (See “Bespoke to Brokeâ€� below).

The CSS for the video element looks like this:

video { position: fixed; left: 50%; z-index: 1;}

I’ve positioned the video 50% from the left so that it moves when the browser’s size is changed. I’ve also given it a z-index: 1. This z-index prevents the video element from causing rendering problems with neighbouring sections.

And now for the JavaScript! This code should be familiar to you:

// Check for any Videos that need scrolling
$('[data-type="video"]', $self).each(function() {

  // Cache the sprite
  $video = $(this);

  // Use the same calculation to work out how far to scroll the sprite
  var yPos = -($window.scrollTop() / $video.data('speed'));
  var coords = (yPos + $video.data('offsetY')) + 'px';

  $video.css({ top: coords });

}); // video

And there you have it! A parallax scrolling HTML5 video.

Bespoke or Broke

Of course, every design is different, which means that your code for your design will be unique. The JavaScript above will plug and play, but you will need to experiment with values for the y offset to get the effect you want. Different viewport sizes means that users will scroll different amounts to get to each section, and this in turn affects how far your elements scroll. I can’t control it any more than you can, so you have to pick a happy medium. Even Nike Better World suffers when the viewport’s vertical axis stretches beyond the height of the background images.

I asked W+K how it decides which effects to power with JavaScript and which are better suited to modern CSS techniques:

Key points that required complex interaction relied on JavaScript, while visual-only interactivity relied on CSS3. Additionally, fewer browsers support native CSS3 techniques, so items that were more important to cross-browser compatibility were controlled via JavaScript as well.

– W+K

This is a wonderful example of “real-world design.� So often we are bamboozled with amazing new CSS effects, and we make websites that sneer at older browsers. The truth is, for most commercial websites and indeed for websites like Nike Better World that target the biggest audience possible, stepping back and considering how best to serve your visitors is important.

W+K explains further:

We started by creating the best possible version, but always kept the needs of all browsers in mind. Interactive storytelling must balance design and technology to be successful. A great website usable in one or two browsers ultimately fails if you want to engage a wide audience.

– W+K

And Internet Explorer?!

IE was launched in tandem with the primary site. Only IE6 experienced challenges, and as a deprecated browser, it gracefully degrades.

– W+K

The Final Code

The code snippets in this piece hopefully go some way to explaining the techniques required for a parallax scrolling effect. You can extend them further to scroll multiple elements in a section at different speeds, or even scroll elements sideways!

Feel free to grab the full source code from GitHub, and adapt it as you see fit. Don’t forget to let us know what you’ve done, so that others can learn from your work.

Of course, remember that manipulating huge images and multiple sprites with JavaScript can have huge performance drawbacks. As Keith Clark recently tweeted:

KeithClark1 in Behind The Scenes Of Nike Better World

Test, test and test again. Optimize your images, and be aware that you may have to compromise to support all browsers and operating systems.

Tell A Story

Above and beyond the technical wizardry of parallax websites — some of the best of which are listed below — the common thread that each seems to embody is story. That’s what makes them great.

I asked W+K what it learned from the project:

That a strong voice, simplicity and beauty are integral to a great interactive storytelling experience. We often hear things like “content is king, and technology is just a tool to deliver it,â€� but when you’re able to successfully combine a powerful message with a compelling execution, it creates an experience that people really respond to and want to spend time with.

– W+K

We really have just scratched the surface of the work that goes into a website like Nike Better World. The devil is in the details, and it doesn’t take long to see how much detail goes into both the design and development.

However, if you have a compelling story to tell and you’re not afraid of a little JavaScript and some mind-bending offset calculations, then a parallax website might just be the way to communicate your message to the world.

More Examples

Nike wasn’t the first and won’t be the last. Here are some other great examples of parallax scrolling:

Manufacture d’essai

Manufacture-dEssai in Behind The Scenes Of Nike Better World

Yebo Creative

Yebocreative in Behind The Scenes Of Nike Better World

TEDx Portland

TEDxPortland1 in Behind The Scenes Of Nike Better World

Ben the Bodyguard

BenTheBodyguard in Behind The Scenes Of Nike Better World

Campaign Monitor Is Hiring

CampaignMonitor1 in Behind The Scenes Of Nike Better World

Nizo App

Nizo1 in Behind The Scenes Of Nike Better World

7 Best Things of 2010

7BestThings in Behind The Scenes Of Nike Better World

If you’ve seen or built a great parallax website, please let us know about it in the comments.

… If you need any more encouragement to create a website as compelling as these, here’s what the team at W+K used to put together Nike Better World: MacBook Air 13″, Canon 5D Mark II, Coda, Adobe Photoshop and Adobe Illustrator.

Thanks

Putting together this article took the cooperation of a number of people. I’d like to thank Seth, Ryan, Ian and Duane for answering my questions; Katie Abrahamson at W+K for her patience and for helping coordinate the interview; and Nike for allowing us to dissect its website so that others could learn.

(al)


© Richard Shepherd for Smashing Magazine, 2011.


A Collection of Retro & Vintage Design Resources

Advertisement in A Collection of Retro & Vintage Design Resources
 in A Collection of Retro & Vintage Design Resources  in A Collection of Retro & Vintage Design Resources  in A Collection of Retro & Vintage Design Resources

As summer hits and gets underway, many are drawn back to those summer days of our youth. Memories of summer breaks filled with vacation from school, home, and many other places or responsibilities get us in a sort of retrospective mindset. It is with that theme in hand that we have compiled this bountiful resource post for our readers in a retro frame of mind.

Designers dive right in to this collection that is positively overflowing with vintage styled design goodies just waiting to be added into your next design project. From PS brushes to patterns to icons and so much more, this post has got it all! Literally! Well, not literally, but close. So get your toolbox open and ready to add in some design resources that take you back a few decades in style. Enjoy!

Photoshop Brushes

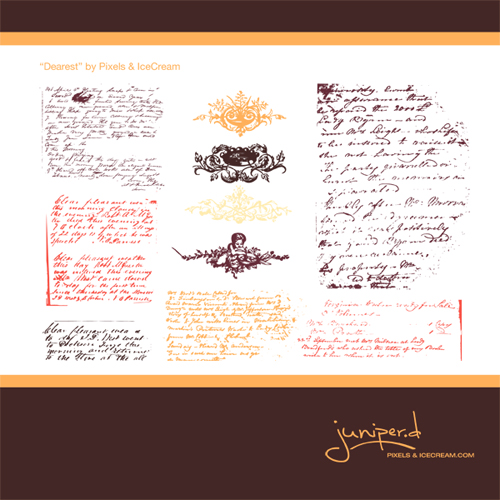
Vintage Ornament & Handwriting Brushes

Vintagewriting in A Collection of Retro & Vintage Design Resources

240 Retro Dynamic Brushes

Retrobrushes in A Collection of Retro & Vintage Design Resources

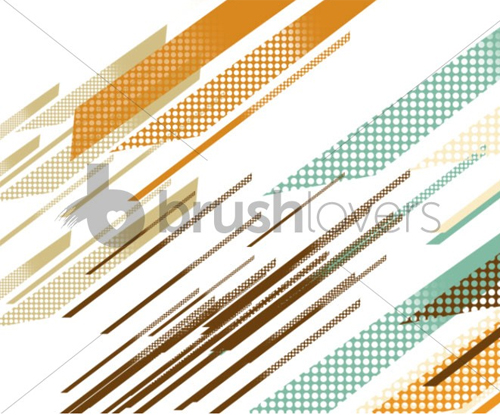
Retro Diagonals
Retrodiagonals in A Collection of Retro & Vintage Design Resources

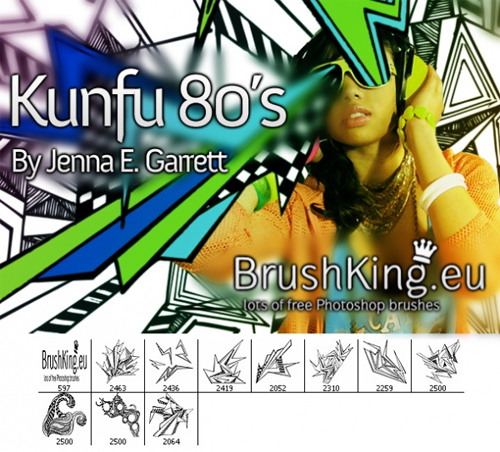
80′s Kunfu Brushes

Kungfu80s in A Collection of Retro & Vintage Design Resources

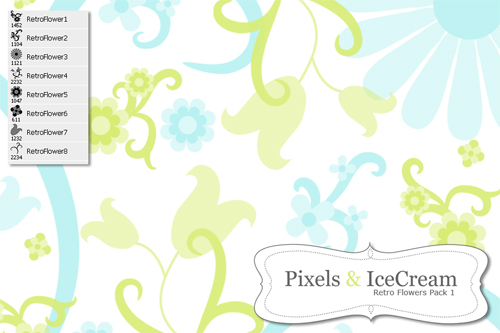
Retro Flower Brushes

Retroflowers in A Collection of Retro & Vintage Design Resources

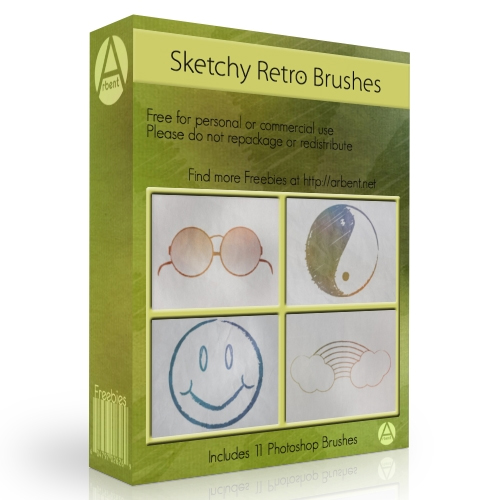
11 Sketchy Retro Photoshop Brushes

Sketchyretro in A Collection of Retro & Vintage Design Resources

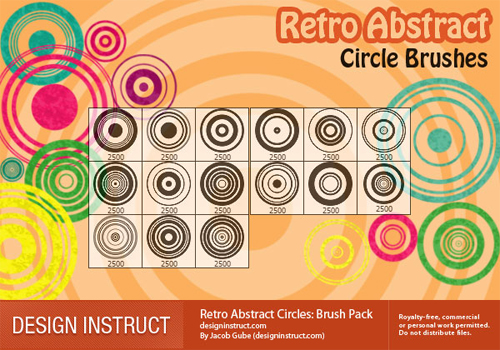
Retro Abstract Circles

Retroabstractcircles in A Collection of Retro & Vintage Design Resources

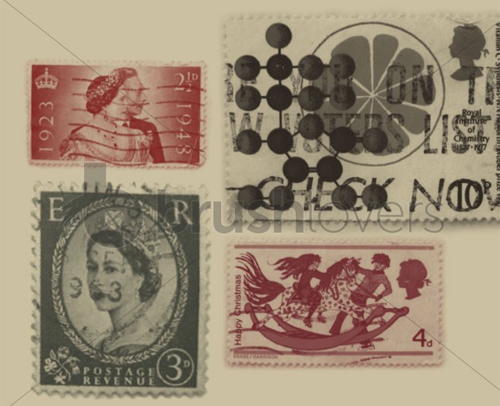
UK Stamps

Ukstamps in A Collection of Retro & Vintage Design Resources

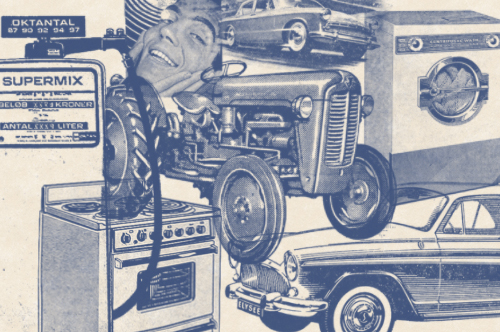
Newspaper Ads From The 60s

60snewspaper in A Collection of Retro & Vintage Design Resources

14 High Resolution Assorted Maps

Vintagemaps in A Collection of Retro & Vintage Design Resources

Icons

Smashing Retro Icon Set

Smashingretroicons in A Collection of Retro & Vintage Design Resources

Retro Vector Icons

Retrovectoricons in A Collection of Retro & Vintage Design Resources

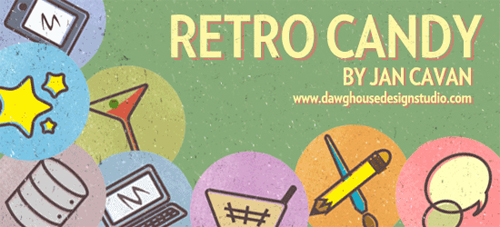
Retro Candy: Free Icon Set

Retrocandy in A Collection of Retro & Vintage Design Resources

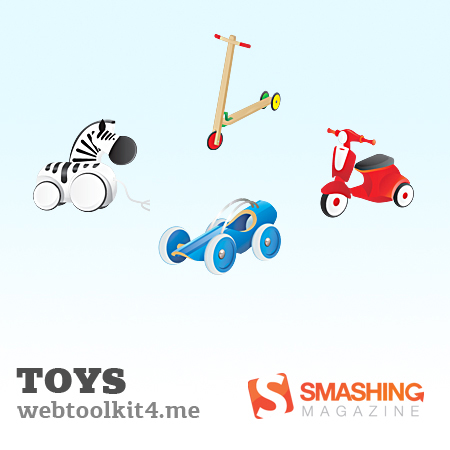
Retro Toys: A Free Icon Set

Vintagetoys in A Collection of Retro & Vintage Design Resources

Textures

Retro Wallpaper Textures

Vintagewallpapertexture in A Collection of Retro & Vintage Design Resources

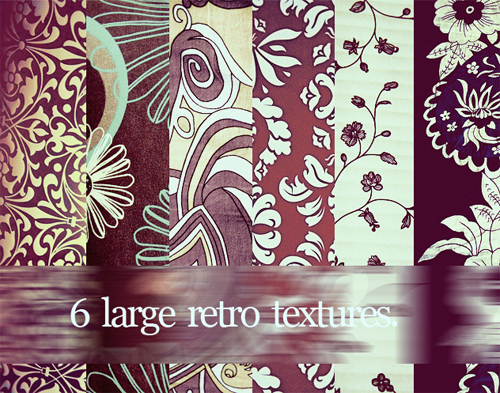
6 large retro textures

Vintageretrotextures in A Collection of Retro & Vintage Design Resources

Vintage Textures and Backgrounds

Vintagetextures in A Collection of Retro & Vintage Design Resources

Colored Vintage Paper

Coloredvintagepaper in A Collection of Retro & Vintage Design Resources

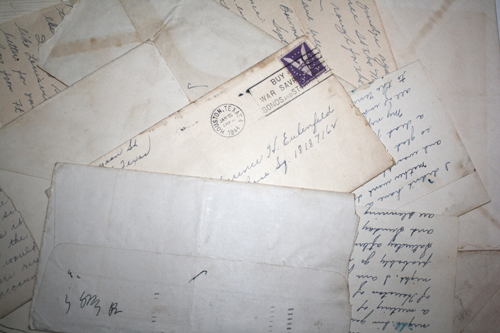
28 High-Res Vintage Postal Textures

Vintageletters in A Collection of Retro & Vintage Design Resources

Vintage Wallpaper Urban Decay

Vintagegrungewallpaper in A Collection of Retro & Vintage Design Resources

Patterns

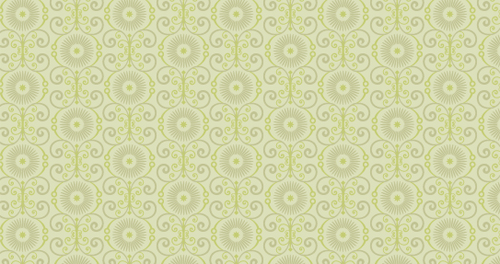
Free Seamless Vector Pattern – Vintage Velvet

Ornatepattern in A Collection of Retro & Vintage Design Resources

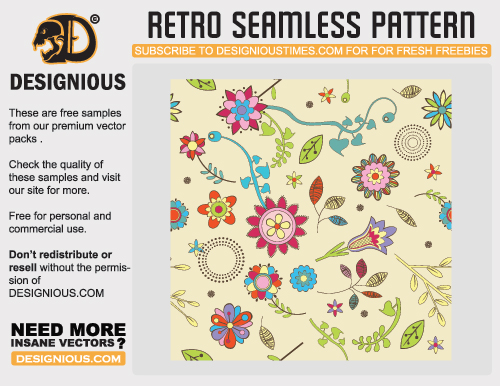
Seamless Retro Vectors

Retroseamlesspattern in A Collection of Retro & Vintage Design Resources

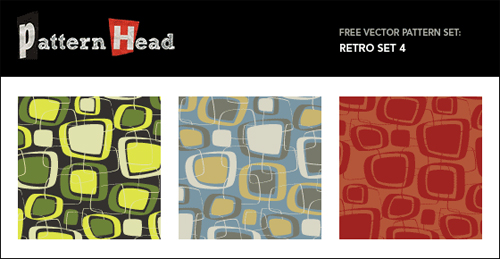
Retro Set 4

Retropatterns in A Collection of Retro & Vintage Design Resources

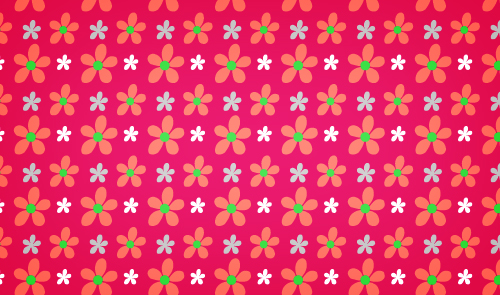
Pink Petals Seamless Photoshop Pattern

Pinkpettals in A Collection of Retro & Vintage Design Resources

Free Vector and Pixel Pattern – Antique Engraved

Antiqueengrave in A Collection of Retro & Vintage Design Resources

More Resources

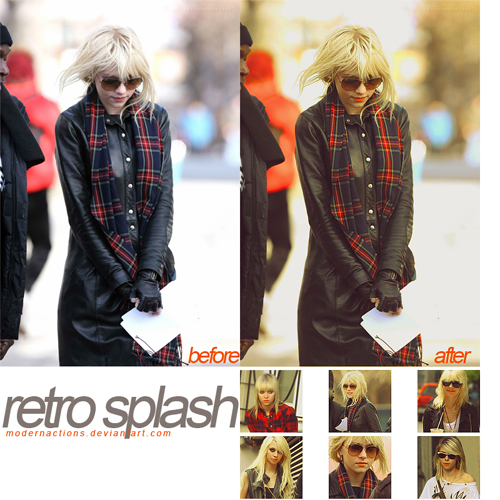
Retro Splash Photoshop Action

Retrosplash in A Collection of Retro & Vintage Design Resources

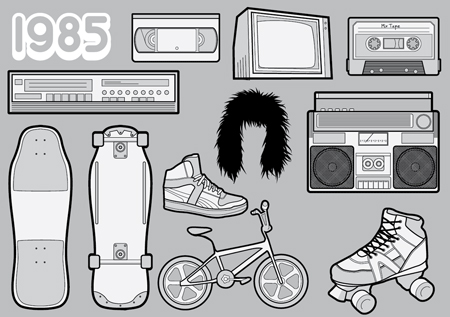
1985 – A Free Vector Pack of Your Favourite 80s Icons

1985 in A Collection of Retro & Vintage Design Resources

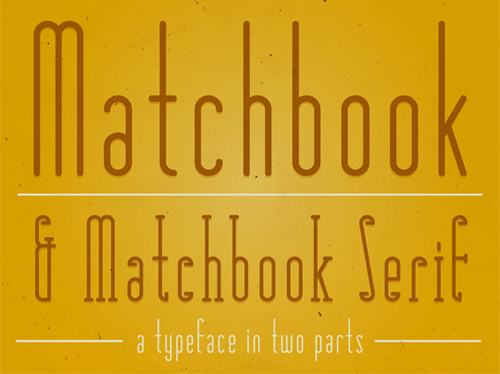
Matchbook Typefaces

Matchbookfont in A Collection of Retro & Vintage Design Resources

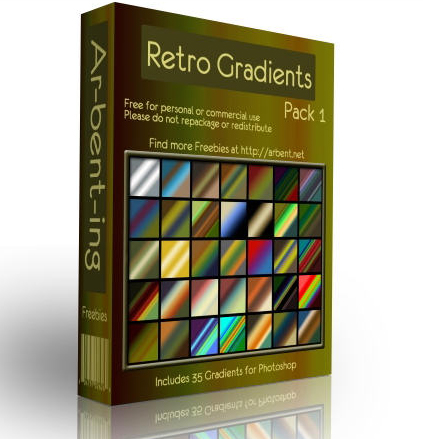
35 Retro Photoshop Gradients

Retrogradients in A Collection of Retro & Vintage Design Resources

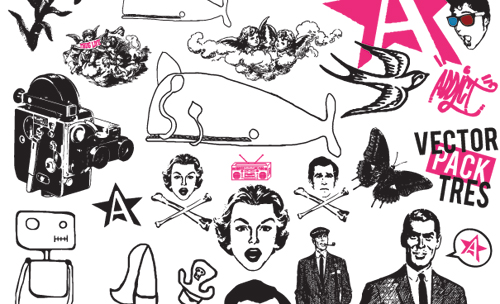
Vector Pack: Tres

Tres in A Collection of Retro & Vintage Design Resources

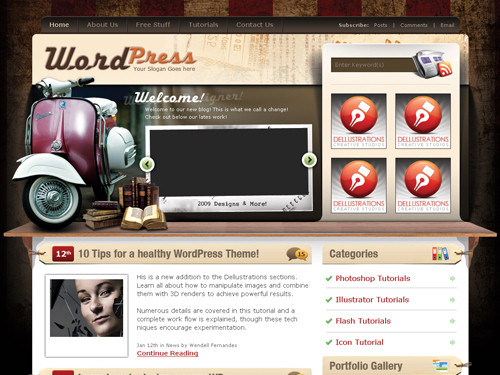
Vintage: A Free WordPress Theme

Vintagewptheme in A Collection of Retro & Vintage Design Resources

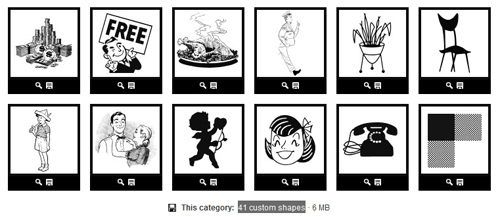
41 Custom Photoshop Shapes

Retroshapes in A Collection of Retro & Vintage Design Resources

Tutorials

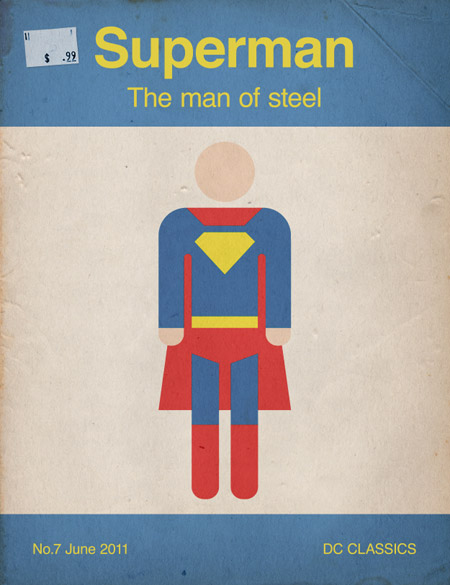
How To Create a Retro Style Superman Book Cover

Supermantut in A Collection of Retro & Vintage Design Resources

Create a Retro Pop Art in Photoshop

Retropoptut in A Collection of Retro & Vintage Design Resources

Create a Retro Urban Gig Poster in Photoshop

Urbangigtut in A Collection of Retro & Vintage Design Resources

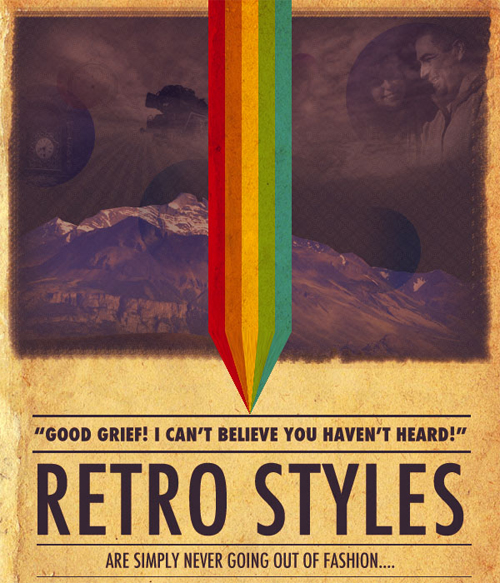
Design a Retro Styled Poster

Retropostertut in A Collection of Retro & Vintage Design Resources

Quick Tutorial: Create a Reusable Retro Type Treatment

Retrotypetreatment in A Collection of Retro & Vintage Design Resources

Illustrator Tutorial: Vector Retro Television

Retrotvtut in A Collection of Retro & Vintage Design Resources

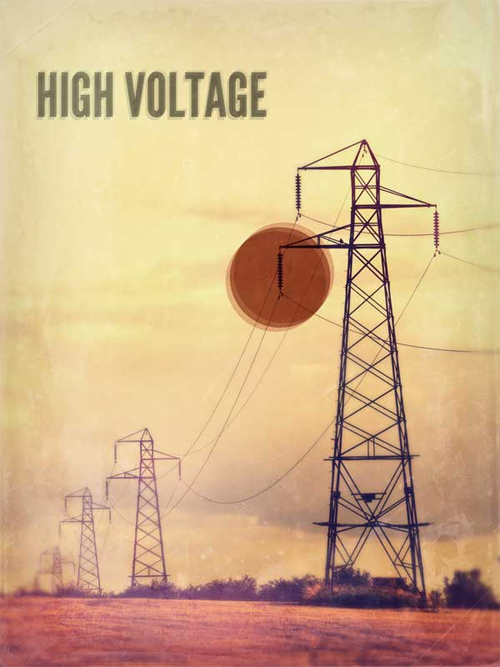
Create Vintage and Grungy Digital Art Work in Photoshop

Highvoltage in A Collection of Retro & Vintage Design Resources

(rb)


  •   
  • Copyright © 1996-2010 BlogmyQuery - BMQ. All rights reserved.
    iDream theme by Templates Next | Powered by WordPress