In the last part, we covered the elements that make up most designs. In this part, we’ll cover the principles you can apply to those elements to create a design. All of these principles can be applied to any project, and have a direct impact on the success of that design.
Learning to recognize and apply these design principles to your own work is a key step in becoming a better, more competent designer. Some of these elements are inherent in any design, regardless of whether they were consciously applied or not. The key to creating better designs is learning how to master these principles and apply them proactively to your design work, so that you use each to its maximum effect.
Balance
Balance is the way elements are distributed throughout a design. Good balance lends stability to the design. Bad balance leaves it looking off-kilter and skewed. However, it is possible to create designs that are slightly off-balance, in order to emphasize one element of the design over others.
There are three basic types of balance: symmetrical, asymmetrical, and radial. Symmetrical balance occurs when two sides of a design are the same. Generally, this happens along a vertical line, though sometimes it can also happen along a horizontal line (and sometimes both).
Asymmetrical balance is when the two sides of a design aren’t the same, but have elements that compliment one another and still provide the same kind of stability a symmetrical design provides. Asymmetrical designs are generally more visually interesting than symmetrical ones.
Radial balance occurs when design elements are laid out in a circular pattern. Radial balance can give a real sense of movement to a design, though it’s also one of the most difficult to achieve in a web design environment while still maintaining good user experience.
Balance can be achieved through the use of shapes, lines, colors, textures and other elements. Think of each element as having a “weight”, with brighter, larger, and more visually striking elements being heavier than other elements. The goal is to balance a scale set on the imaginary center line of the design. So on one side you might have a small but bright red element, while on the other side you have a larger gray element. The brightness of the one element offsets its smaller size, making it have the same visual weight as the larger element.

Examples
Scribble and Tweak
An example of slightly asymmetrical balance, especially in the header.

Quirky Kid Clinic
A good example of a symmetrical design.

Proportion
Proportion is the scale of elements in relation to one another. Proportion has a strong effect on the dominance of elements, with larger elements having a stronger visual impact than smaller ones, all other things being equal.
The proportion of elements in your designs is an effective way to indicate what’s important in the design and what isn’t. The most important parts of a design should logically be larger than the less important elements.
Notice how your eye automatically falls on the largest rectangle in the layout below. This is an example proportion effects our impression of what’s important.

Examples
SimpleGeo
SimpleGeo uses proportion of different elements to place emphasis on different areas of the page.

Bluecadet Interactive
The very large slideshow is a good example of using proportion to draw the eye to a specific element.

Dominance and Priority
The priority of elements within a design can make the difference between a good user experience and a bad one. Without some kind of priority or dominance among elements in a design, it’s difficult for the user to figure out what they’re supposed to do. Dominance of one element over another gives us a sense of what’s important and what’s not.
There are generally three levels of priority. Primary elements are the most important. In a website design, these are things like a call to action or headline.
Secondary elements are important, but they’re not vital. These are things like the images you use to illustrate a point or your navigation. They need to be easy for a visitor to find, but they’re not the most important part of the design by any means.
Tertiary elements are mostly unimportant. These are things like meta information on blog posts, some navigation elements, or footer links. Tertiary elements, to an extent, sort of “blend in” with the rest of the page’s design, rather than calling attention to themselves.
Examples
Disqus
There’s a definite sense of priority and hierarchy on this page.

Wigolia Design
Another site with a definite sense of priority in the design.

Contrast
Contrast is fairly self-explanatory. Good designs have sufficient contrast between elements so that each element stands out as much as needed. Note that in some cases, contrast is minimal, because the intention is for elements to blend together. In other cases, contrast is high, because each element needs to be distinct.
The most basic method of creating contrast is through color. But you can also have contrast with style (this is especially common in typography), texture, shape, and other elements. Contrast should be used to reinforce the priority of elements on a page.
Examples
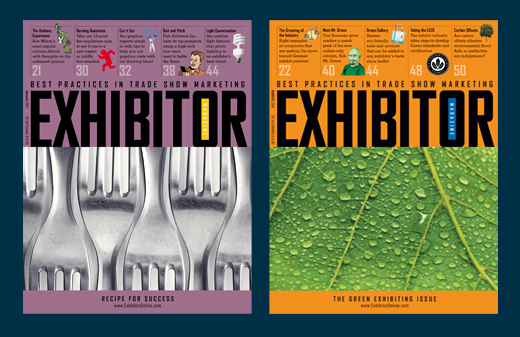
Fairhead Creative
A good example of a site design that has varied contrast for different elements within the design.

Titi Vidal
The varied contrast among different elements effects the emphasis placed on each.

Rhythm and Flow
The rhythm of a page directs the visitor from one element to the next. There are a handful of different rhythm patterns. Regular rhythm is orderly and even. There’s no variation in a regular rhythm. Think of it like a staircase: each step is the same height and width, and the same distance from the previous step.

Fluid rhythm is more organic in nature. There’s variation between the elements, and movement between them is not in a regular, orderly pattern. Think of fluid rhythm as a river: all the water is flowing in the roughly same direction, but there’s variation in how it moves.

Progressive rhythm could also be called sequential rhythm. There’s a definite sequence in how the eye moves from one element to the next. Progressive rhythm could best be thought of as like a fanned-out deck of cards.

Examples
David DeSandro
There’s a definite regular rhythm to this layout.

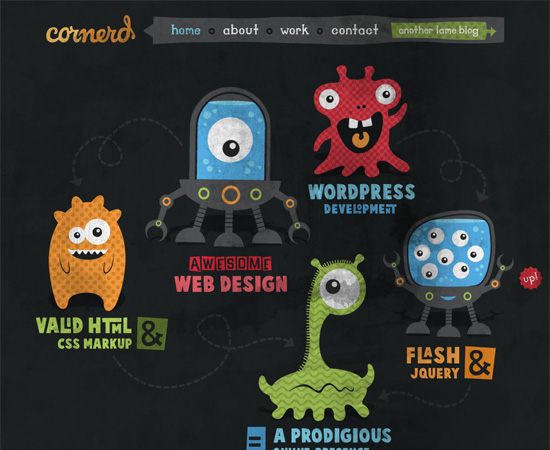
Cornerd
The Cornerd site is a good example of a fluid rhythm in design.
Harmony and Unity
Even if you follow all the principles listed above, without unity and harmony, it’s impossible to create a good design. When all of the elements of your design are working together, you achieve unity.
Without that unity, all you have is a bunch of individual elements on a page, without any real “design”. The elements should complement one another, and work together to create a design that’s both functional and pleasing to the eye.
Examples
SeatGeek
All the elements here work together, while following the principles above.

Moove Agency
The Moove site uses all of the elements above to great effect, creating a unified design.

More Examples of Design Principles in Action
Keith Homemade Cakes
This design gives a good sense of priority, and uses both symmetrical and asymmetrical balance in different sections of the site.

International Storytelling Center
A great example of a site with asymmetrical balance and excellent proportion used to influence the priority of elements on the page.

Quincaillerie Sucree
Another site that uses roughly symmetrical balance, as well as a regular rhythm.

Platform45
Platform45 is a great example of how proportion effects priority. The site also has excellent unity throughout.

SiteOptimizer
SiteOptimizer uses slight progressive rhythm in their header, as well as proportion to make some elements dominate others.

Wade | A Retrospective
One of the few successful site designs out there that uses radial and asymmetrical balance, as well as fluid rhythm effectively.

James Pedrazzini
An excellent example of good contrast, regular rhythm, and symmetrical balance.

Experiencia Lecom
A good example of a site with moderate contrast and a symmetrical design.

Youandigraphics
Very creative use of balance, proportion, dominance, and contrast.

Turks & Caicos Sporting Club
A great example of how proportion is used to create a visual hierarchy.

Up Next…
In the third installment of this graphic design primer, we’ll cover different composition methods and guides, including the rule of thirds, Gestalt principles, and grid layouts.
More Resources
(rb)


 You have likely seen the term �